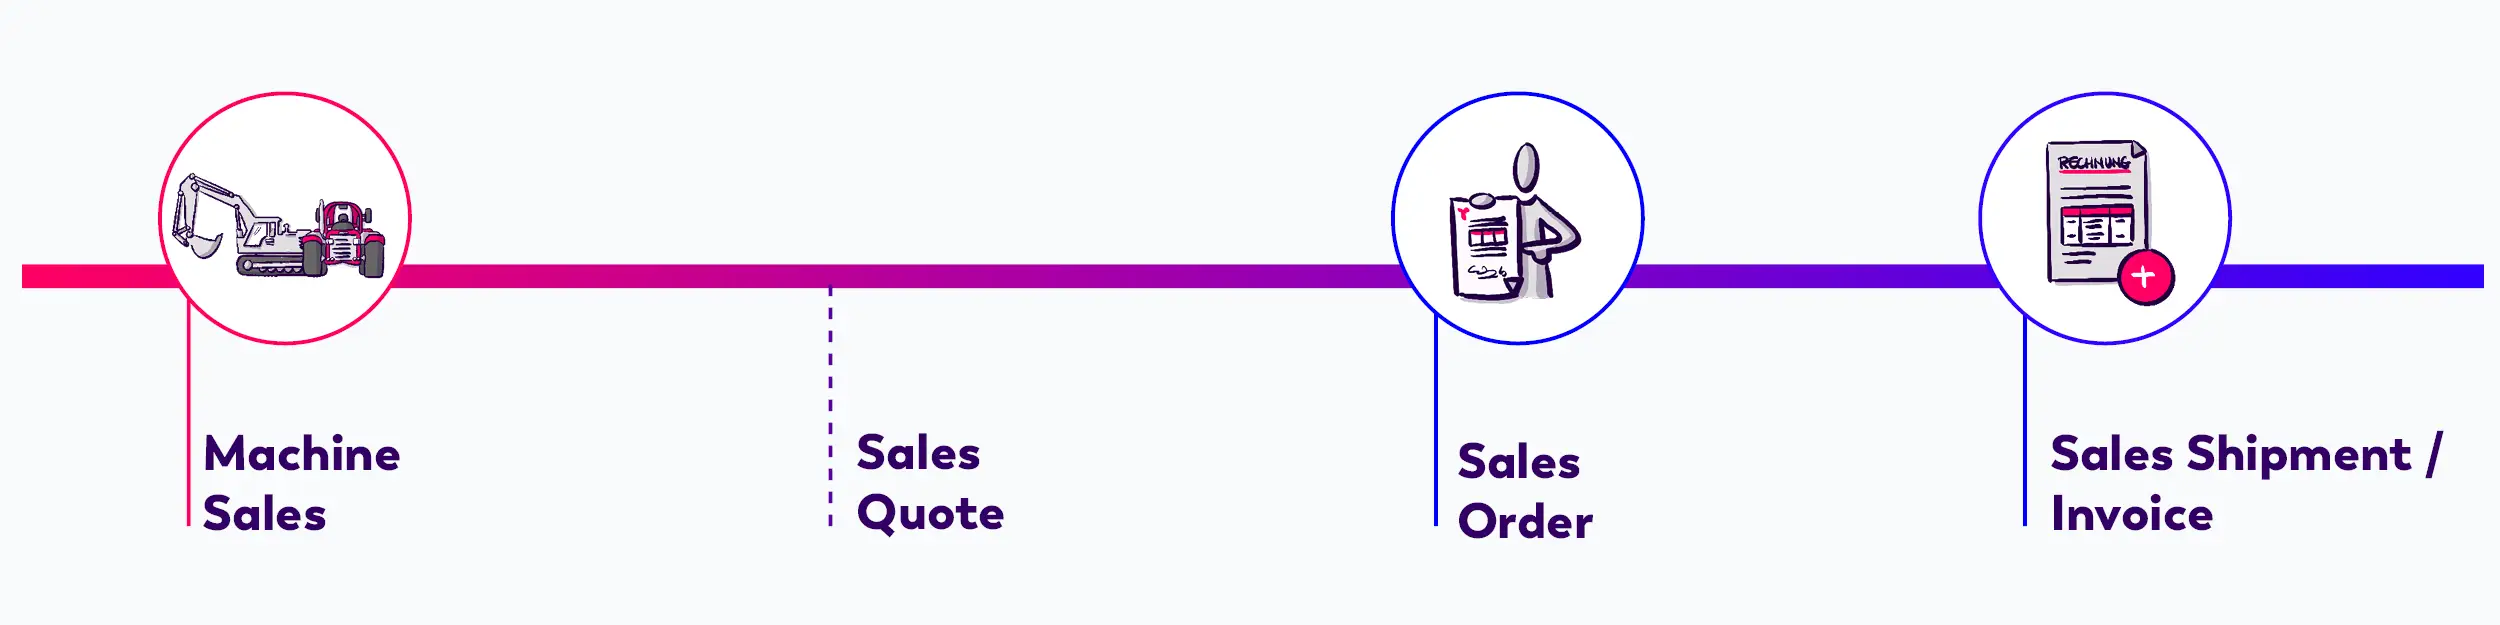
Machine Sales without Forecast

The following documentation describes the process of selling a machine without a forecast. If you would like to access the documentation concerning machine sales with a forecast, please click here.

without forecast

The following chapter is divided into the following sections:

Sales Quote

This subsection describes how to create sales quotes for service items without a forecast. You can create a sales quote either from the service item card or from the sales quote page.

Creating a Sales Quote via the Service Item Card

This section describes how to create a service quote via the service item card.
Please proceed as follows:

  • Use the quick search (ALT+Q) in TRASER DMS 365 to find the page Service Items.
  • A list containing all Service Items is displayed.
  • Open the service item you would like to create a sales quote for, or create a new service item.
  • To create a new sales quote, click Home > New Sales Quote in the menu bar of the service item.
  • A new sales quote card is displayed.
  • Please fill out the applicable fields.
  • Select OK to create the sales quote.
  • The sales quote card is displayed.

You have successfully created a new sales quote. You can now create a Sales Order out of this sales quote.

Creating a Sales Quote via the Sales Quote Page

This section describes how to create a sales quote for a service item from the sales quote page.
Please proceed as follows:

  • Use the quick search (ALT+Q) in TRASER DMS 365 to find the page Sales Quotes.
  • The page Sales Quotes is displayed.
  • To create a new sales quote, click New in the menu bar.
  • A new sales quote card is displayed.
  • Complete the information in the header.
  • To add a service item to the sales quote, navigate to the Lines tab and click on Functions > Add Service Item.
  • The window Select Service Item - 1 is displayed.
  • Complete the following information:
Input field Description
In Stock As Select from the drop-down list which value you would like to filter by.
Manufacturer Select the code of the manufacturer of the service item from the drop-down list.
Category Select the category of the service item from the drop-down list.
Subcategory Select the subcategory of the parent category from the drop-down-list.
Model Use this field to enter the model of the service item.
Service Item No. Use this field to enter the service item. If the service item has not been created in the system yet, then leave the field empty. After entering the remaining information you will be automatically forwarded to the item templates to create the item in the system.
Quantity Use this field to enter the quantity of the used service item.

Note

If you know the exact model of the service item, you can enter it directly into the Model field. The remaining data of the fields Manufacturer, Category and Subcategory will be added by the system (in case it’s already included in the system). You can find more information about this in the Service Item Models section.

  • Click OK to close the window and to add a new service item line to your document.
  • The service item is added in a new line in the Lines tab.

You have added on or more service items to the sales quote. In addition you can also add the following entries to the sales quote:

Sales Order

Creating a Sales Order for a Service Item

This section describes how to create a sales order for a service item without creating the document from a forecast.
Please proceed as follows:

Note

You may also create a sales order directly from the Sales Quote. Select Make Order from the menu bar in the opened sales quote. The system will create a sales order from the sales quote.

  • Use the quick search (ALT+Q) in TRASER DMS 365 to find the page Sales Orders.
  • The page Sales Orders is displayed.
  • To create a new sales order, click New in the menu bar.
  • A new sales order card is displayed.
  • Complete the information in the header.
  • To add a service item to the sales order, navigate to the Lines tab and click on Functions > Add Service Item.
  • The window **Select Service Item - 1
    ** is displayed.
  • Complete the following information:
Input field Description
In Stock as Select from the drop-down list which value you would like to filter by.
Manufacturer Select the code of the manufacturer of the service item from the drop-down list.
Category Select the category of the service item from the drop-down list.
Subcategory Select the subcategory of the parent category from the drop-down-list.
Model Use this field to enter the model of the service item.
Service Item No. Use this field to enter the service item. If the service item has not been created in the system yet, then leave the field empty. After entering the remaining information you will be automatically forwarded to the item templates to create the item in the system.
Quantity Use this field to enter the quantity of the used service item.

Note

If you know the exact model of the service item, you can enter it directly into the Model field. The remaining data of the fields Manufacturer, Category and Subcategory will be added by the system (in case it’s already included in the system). You can find more information about this in the Service Item Models section.

  • Click OK to close the window and to add a new service item line to your document.
  • The service item is added in a new line in the Lines tab.

Tip

In the lines of the sales order, you can add the field Margin % as needed via the Personalize action. The calculation of the margin amount is carried out according to the formula shown in the following illustration.
Marge %

You have added on or more service items to the sales order. In addition you can also add the following entries to the sales order:

Sales Invoice and Shipment

Creating a Sales Invoice for Service Items without a Forecast

This section describes how to create a sales invoice for a service item without creating the document from a forecast.
Please proceed as follows:

Note

You may also create the invoice/shipment directly from the Sales Order. Select Start > Post from the menu bar in the opened sales order. The system will then ask you whether you would like to ship, invoice or ship and invoice the order.

  • Use the quick search (ALT+Q) in TRASER DMS 365 to find the page Sales Invoices.
  • The page Sales Invoices is displayed.
  • To create a new sales invoice, click New in the menu bar.
  • A new sales invoice card is displayed.
  • Complete the information in the header.
  • To add a service item to the sales invoice, navigate to the Lines tab and click on Functions > Add Service Item.
  • The window Select Service Item - 1 is displayed.
  • Complete the following information:
Input field Description
In Stock as Select from the drop-down list which value you would like to filter by.
Manufacturer Select the code of the manufacturer of the service item from the drop-down list.
Category Select the category of the service item from the drop-down list.
Subcategory Select the subcategory of the parent category from the drop-down-list.
Model Use this field to enter the model of the service item.
Service Item No. Use this field to enter the service item. If the service item has not been created in the system yet, then leave the field empty. After entering the remaining information you will be automatically forwarded to the item templates to create the item in the system.
Quantity Use this field to enter the quantity of the used service item.

Note

If you know the exact model of the service item, you can enter it directly into the Model field. The remaining data of the fields Manufacturer, Category and Subcategory will be added by the system (in case it’s already included in the system). You can find more information about this in the Service Item Models section.

  • Click OK to close the window and to add a new service item line to your document.
  • The service item is added in a new line in the Lines tab.

You have added on or more service items to the sales invoice. In addition you can also add the following entries to the sales invoice:

Additional Information

Adding Costs to Sales Documents

This section describes how to add costs to sales documents which were created without an underlying forecast. For the following description it is assumed that you have already created a sales document.

Please proceed as follows to add costs to a sales document:

  • Open the card of the respective sales document.
  • Navigate to the Lines tab and select Functions > Add Sales Cost.
  • The window Item Charge Wizard is displayed.

Note

If the window Item Charge Wizard is not displayed or no item charges are displayed, this might be due to the fact that no charges have been defined for this document type.

  • Select the item charge from the list and enter the amount in the Charge Amount column.
  • To add the charge to the document lines, click OK.
  • The charge is added in a new line in the document.

You have added a new line including sales costs to the sales document.

Adding Discounts to Sales Documents

This section describes how to add discounts to sales documents which were created without an underlying forecast. For the following description it is assumed that you have already created a sales document.

Please proceed as follows to add discounts to a sales document:

  • Open the card of the respective sales document.
  • Navigate to the Lines tab and select Functions > Add Sales Discount.
  • The window Item Charge Wizard is displayed.

Note

If the window Item Charge Wizard is not displayed or no item charges are displayed, this might be due to the fact that no charges have been defined for this document type.

  • Select the item charge from the list and enter the amount in the Charge Amount column.
  • To add the charge to the document lines, click OK.
  • The charge is added in a new line in the document.

You have added a new line including a sales discount to the sales document.