Default values
Table of contents
- Salutations
- Address layouts
- Countries
- Languages
- Industry Groups
- Payment Terms
- Priorities
- Sales territories
- Manager/employee hierarchy
Salutations
In the table Salutations, you can define salutations. If possible, these should match those of your ERP software.
| Column | Description |
|---|---|
| Name | Enter the name of the salutation in this column. |
| Description | Enter the description of the salutation in this column. |
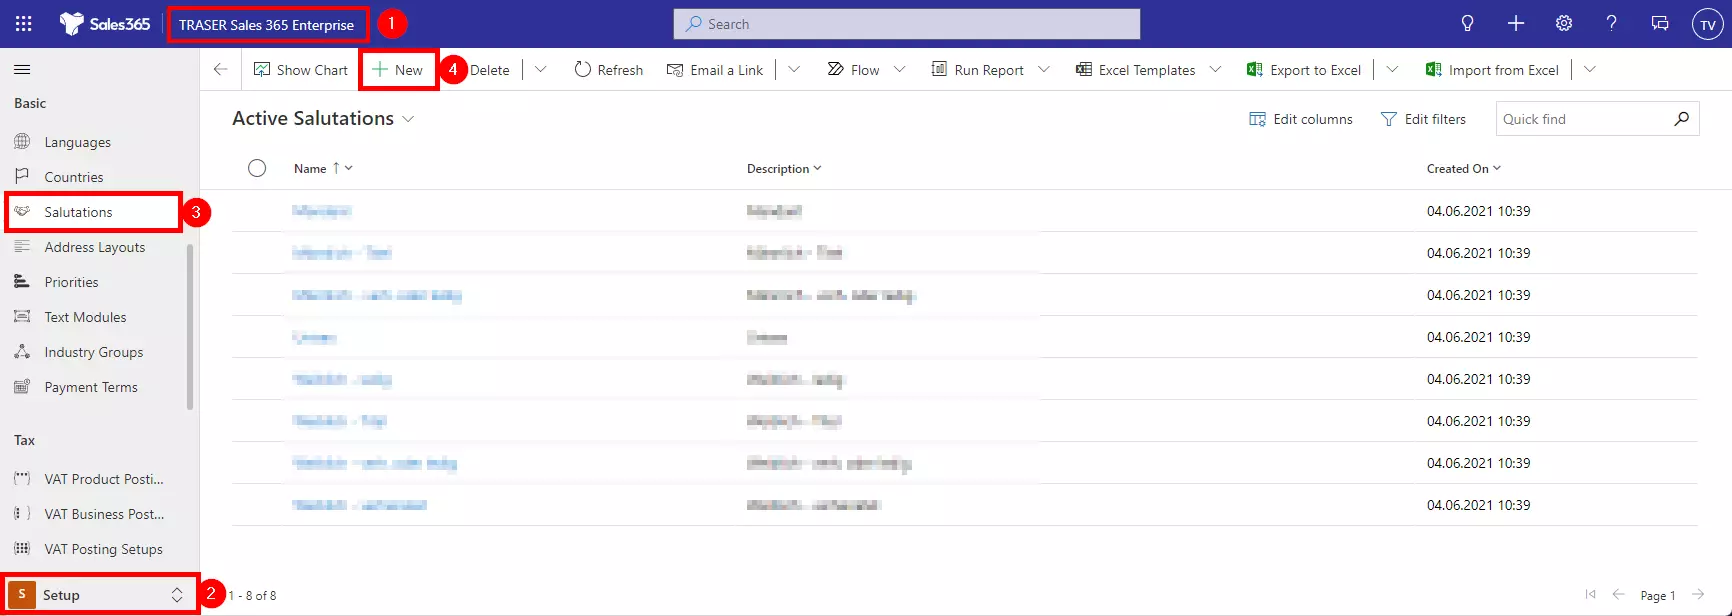
Make sure you are in the TRASER Sales 365 Enterprise (or TRASER Sales 365 Professional) app (1). Navigate to the Setup section (2). Click on the Salutations option in the navigation bar (3). Select the NEW action (4).
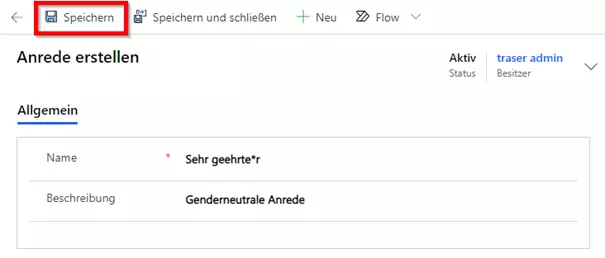
Enter a name and a description and then select the Save action.
Address layouts
Different countries have different address layouts. These can be configured in TRASER Sales 365 so that international addresses (e.g. in quotes) are also dynamically printed correctly.
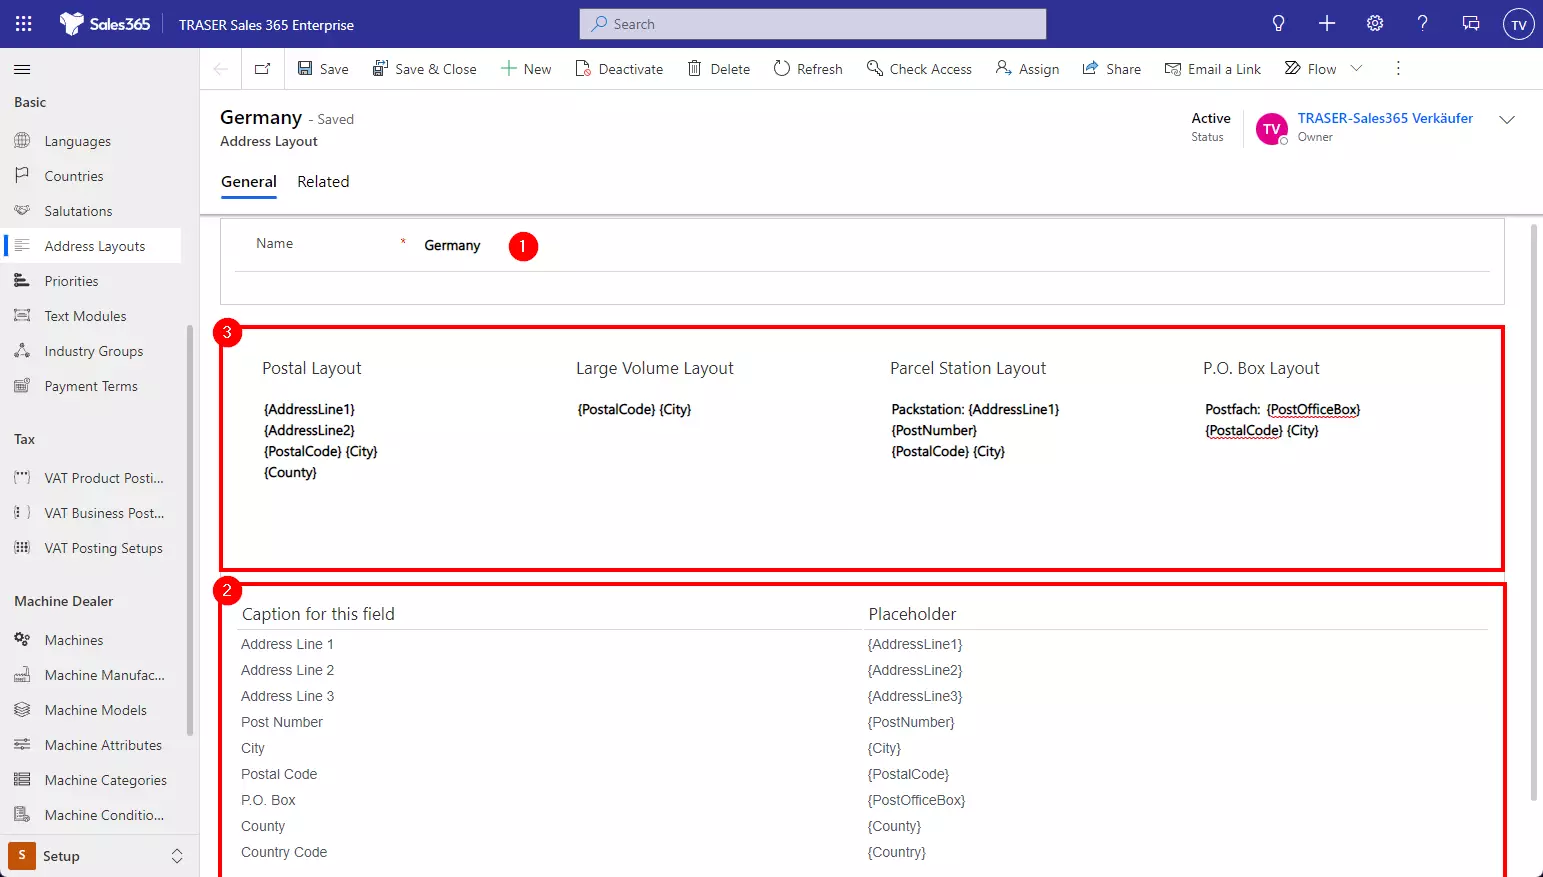
To do this, navigate to Address layouts in the sitemap and click New. Enter a name for the address layout you want to create (1). Then arrange the suggested placeholders (2) in the Postal Layout, Large Volume Layout, Parcel Station Layout, and P.O. Box Layout (3) fields respectively to define the layouts. Click Save when you are finished.
Here, for example, is the typical address layout configuration for Germany:
Countries
In the Countries table, you set up those countries in which your customers are located. Here, the Code column should match the country code of your ERP software. To set up, proceed as you did for the salutation setup.
| Column | Description |
|---|---|
| Name | Specify the name of the country in this column. |
| Code | Specify the name of the code in this column. |
| ISO Code | Geben Sie in dieser Column den ISO Code des Landes an. |
| Default currency | Select the default currency of this country. This way, all companies located in this country will be assigned to this default currency. If the main location of a company is changed, the currency will adapt to this setting. |
| Country code | Enter the country's telephone area code in this column. |
| Adresslayout | Select the appropriate address layout for the country or create one if it does not already exist (see Address Layouts). |
Languages
In the Languages table, you set up those languages that you want to assign to your customers. Here, the Code column should match the country code of your ERP software. To set up, proceed with the salutation setup.
| Column | Description |
|---|---|
| Name | Specify the name of the language in this column. |
| Code | Specify the code of the language in this column. |
| Windows language ID | Enter the Windows language ID of the language in this column. |
| Windows language name | In this column, specify the Windows language names of the language. |
Industry Groups
In the Industries Groups table, you set up the industries of your customers. Make sure that the Code of the industries you set up matches those in your ERP software. To set up, follow the same procedure as for setting up the tables above.
| Column | Description |
|---|---|
| Name | Enter the name of the industry group in this column. |
| Code | Enter the code of the industry group in this column. |
Payment terms
In the setup area, you can create different payment terms, which will later be assigned to the customers. The setup is the same as for the tables above.
| Column | Description |
|---|---|
| Name | In this column, specify the name of the payment term. |
| Description | In this column, specify the description of the payment term. |
Priorities
Via Priorities, you have the possibility to prioritize customers. This allows you to address different customers differently or to perform evaluations. Make sure that the names match those in your ERP software. The setup is the same as for the tables above.
| Column | Description |
|---|---|
| Name | Specify the name of the priority in this column. |
Text modules
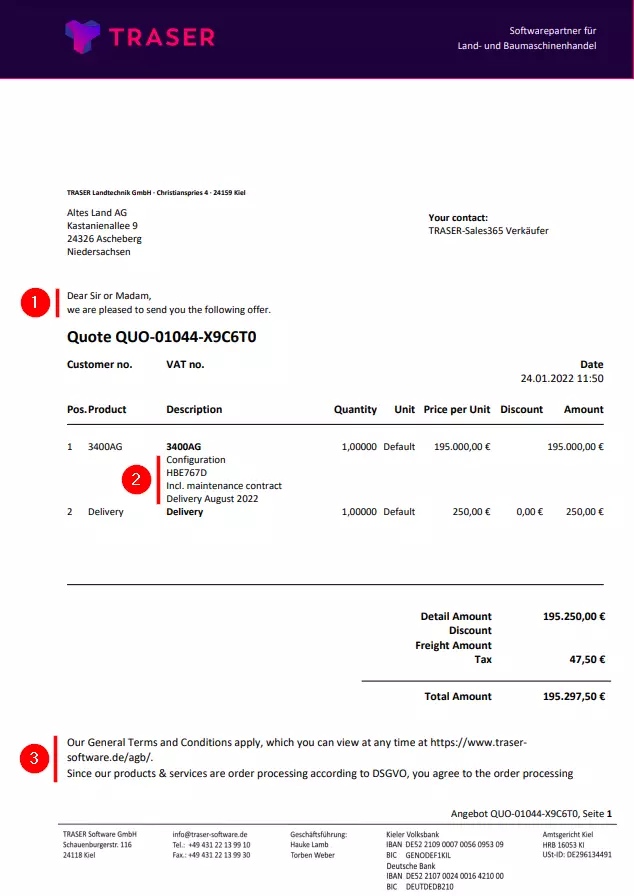
In TRASER Sales 365 you can define recurring text modules for quotes, orders, and invoices. There are two types of text modules: Document and Product. Document text modules can be used for the quote (as well as order, invoice) header (1) and closing (2). Product text modules can be used for the description of individual offer (as well as order, and invoice) lines (3).
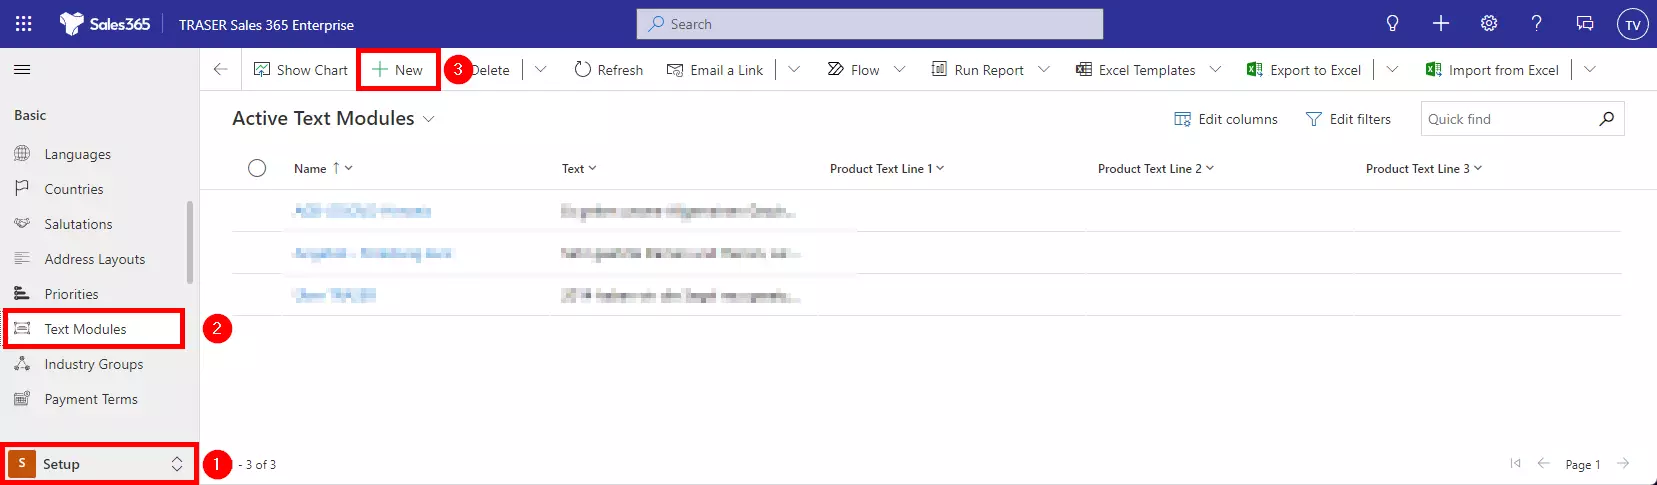
For setup, switch to the Setup area (1) and navigate via Text Modules (2) to New (3).
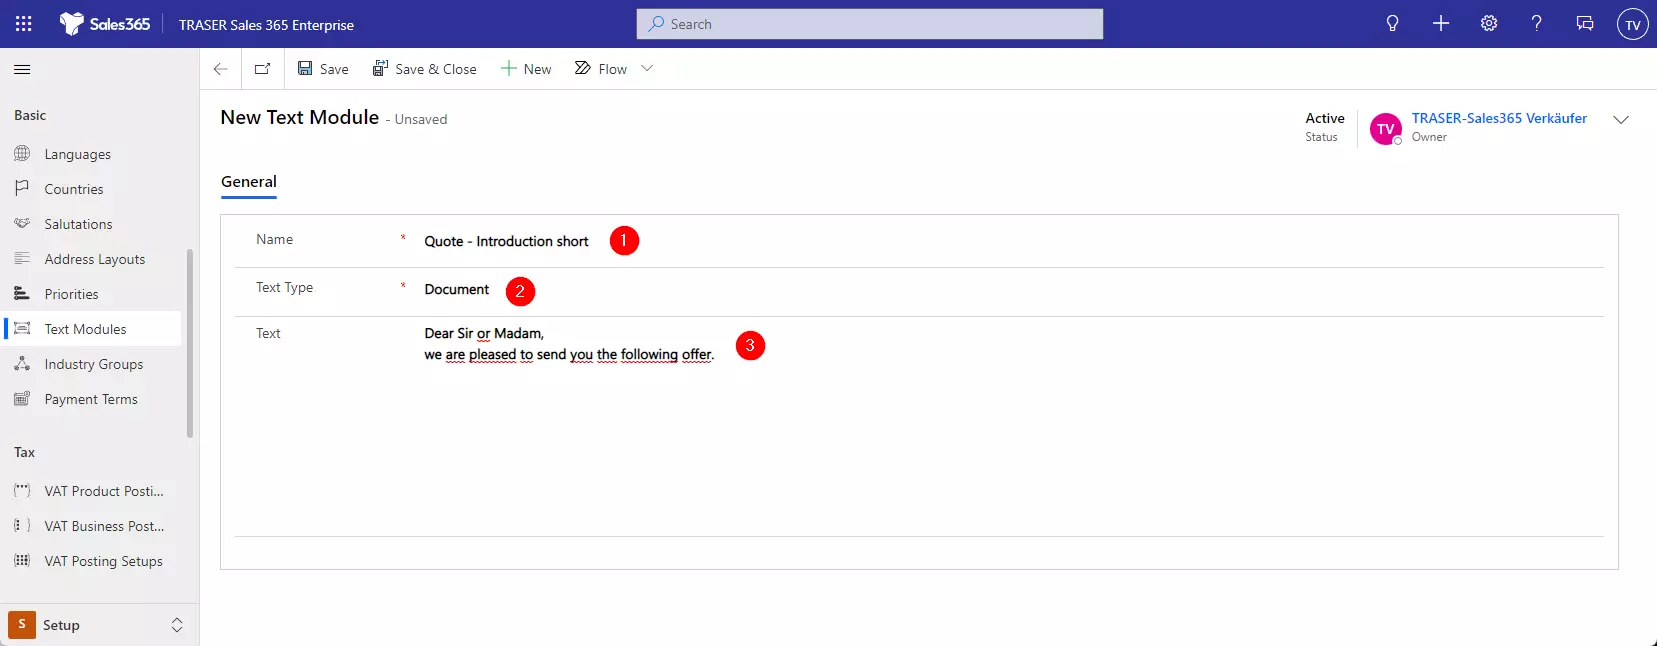
First select the Name of the text module (1) and then the Text Type, i.e. document or product (2). For the type Document, you have a Text field (3) with a length of 2,000 characters.
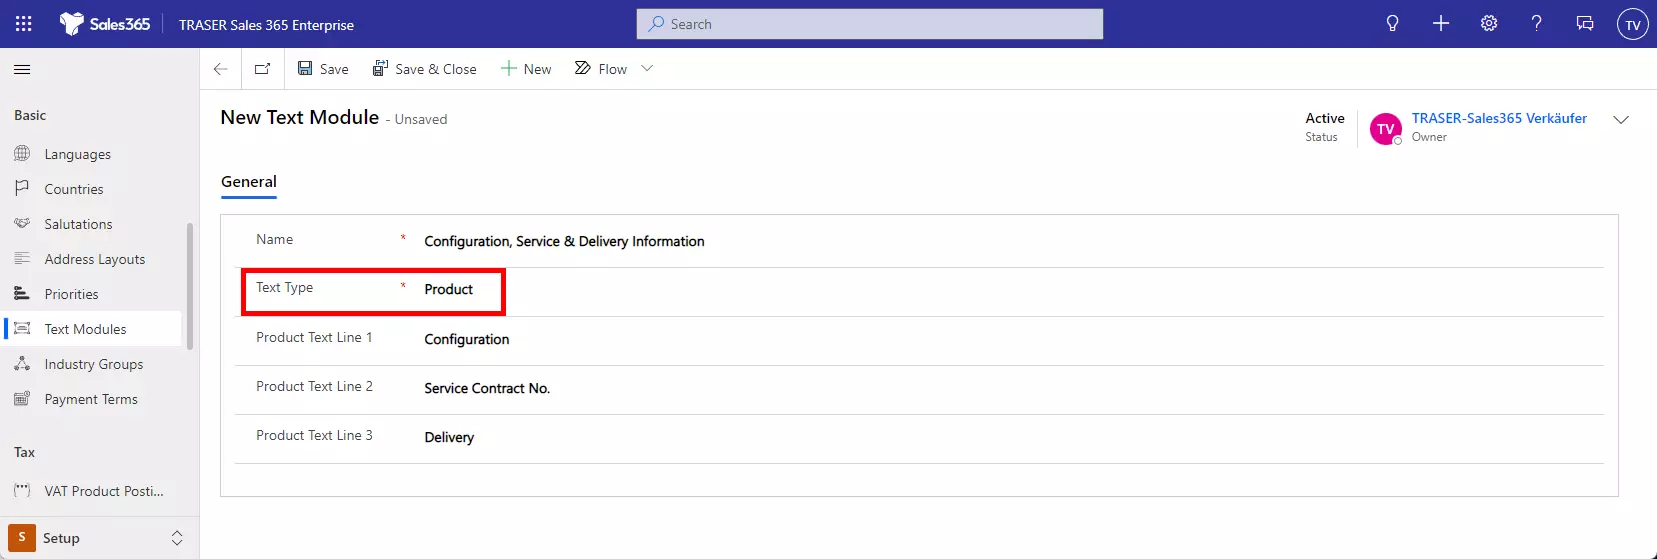
For the text type Product, you have three text lines available, which will be printed under the product name in the exported (PDF) document when this text module is selected.
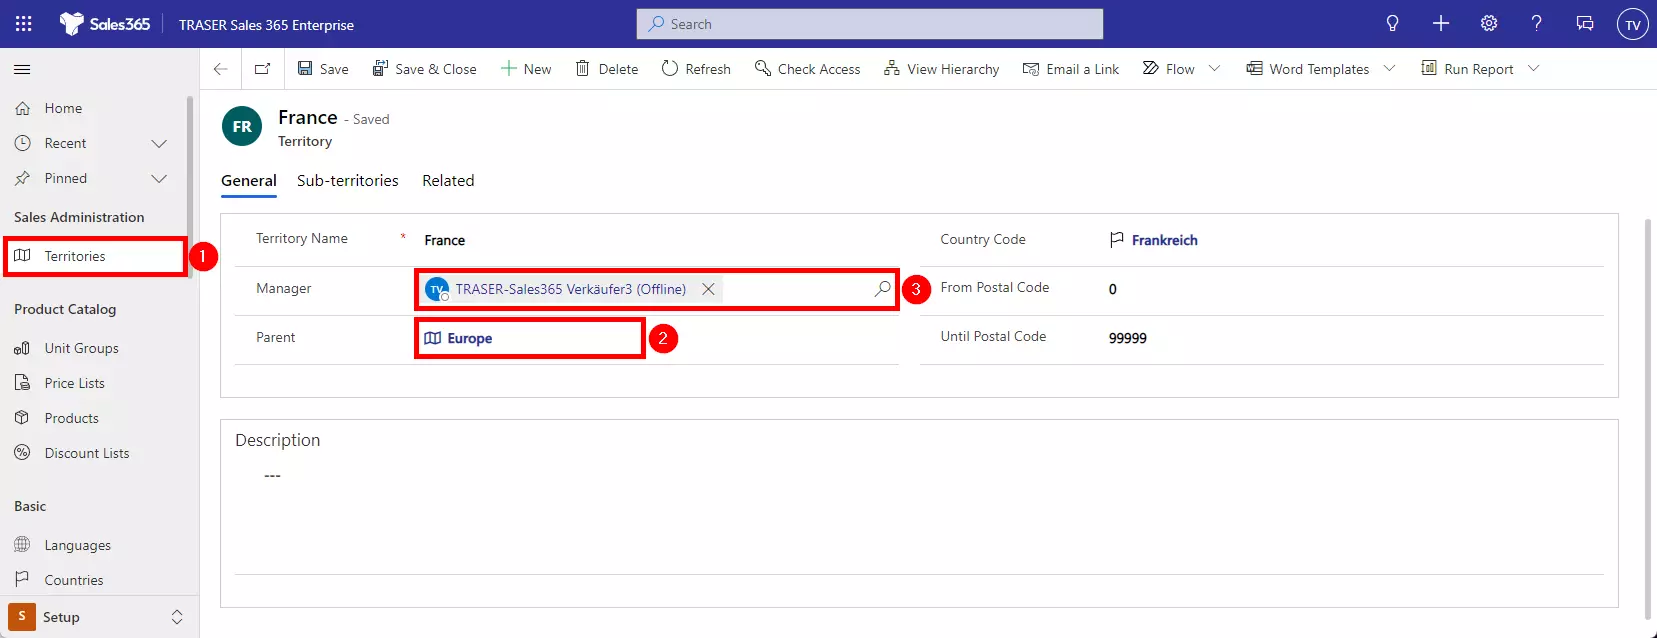
Sales territories
To set up sales territories, select Territories (1) in the navigation bar. First, the Parent must be created (e.g. Germany). Then, the sub-territories can be created and assigned to the parent territory (2). In addition, territories can be assigned to one Manager at a time (3). However, a seller can only own one territory.
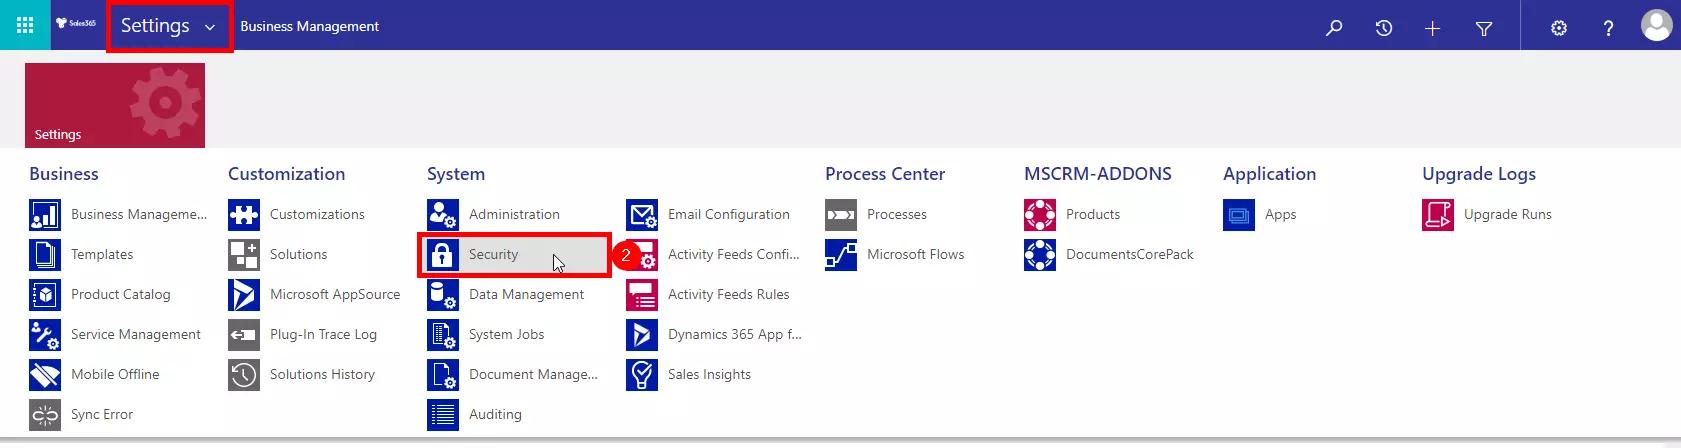
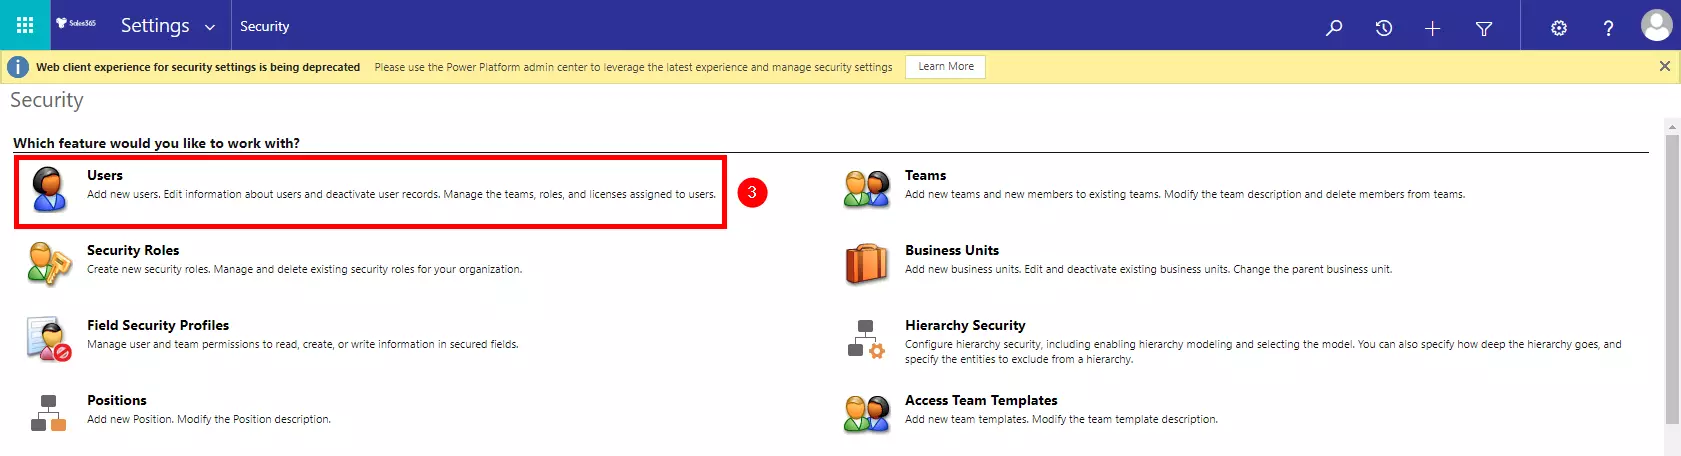
Manager/employee hierarchy
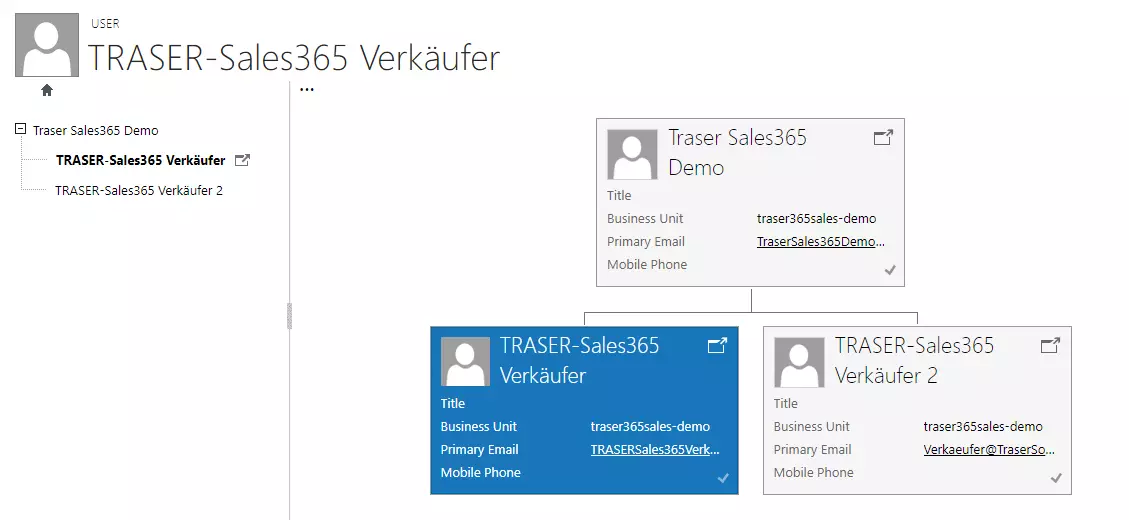
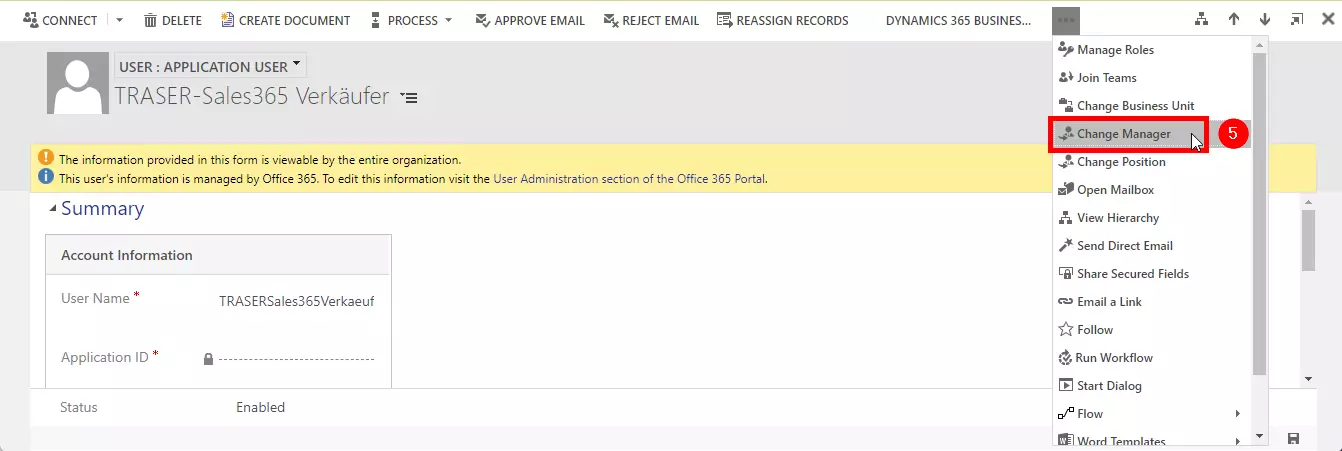
To set up a manager/employee hierarchy, navigate via Advanced Settings (1), via the small arrow at Settings, Security (2) to Users (3), and select the subordinate employee (4).

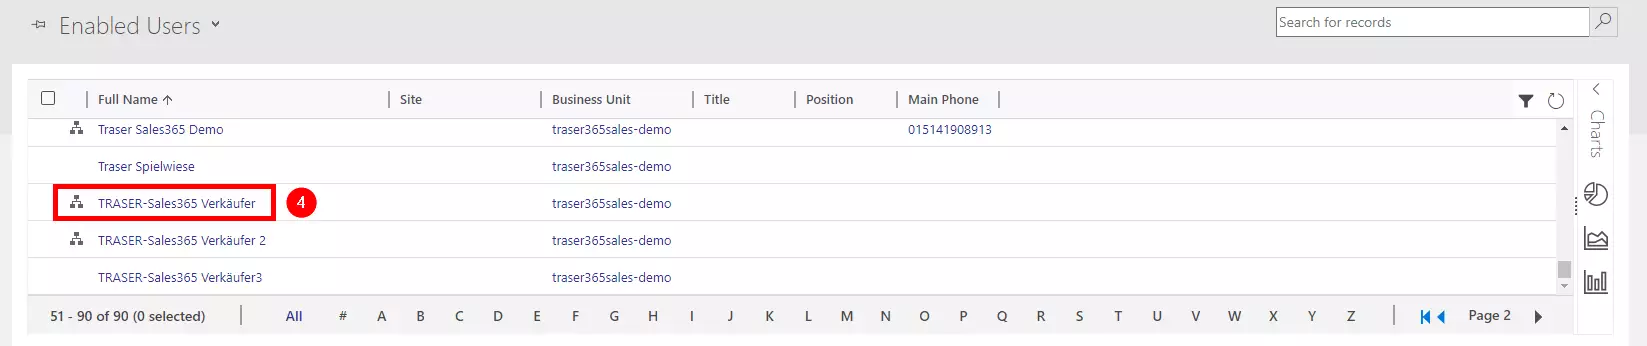
Click Change Manager (5) in the command bar via the three dots.
Find the parent employee/team leader (6) and then click Add (7).
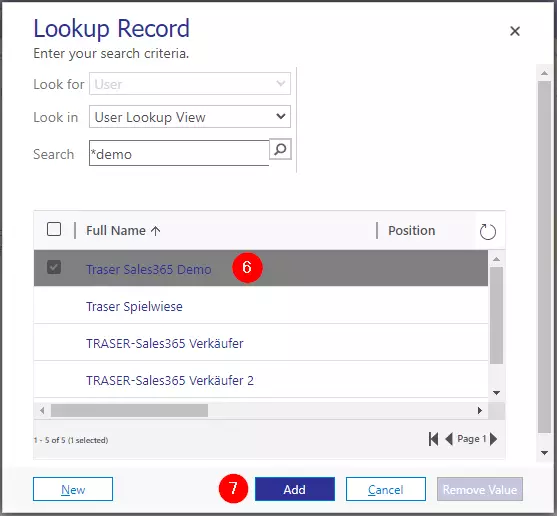
This way you have created a hierarchy among the employees, which you can check via the icon