Further configurations
Table of contents
- Sales forecasts
- Assistant and insight cards
- Enable enhanced email experience
- Create or edit offline profile
Sales forecasts
The "Sales Enterprise" license includes the ability to create manual sales forecasts for employees and teams, products, and sales territories. For automated forecasts, "Sales Premium" is required.
To use them, they must first be configured in the setup area. Navigate via the Sales Hub app (1), the App Settings area (2) to the Forecast configuration menu item (3).
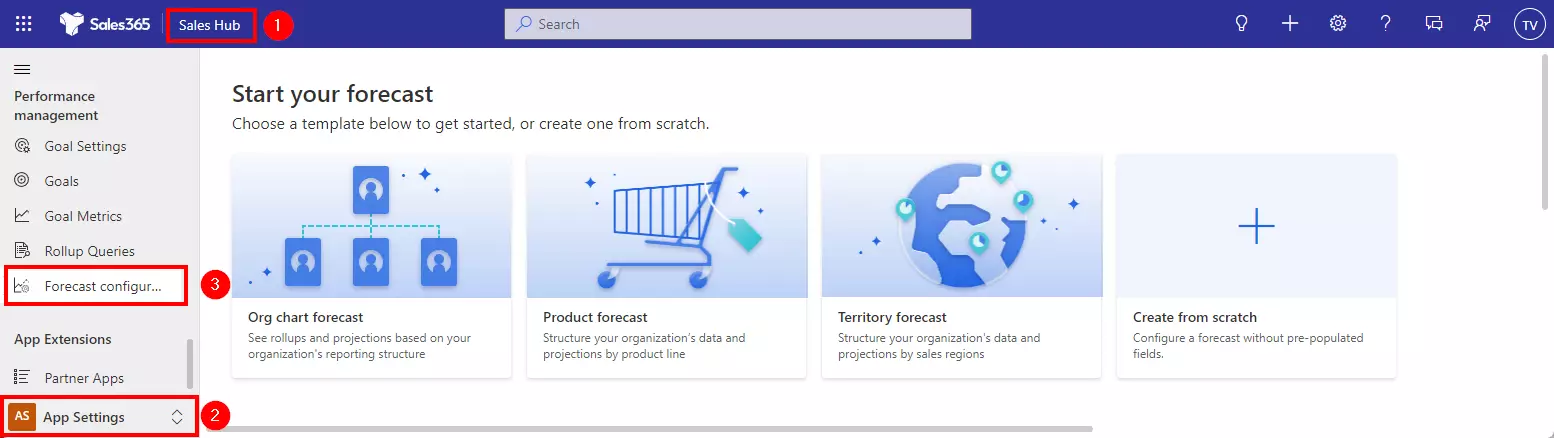
There you can choose between the templates Org chart forecast, Product forecast, or Territory forecast. Alternatively, a forecast can also be created without pre-populated fields (Create from scratch).
First, the top hierarchical level of the desired entity must be selected. In the case of an area forecast, this is Germany, for example, and in the case of an organization chart forecast, the sales manager or team leader. For this purpose, the hierarchies of sales territories or employees must be configured beforehand.
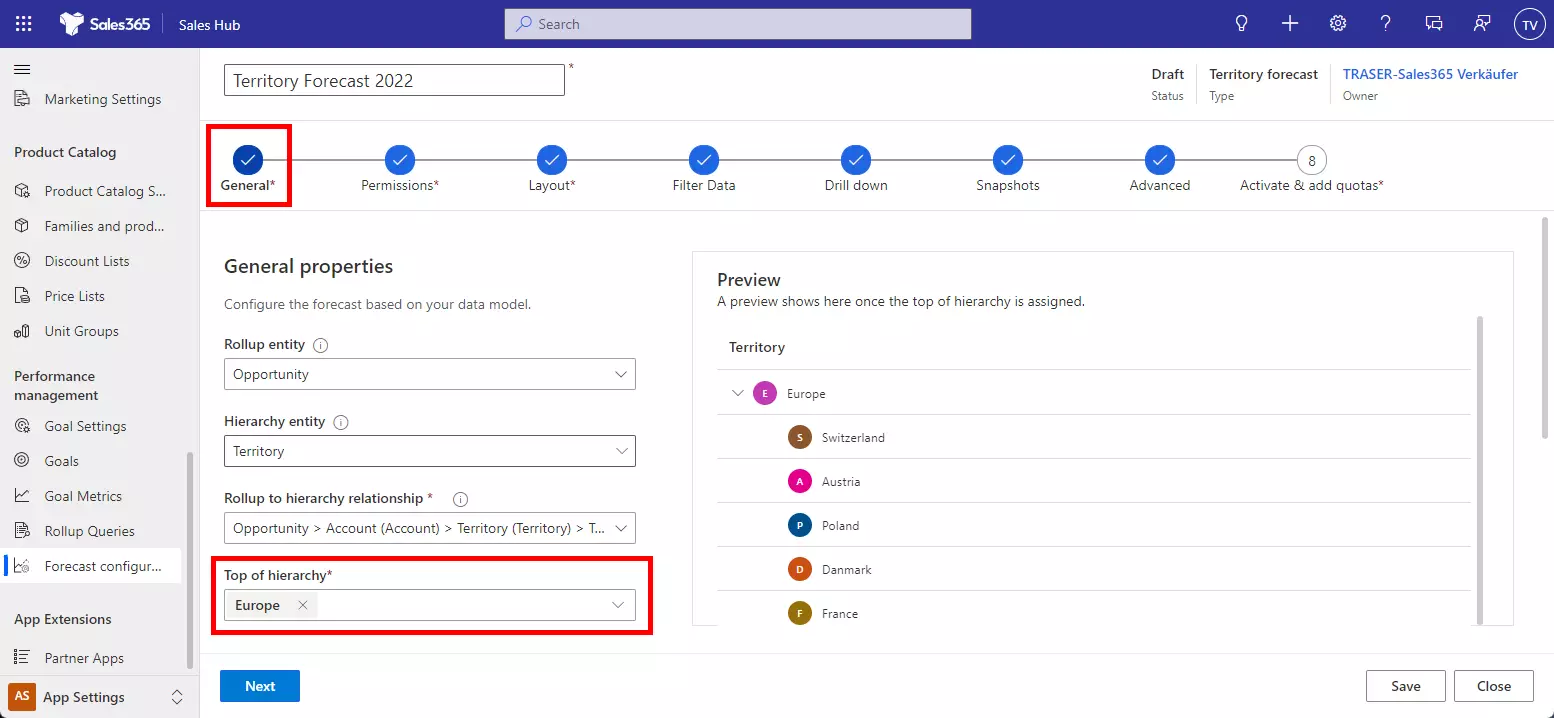
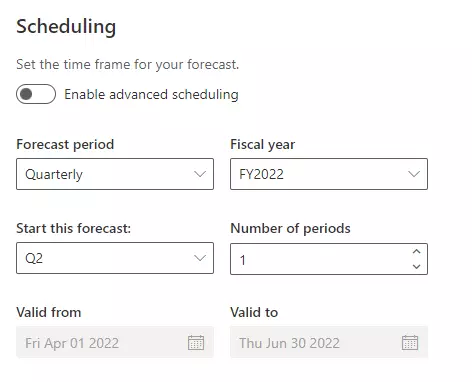
Further down on the first setup page, the time periods of the forecasts can be set up.
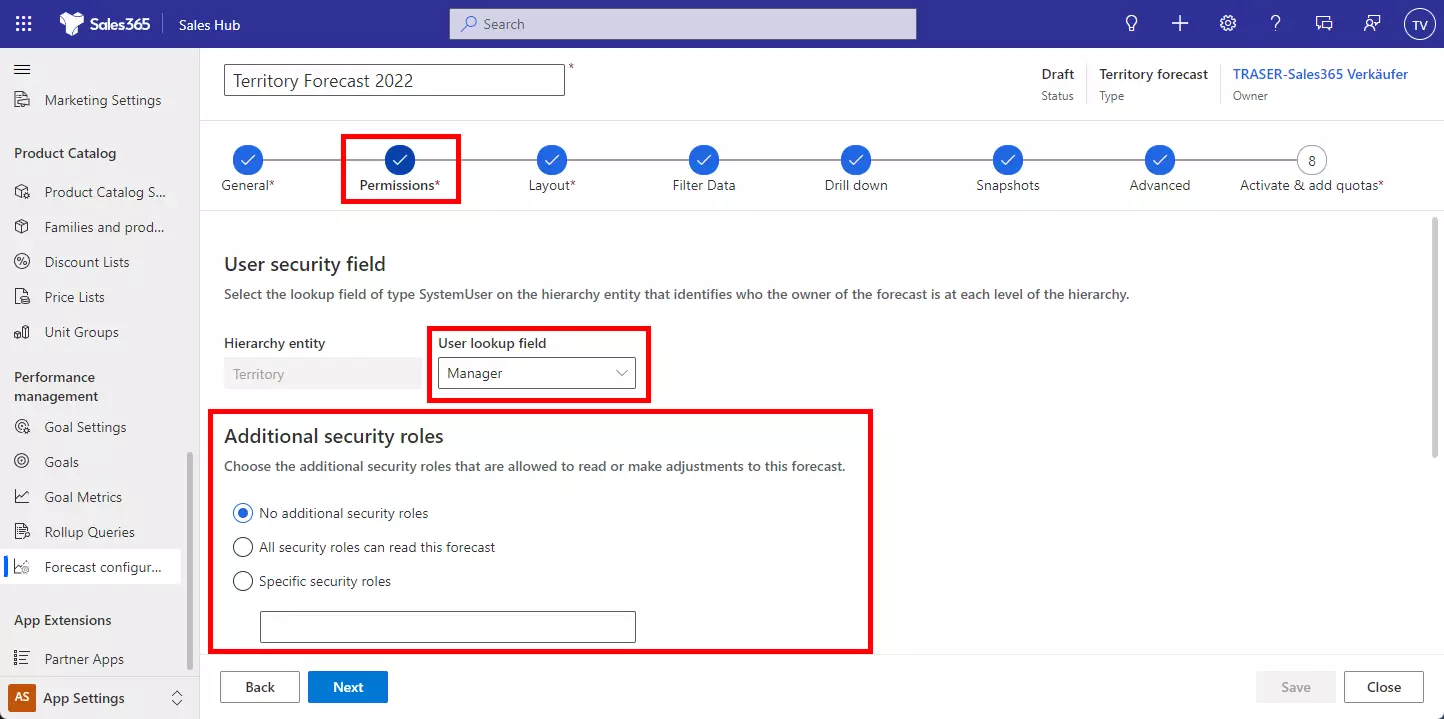
The second setup page is used to configure the permission to view the forecasts, targets, and current sales of the other team members, or sales territories.
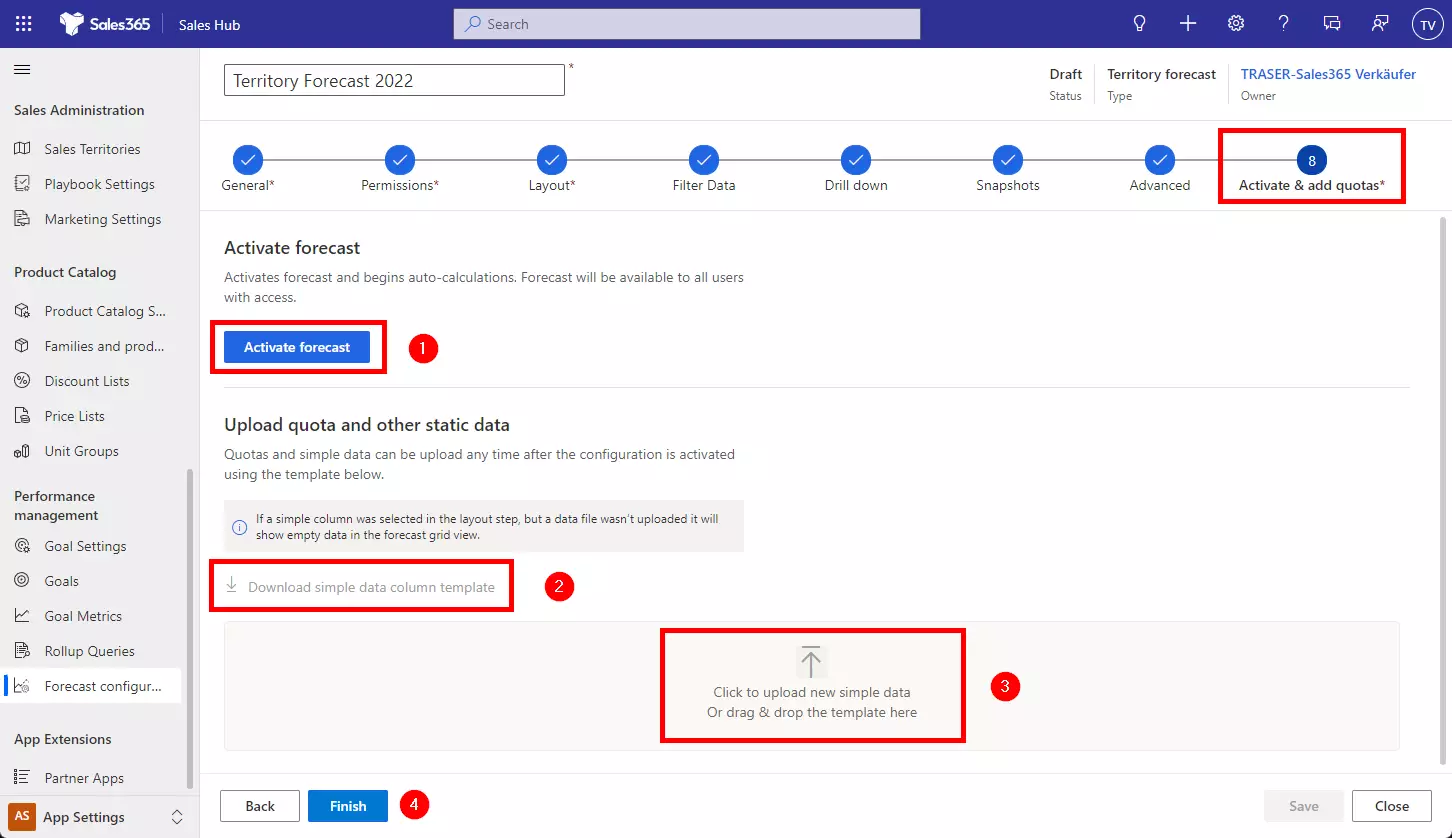
On the last page of the forecast configuration, the forecast must first be activated (1). Then download the Excel template (2), enter the forecast values into the Excel worksheet, and upload it to Sales 365 via drag & drop (3). Finish (4) completes the configuration.

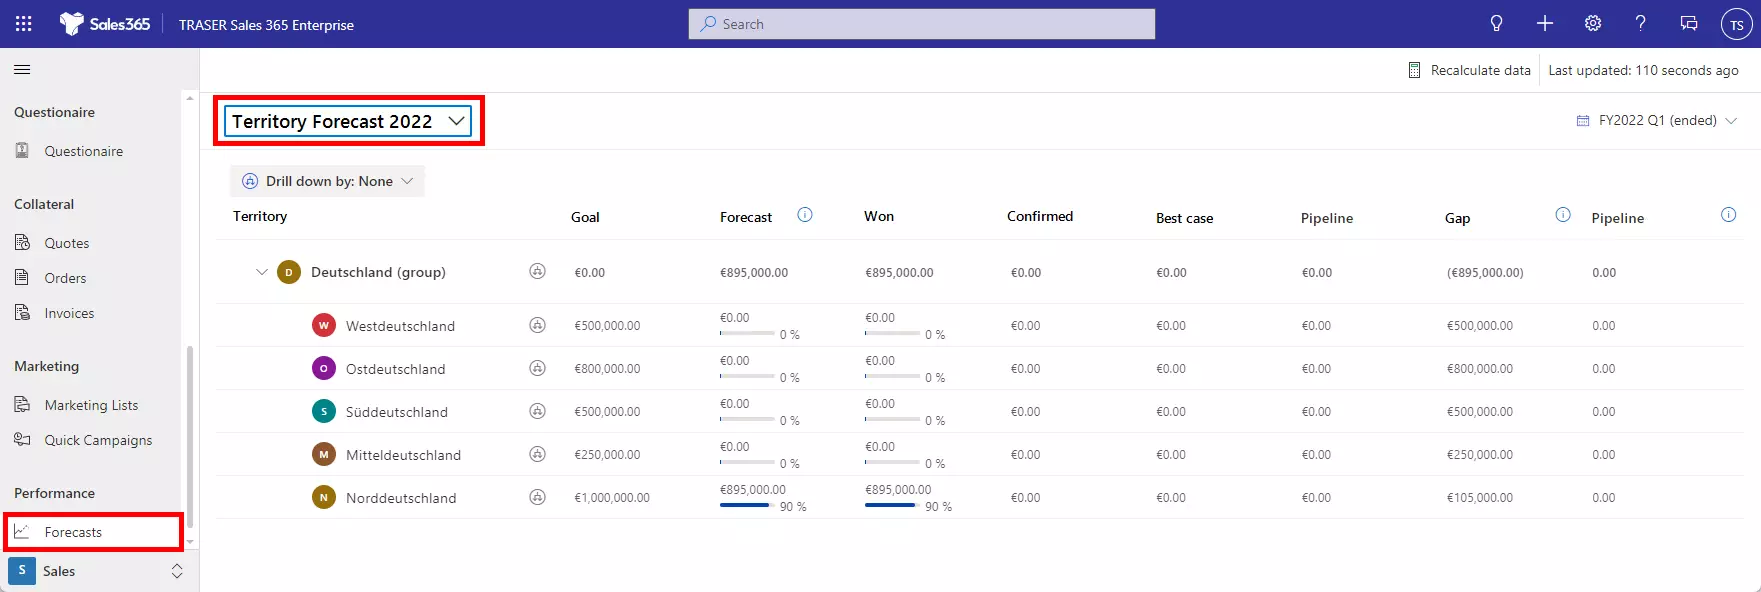
The evaluation of the forecasts can be viewed in the main area Sales under Forecasts (1). To do this, the respective forecast that has been set up must first be selected (2). The layout of this overview can be configured on the third setup page under Layout.
Assistant and insight cards
The assistant can display for example upcoming activities from Outlook, such as appointments, tasks, flights, etc., as a notification in the system. This is especially interesting when using the mobile app.
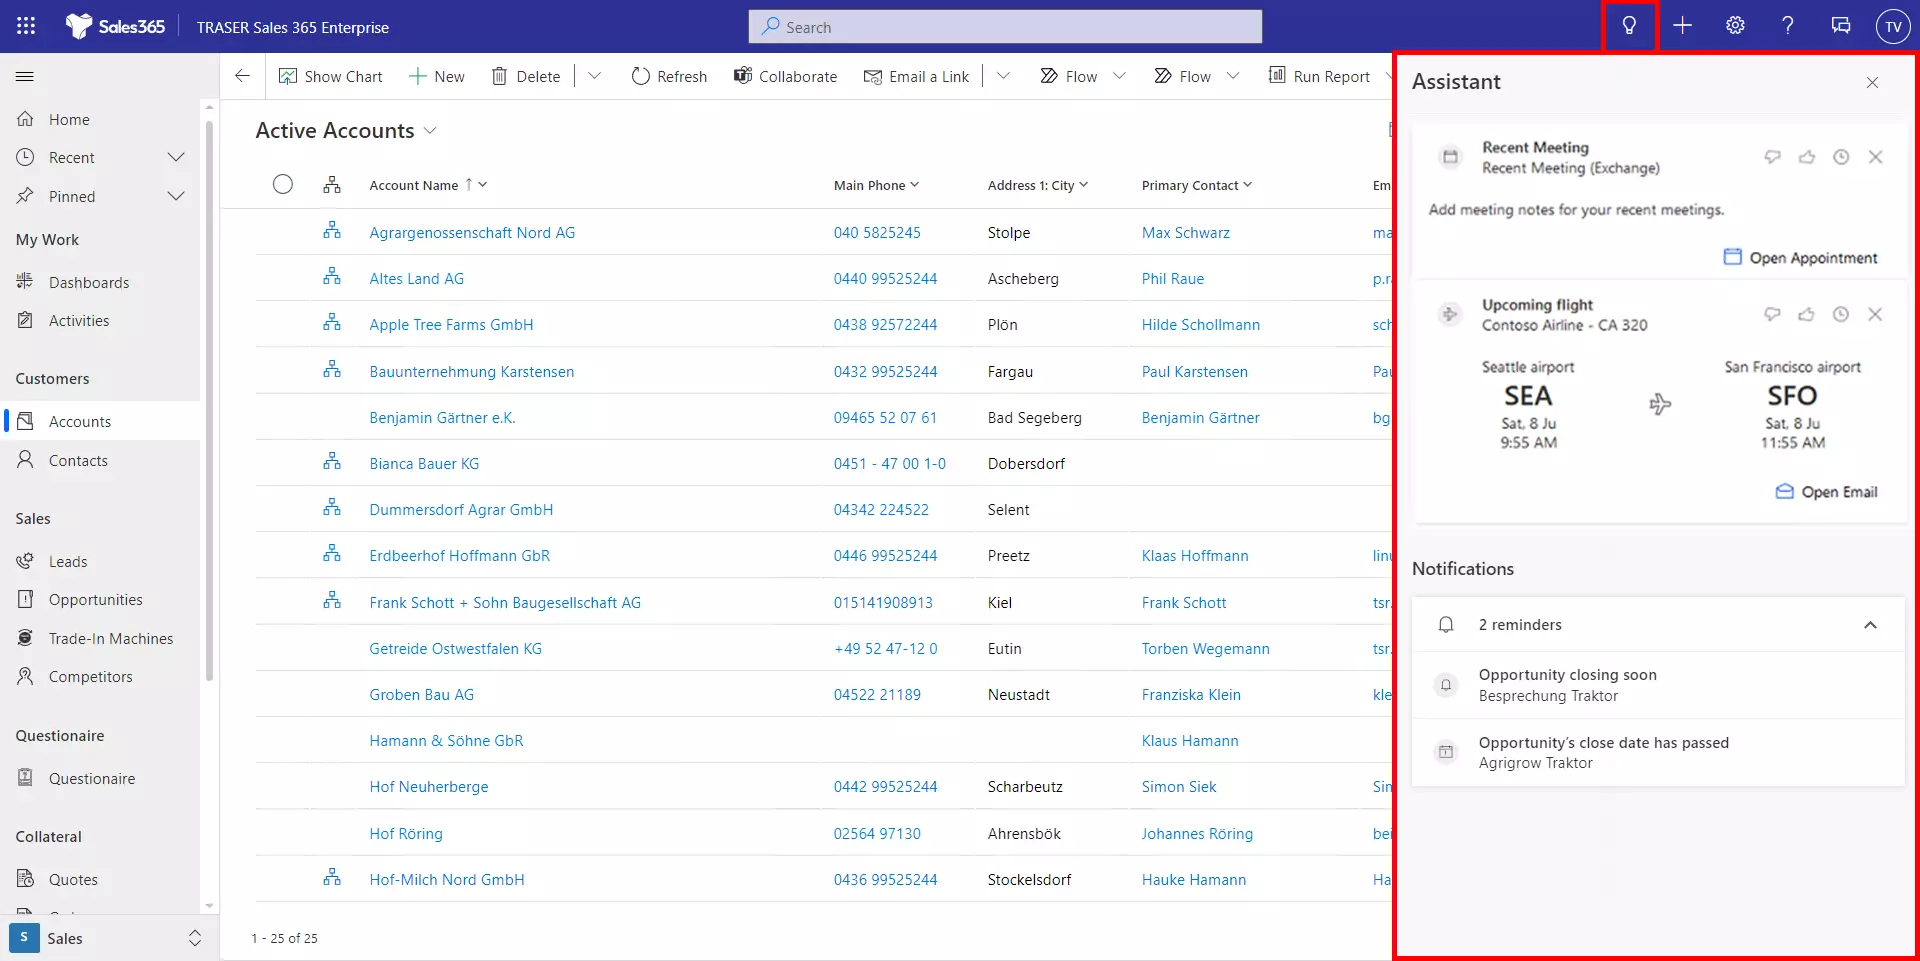
For this purpose, the following settings should be made in the Personal Settings. To do this, navigate via the Sales Hub (1), in the Personal Settings (2) and Insights (3), to activate the following cards there. All other cards will be deactivated.
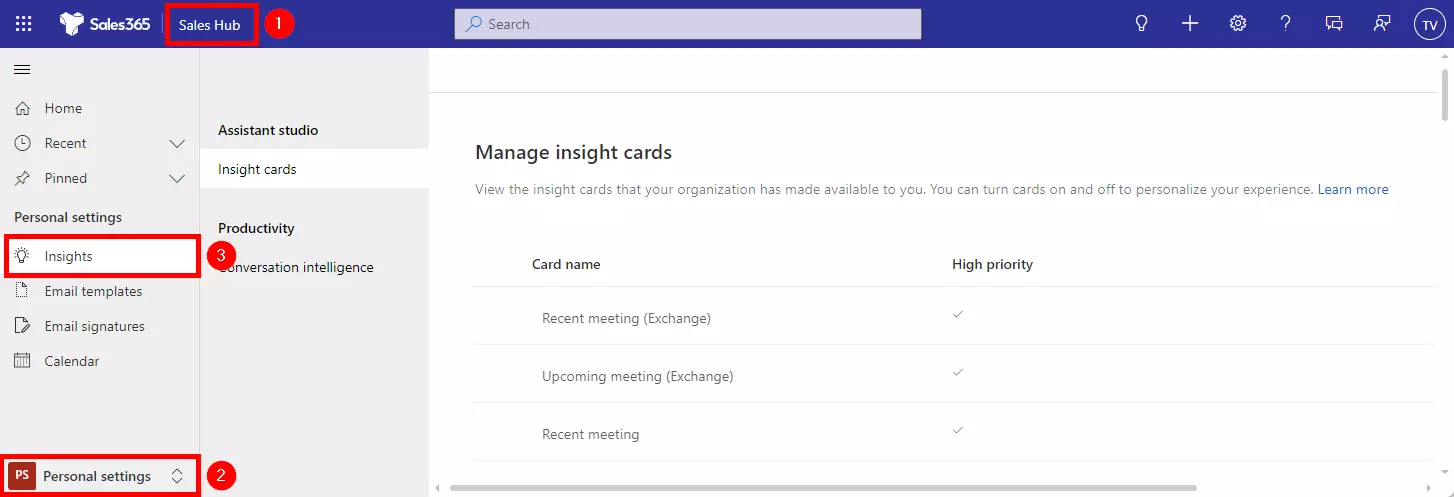
The following insight cards are recommended:
- Recent Meeting
- Missed closed date
- Close date coming soon
- Base custom activity due today
- Task due today
- Email due today
- Meeting today
- Phone call due today
- Recent meeting (Exchange)
- Upcoming meeting (Exchange)
- Upcoming flight
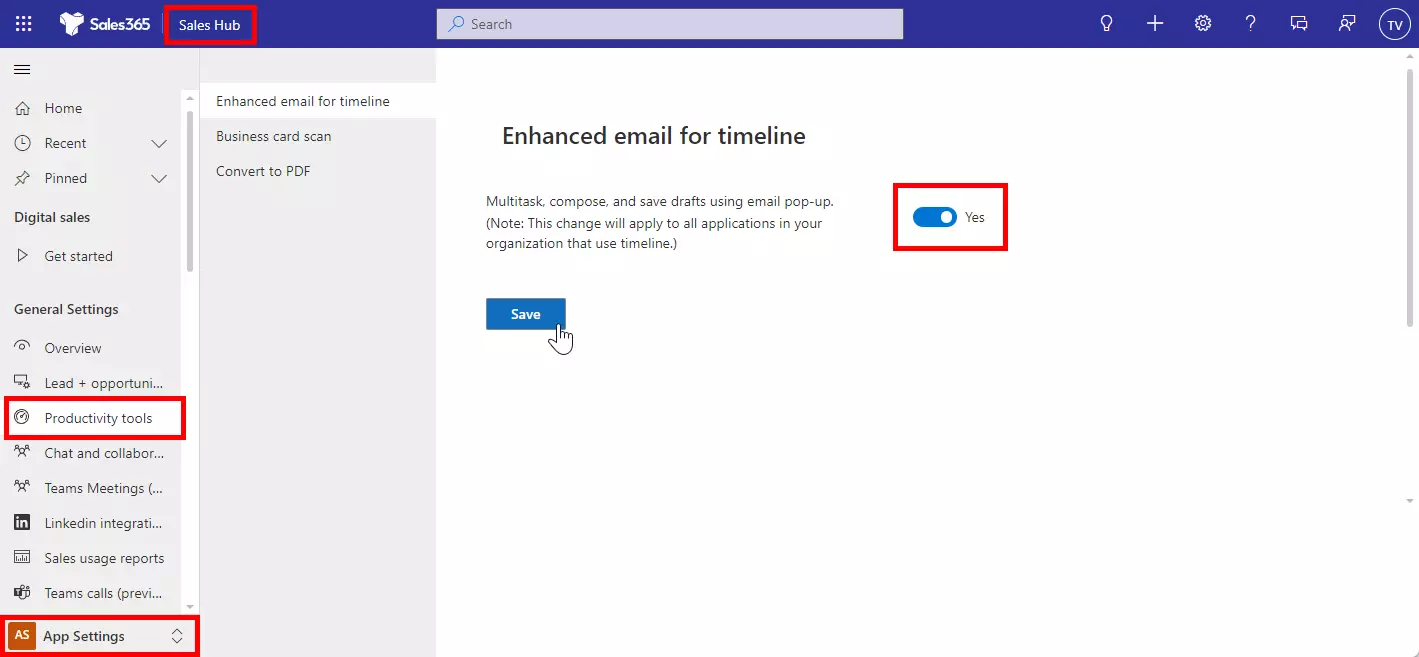
Enable enhanced email experience
Set up the enhanced email experience so sales reps can compose and send emails without leaving the context of what they are working on.
To do this, navigate to the App Settings section in the Sales Hub, and on the site map, navigate to Productivity Tools and Enhanced email for Timeline. Select Yes and then click Save.
Create or edit offline profile
In TRASER Sales 365 Basic, an offline profile is already set up and fully functional. If new, company-specific tables should be configured or added for this offline profile. To do this, follow this documentation: Configure mobile offline synchronization for your mobile app.