


Rent Quotes
This chapter deals with the management of rent quotes.
This chapter is divided into the following sections:
- Creating a Rent Quote
- Creating Alternative Rent Quotes
- Converting a Rent Quote into a Rent Contract
- Linking a Rent Quote to a Sales Opportunity
- Editing a Rent Quote
- Deleting a Rent Quote
- Creating a Sub-Rent Request from a Rent Quote
- Calculation Overview in Rent Quotes
- Depositing Several Contacts in a Rent Quote
Creating a Rent Quote
This section describes how to create a rent quote. To do so, please proceed as follows:
- Use the quick search (ALT+Q) to find the Rent Quotes page.
- A list containing all rent quotes is displayed.
- Select New from the menu bar.
- The input mask for a new rent quote opens.
Tip
A rent quote can also be created directly via the customer card. To do so, please proceed as follows:
- Use the quick search (ALT+Q) to find the Customers page.
- A list containing all customers is displayed.
- Select the customer for which you want to create a rent quote.
- Under New Document, select New Rent Quote.
- The input mask for a rent quote is displayed where the selected customer has already been filled in.
- Please fill in the fields according to the table below to create a rent quote.
| Option | Action | Description |
|---|---|---|
| General | Customer Name | Select the customer’s name for the rent quote by clicking on the button with the three dots. The Contact field will be automatically filled with the stored contact name. |
| Contract Start Date | Here, select the start date of the rent period by clicking on the calendar symbol. | |
| Requested Rent Period Start Date | Here, select the start date of the rent period requested by the customer by clicking on the calendar symbol. This date will be also used in connection with the Estimated Contract End Date for the calculation of the rent price. The start date of the rent period cannot be earlier than the Contract Start Date. If the rent quote is converted into a rent contract, the requested rent period start date will be updated into the current workdate if it was before the current workdate. | |
| Estimated Contract Duration (Days) | Optional Enter the number of full days the rent period lasts. If you confirm your entry using the TAB key, the Estimated Contract End Date field will be filled automatically. You can also enter values like 1W = 1 week or 6M = 6 months. These values will be automatically converted into days by Microsoft Dynamics 365 Business Central. |
|
| Estimated Contract End Date | Select the date for the end of the rent period by clicking on the calendar symbol. If you have already entered a value under Estimated Contract Duration (Days), this field might already be filled. |
|
| First Invoice Period (Days) | Depending on the value that is selected in the First Invoice Period Option field, you can either specify in this field after how many days the customer should receive the first invoice or how long the minimum rent period should be which is always invoiced even if all rent objects are returned ahead of time. If a number is entered here, the respective date is automatically calculated in the First Invoice Date or Minimum Rent Until Date field, based on the contract starting date. | |
| First Invoice Period Option | In this field, you can choose whether to set up a period independent of the invoice frequency defined in the rent contract after which the customer automatically receives the first invoice (First Invoice Period option) or to define a minimum rent period that will always be invoiced to the customer, even if all rent objects are returned early (Minimum Rent Period option). Depending on the selected option, the fields above and below are renamed. If you leave this field empty, the set up invoice frequency of the rent contract is used. You can find more information on these options in the Setting the First Invoice Period or Setting a Minimum Rent Period sections. | |
| Order Type | Here you select the order type that should be used as a basis for the rent quote. The Rental checkbox has to be activated for the order type. You can find more information on setting up order types under Setting Up Order Types. |
|
| Internal Contract | This toggle switch is activated when you select the corresponding order type under Order Type. The Rental and Internal Invoicing checkboxes must be activated for the order type. An internal customer must also be set up. You can find information about setting up internal customers under Setting up Internal Invoicing. |
|
| Document Status | This field specifies if the rent quote has already been released or is still open. You cannot edit the field. | |
| Contact | Reference This field will be filled automatically if you select a customer under Customer Name that has a stored contact. You can change the value by clicking on the three horizontal dots in the field and selecting a different contact. |
|
| Quote Status | Select the status of the quote from this drop-down list. The available statuses can be freely defined and serve as a reference. Once a rent quote is converted into a contract, the status is automatically set to Won. If a quote is deleted or manually archived, the status automatically changes to Lost. You can also specify why the quote did not go ahead in the following field. | |
| Quote Lost Reason | Select the reason from this dropdown list why the quote did not go ahead. The previously selected status and the specified reason will be displayed on archived quotes. | |
| Contacts | You can deposit multiple contacts in the table of this FastTab. This way, the person in charge has the option to call another contact person in case the main contact is not available. For more information on depositing contacts, click here. | |
| Shipping | Preferred Delivery Location | In this field, you can select a preferred location. This column can also be automatically filled with a default rent location if one has been defined on the User Setup Card and the Set Default Delivery Location in Contract toggle switch is activated in the TRASER Rent Setup. The default value can be adjusted later, provided that a sufficient quantity of the rent object is available at the new location. |
| Delivery Date Prefix | In this field, you can specify if the contract objects should be received until or from a certain date or should be delivered on a fixed date. This prefix applies to the entire rent quote. This prefix can be individually adjusted per line in the quote lines. | |
| Ship-to Date | In this field, you can enter the requested delivery date for the delivery of the Object Lines. | |
| Ship-to Time Prefix | In this field, you can specify if the contract objects should be received until or from a certain time. This prefix applies to the entire rent contract. This prefix can be individually adjusted per line in the contract lines. | |
| Ship-to Time | This field specifies at which time the contract objects should be received by the customer. This time applies to the entire rent contract. This time can be individually adjusted per line in the contract lines. | |
| Shipping Agent Code | In this field, you can enter a shipping agent code with which the rent object is expected to be shipped. | |
| Ship-to | From this dropdown list, select the address to which the products of the rent document will be shipped. By default, the address of the customer selected in the rent contract will be used. If you select Customer Address, you can enter the address of a different customer. The shipping address will be entered automatically in the applicable documents. If you select Alternate Shipping Address, you can choose a new shipping address. | |
| Name | Specify the name of the recipient that products of the rent document shall be shipped to. | |
| Name 2 | Enter additional name information here. | |
| Address | Specify the address that products of the rent document shall be shipped to. | |
| Address 2 | Enter additional address information here. | |
| Post Code | Enter the postal code here. If the postal code is stored in the system, the city will be entered automatically. | |
| City | Specify the city that products of the rent document shall be shipped to. | |
| Country/Region | Enter the country or region to which the products in the rent document are to be delivered. If an alternative VAT registration number is set up for this country or region, a dialog box will be displayed where you can confirm the change of the VAT registration number. | |
| Line Price | Replacement Amount (Total) | This field specifies the replacement amount of all rent quote lines (Quantity * Replacement Price). |
| Replacement % | In this field, enter the replacement price percentage for the entire rent quote. This value is applied to all rent class lines for which the checkbox in the Manual Price column is deactivated. | |
| Lines | This area will be described in further steps and sections below this table. You can find an overview of all the individual columns in the Rent Class Wizard section. | |
| Object Attribute Filter | This table shows the attributes assigned to a rent class. You can find more information on assigning attributes here. If needed, select the checkbox in the Print on Rent Delivery/Return column if you want the attributes to be printed in the delivery/return. Clear the checkbox if the attributes should not be printed in the delivery/return. | |
| Additional Agreements | In the table of this FastTab, the additional agreements for this rent contract are displayed. For more information on adding additional agreements, click here. | |
| Invoice Details | Invoice Frequency | Optional Here you select the invoice frequency. The value defined in the 'TRASER Rent Setup' is taken by default. You can find more information on setting the invoice frequency under Setting the Invoice Frequency. |
| Combine Contracts | Optional Activate this toggle switch if the contract should be invoiced as combined shipments. All contracts with the same customer for which this toggle switch is activated will be summarized in a combined invoice per invoice period. | |
| Currency Code | Optional Select the currency code for the contract from this dropdown list, if it differs from the domestic currency. | |
| Print Values in Client Currency | Activate this toggle switch if customer currency amounts are to be calculated using the current exchange rate and printed on reports alongside the document currency amount. If the function is disabled, the amount is printed only in the document currency. | |
| Prices Incl. VAT | Activate this toggle switch if the prices in the rent contract should be displayed including the statutory value-added tax. You can find information on the status of the toggle switch in the 'Toggle Switch' Table. If you are using a (service) order type where this option has already been activated, this toggle switch will be activated automatically. You can find more information on this in the chapter Order Types for Rental. |
|
| VAT Bus. Posting Group | Select the VAT posting group to be used for the business premises from this dropdown list. | |
| Payment Terms Code | Specify the number of days after which the due date of the invoice occurs. The payment discount date and payment discount amount will also be influenced by this value. Enter an integer number as the value directly followed by the unit of measure, e.g., 5D equals 5 days incl. weekends and holidays or 1M equals 1 month. The following units are possible: D = Day WD = Working Day W = Week M = Month Q = Quarter Y = Year |
|
| Shortcut Dimension 1 Code | Optional Enter the code for shortcut dimension 1 here. | |
| Shortcut Dimension 2 Code | Optional Enter the code for shortcut dimension 2 here. | |
| Invoicing | Bill-to | Select from the dropdown list who will receive the invoice. The address of the customer selected in the rent contract is used by default. If you select Another Customer, a different customer will be invoiced. If you select Custom Address, you can enter a different recipient address for the customer selected in the rent contract. The customer’s address stored in the system will not be overwritten by this. |
| Foreign Trade | EU 3-Party Trade | Optional Activate this toggle switch if the transaction is related to trade with a third party within the EU. |
| Area | Optional Specify the source area of the customer or vendor for the purpose of reporting to INTRASTAT. | |
| General Terms & Conditions | Optional Select for which document line number which kind of GTC text or code should be used in the Line FastTab. This area can only be edited if the Contract Status = Open. For more information on creating GTC texts, click here. |
- All changes are saved automatically.
- For adding entries to the rent quote, select Manage > Add Rent Class in the Lines FastTab.
You may have to select 'More Options' first to show the Manage option. - The Rent Class Wizard opens.
Rent Class Wizard
Add Rent Classes or Rent Packages Wizard – Step 1
The upper section is meant for filtering rent classes or rent packages. The filtered results are displayed in the lower section of the wizard. The Location Information FastTab displays the available quantity of the item at the respective location.
To add a Rent Class, proceed as follows:
- Under Rent Class/Package, select the Rent Class option.
- Optional In the Object Type Filter for Rent Class, select the desired rent class type you want to use (Service item, Item, Resource, or Service) in order to further narrow down your search results.
- Optional The Has linked Rent Classes columns shows if there are any linked rent classes. If Yes, you can open a window which shows the linked rent classes by clicking int the field. Linked rent classes are automatically additionally added to the rent document.
- Enter the desired quantity in the Selected Quantity column. The Selected Unit of Measure field will be filled automatically.
A value ≥1,00 must be entered for the rent class to be added. - Optional If needed, change the unit of measure of the rent class via the Selected UoM by selecting a unit deposited for this rent class from the dropdown list in the corresponding line. You can find more information on depositing an alternative unit of measure for a rent class "here".
Tip
It is possible to automatically calculate the required quantity of a rent class with a defined unit of measure. To do so, click on the desired rent class line and then on UoM Calculator in the menu bar. This option is only displayed for rent classes with Object Type=Item. Enter the required values in the dialog window. The Selected quantity is then updated automatically.
To use this function, a Calculatory Unit of Measure must be deposited for the rent class. For more information, see
"Deposit.
- Optional Select an invoice calendar in the Selected Invoice Calendar column.
More information on creating invoice calendars can be found under "Set. - Once you have selected the desired quantity, click Next.
- The Second Step of the Add Rent Classes Wizard opens.
To add a Rent Package instead, proceed as follows:
- Under Rent Class/Package, select the Rent Package option.
- Select the checkbox in the Selected column to add a Rent Package.
Note
If you deactivate an Optional rent class in a rent package, the related price lines of this rent class are also deactivated and hidden.
-
Optional Select an invoice calendar in the Selected Invoice Calendar column.
More information on creating invoice calendars can be found under "Set. -
Once you have selected the desired packages, click Next.
-
The Second Step of the Add Rent Classes Wizard opens.
Add Rent Classes Wizard – Step 2
In this step you can select or deselect additional revenues for the previous selected rent classes/packages. Additional revenues are added directly to a rent class (see also "Create).
- Select the checkboxes in the Selected column for all price lines that you want to transfer to the rent contract. If needed, deselect price lines that should not be transferred to the rent contract.
Note
Mandatory price lines cannot be deselected.
Additional revenue items with Revenue Item No.=INSURANCE are automatically deselected if the customer specified in the rent contract is set up as a self-insurer. To include insurance lines in the rent contract anyway, select the checkbox for the corresponding price line and confirm the dialog window with Yes.
Tip
To change the selection of rent classes or rent packages, click Back.
To transfer the selected rent classes/packages directly to the rent document without displaying the remaining steps of the wizard, click Add. The wizard will then restart.
- Once you have selected the desired price lines, click Next.
- The Third Step of the Add Rent Classes Wizard opens.
Add Rent Classes Wizard – Step 3
In this step you can select or deselect contract components for the previously selected rent classes or rent packages. Contract components are added directly to a rent class (see also "Assign). This step is skipped if no contract components are assigned to this rent class or rent package.
- Select the checkboxes in the Selected column for all contract components that you want to transfer to the rent contract. If needed, deselect contract components that should not be transferred to the rent contract.
Note
Mandatory contract components cannot be deselected.
Tip
To change the selection of price lines, click Back.
To transfer the selected rent classes/packages directly to the rent document without displaying the remaining steps of the wizard, click Add. The wizard will then restart.
- Once you have selected the desired contract components, click Next.
- The Fourth Step of the Add Rent Classes Wizard opens.
Add Rent Classes Wizard – Step 4
In this step you can select or deselect contract texts for the previously selected rent classes or rent packages. Contract texts are added directly to a rent class (see also "Assign). This step is skipped if no contract texts are assigned to this rent class or rent package.
- Select the checkboxes in the Selected column for all contract texts that you want to transfer to the rent contract. If needed, deselect contract texts that should not be transferred to the rent contract.
Note
Mandatory contract texts cannot be deselected.
Tip
To change the selection of contract components, click Back.
To transfer the selected rent classes/packages directly to the rent document without displaying the remaining steps of the wizard, click Add. The wizard will then restart.
- Once you have selected the desired contract texts, click Next.
Note
If the rent class to be added is a linked rent class, the linked rent class can also be selected or deselected in the next step. It can only be deselected if the linked rent class is not mandatory. If the linked rent class should be added, the deposited additional revenues, contract compontents and contract texts of the linked rent class can be selected or deselected afterwards.
Linked rent classes are recognizable by an indent underneath the main rent class in the lines of the rent contract.
In addition, the checkbox in the Linked to Rent Line column is selected.
If the main rent class is later deleted from the contract lines, the linked rent class remains as an independent rent class in the contract lines.
- The Fifth Step of the Add Rent Classes Wizard opens.
Add Rent Classes Wizard – Step 5
- The Add Rent Classes Wizard has been completed.
- Click Close to close the window.
- Optional You can restart the Add Rent Classes Wizard by clicking Restart. The previous input has been transferred to the document and the First Step of the process will be displayed.
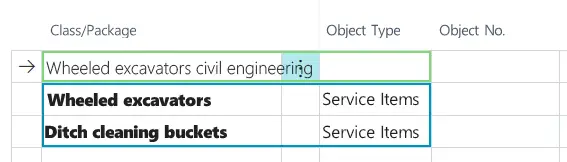
- Once the rent class wizard is closed, rent packages (green) and rent classes (blue) are displayed in the rent quote as follows:
- Optional Add a discount to individual rent classes. You can find more information under Rent Discounts.
- Optional To offer the customer an alternative to the originally added rent class, you can add another rent class to the quote and mark it as an Alternative Position. To mark a rent class as an alternative position, mark the desired rent class in the Lines FastTab and select Alternative Position > Mark as Alternative Position from the menu bar. If the alternative is rejected, you can reset the setting by clicking on Alternative Position > Reset as Alternative Position in the menu bar.
- Optional To open a rent class or rent package card directly from the rent contract, mark the desired rent class in the Lines FastTab and select Manage > Rent Class or Rent Package from the menu bar.
- The rent quote is now finished and can be sent to the customer.
- To release the rent quote, select Release > Release.
Tip
When a rent quote is released, a check of the customer’s credit limit is performed. If the customer has an overdue balance, a message will be displayed above the contract header. If you select More Details next to this message, you will receive more information on the current balance and credit limit of the customer.
Please consider that you have to activate the respective message on the My Notifications page first in order to receive this message.
- Optional To send the rent quote to the customer, select Print/Send > Print.
- Close the Rent Quotes page.
Tip
If you want to view all active rent quotes of the customer, select Navigate > Rent Quotes in the customer card.
A list with all not archived rent contracts for this customer is displayed.
Adding Items via Fast-Track Assistant
In an open rent quote, you can add items directly into the contract lines via the fast-track assistant.
More information on this can be found
here.
Setting a Rent Discount
For more information on setting rent discounts, go to the Rent Discounts chapter.
Adding Comments
Comments can be added to a rent quote in order to share certain information or to make notes. To do so, please proceed as follows:
- Use the quick search (ALT+Q) to find the Rent Quotes page.
- A list containing all rent quotes is displayed.
- You can either select New to create a new rent quote or open an existing open rent quote to which you want to add comments.
- Select Quote > Comments from the menu bar.
- A list containing all comments is displayed.
- The workdate is automatically inserted in the Date column. The date can be adjusted, if needed.
- Enter your notes or annotations in the Comment column. Formatting or lists are not possible.
- Close the Comments page.
The comments deposited in the rent quote are now also displayed in the Comments area in the info area (ALT+F2).
When rent quotes are converted into a rent contract or additional contracts are activated, the deposited comments are automatically transferred into the rent contract.
Creating All-In Prices
You can combine rent classes to an all-in price. This all-in price is a percentage composition of the selected rent classes. You can modify the percentage distribution individually. A requirement for this is that your rent quote contains multiple rent classes.
More information on this can be found
here.
Creating Alternative Rent Quotes
If a customer requests different rent periods for a rent object or if you want to suggest alternative rent objects, you can create alternative rent quotes to a main rent quote. To do so, please proceed as follows:
Note
Create a number series for alternative quotes, if necessary. For more information on creating number series, click here. If you do not create a number series, the number series for rent quotes is used.
- Create a rent quote. This is used as the main rent quote.
- Add at least one rent class to the rent quote.
Important
In order to create alternative rent quotes, the main rent quote must not be released.
- Select Home > Create Alternative Quote from the menu bar.
- A new rent quote card opens.
The following fields are added to the General FastTab of the alternative quote:
| Field | Description |
|---|---|
| Quote Type | This field identifies the quote as an Alternative Quote. |
| Main Quote No. | This field shows the number of the main rent quote. If you click on the number, the main rent quote is displayed. |
| Alternative Quote Version No. | This field shows which version of the main rent quote the alternative quote represents. |
- Make the desired adjustments and changes to the main rent quote in the alternative quote.
- If required, create more alternative quotes as described above.
- Return to the main rent quote afterwards.
Once there are existing alternative quotes, the following fields are added to the General FastTab of the main rent quote:
| Field | Description |
|---|---|
| Quote Type | This field identifies the quote as the Main Quote. |
| No. of Alternative Quotes | This field shows the number of alternative quotes. If you click on the number, the alternative quote (or a list for selection in case of several alternative quotes) opens. |
Note
Alternative quotes can only be opened from the main rent quote.
Note
If you print the main quote, all alternative quotes are printed in the same document. Those are labeled as alternative quotes.
- Once you are finished, release the desired rent quote. This automatically releases all main and alternative quotes as well.
- If you want to convert the main rent quote or one of the alternative quotes into a rent contract, click on Home > Make Contract in the General FastTab.
- A dialog window opens indicating that there are several versions of the rent quote and you have to select one of them.
- Confirm this message with Yes.
- The Alternative Quotes window is displayed. This contains the main rent quote as well as all alternative quotes. The differences between the rent quotes are displayed in the Lines FastTab.
- Select the desired rent quote and confirm your selection with OK.
Note
By selecting a rent quote, the remaining rent quotes (both main and alternative quotes) are archived. If you want to restore an alternative quote, open the archive, open the main rent quote and select the respective alternative quote. For more information on restoring rent quotes, click here.
Converting a Rent Quote into a Rent Contract
This section describes how to convert a rent quote into a rent contract. To do so, please proceed as follows:
Warning!
This action cannot be undone. The rent quote is no longer displayed in the list of Rent Quotes and cannot be edited anymore.
Note
The rent quote has to be released before it can be converted into a rent contract. To do this, select Release > Release from the menu bar in the respective rent quote. A rent quote is released when all input fields are faded out.
- Use the quick search (ALT+Q) to find the Rent Quotes page.
- A list containing all rent quotes is displayed.
- Open the rent quote that you want to convert into a rent contract.
- Check if the rent quote is released.
- Select Home > Make Contract.
- Open the created rent contract by confirming the pop-up window with Yes.
oder
Close the pop-up window by selecting No. The window that was last opened before the rent quote opens.
Tip
When a rent quote is converted into a rent contract, a check of the customer’s credit limit is performed. If the customer has an overdue balance, a message will be displayed above the contract header. If you select More Details next to this message, you will receive more information on the current balance and credit limit of the customer.
Please consider that you have to activate the respective message on the My Notifications page first in order to receive this message.
Linking a Rent Quote to a Sales Opportunity
You can link rent quotes to sales opportunities. This allows you to track rent transactions from the first contact with a customer to the conclusion of a rent contract and to follow each stage of the rent process at any time. More information on this can be found here.
Editing a Rent Quote
This section describes how to edit a rent quote. To do so, please proceed as follows:
- Use the quick search (ALT+Q) to find the Rent Quotes page.
- A list containing all rent quotes is displayed.
- Open the rent quote that you want to edit.
- Make the desired changes.
Note
If the rent quote cannot be edited, it has either been released or is not currently in edit mode.
If the rent quote is released:
- Select Release > Reopen.
If the rent quote is not in edit mode:
- Click on the pen symbol in the rent quote header:
+If the pen is circled you can edit the rent quote.

- Your changes are saved automatically.
- Any previously undone actions must now be repeated.
- Close the Rent Quotes page.
Deleting a Rent Quote
This section describes how to delete a rent quote. To do so, please proceed as follows:
Note
In order to delete the rent quote, it must not be released. If the rent quote is already released, select Release > Reopen. A rent quote is released when all input fields are faded out.
- Use the quick search (ALT+Q) to find the Rent Quotes page.
- A list containing all rent quotes is displayed.
- Open the rent quote that you want to delete.
- Check if the rent quote is released.
- Click on the bin symbol in the rent quote header.
- Confirm the pop-up window with Yes.
- The rent quote has been deleted.
- Close the Rent Quotes page.
Archiving and Deleting Expired Rent Quotes
This section describes how to delete and archive several already expired rent quotes. To do so, please proceed as follows:
- Use the quick search (ALT+Q) to find the Rent Quotes page.
- A list containing all rent quotes is displayed.
- Select Actions > Delete & Archive Quotes from the menu bar.
You may have to select 'More Options' first to show the Actions option.
Note
You can also select the action for deleting and archiving rent quotes directly via the quick search (ALT+Q). By selecting the Delete Expired Rent Quotes option, the Archive and delete expired rent quotes window is displayed and you can proceed as described below.
- The Archive & Delete Expired Rent Quotes window is displayed.
- In the Delete all quotes till field, enter the date until which you want to delete and archive rent quotes. The date entered there does not refer to the start or end date of the rent quote. The rent quotes are being filtered based on the Quote Valid To Date field in the General FastTab inside a rent quote.
- Under Filter: Contract Header you can further limit the filter of the rent quotes to be deleted by using existing fields in a rent quote.
- Finally, confirm your settings with OK.
- The rent quotes are now deleted and can be found on the Rent Archive page.
Restoring an Archived Rent Quote
In this section you will learn how to restore an archived rent quote. This can be helpful in case a customer wants to receive the exact rent quote again or if the rent quote should be used as a template. In this case, restoring does not mean that the archived rent quote will be available again after processing the function. Using this function will create a new rent quote based on the data of the archived rent quote. To restore a rent quote, please proceed as follows:
- Use the quick search (ALT+Q) to find the Rent Archive page.
- A list with all archived rent documents is displayed.
- Select the rent quote that should be the basis for the new document.
- Select New > Restore from the menu bar.
- The Restore Document window is displayed.
- The Customer Name and Contact No. fields will be prefilled with the data from the archived rent quote. You can also edit these fields and enter e.g., a different customer.
- Fill in the Contract Start Date, Estimated Contract Start Date (Days) and Estimated Contract End Date fields.
- Activate the Recalculate Prices toggle switch if the prices for the new rent quote should be recalculated. If you deactivate this toggle switch, the prices will be taken from the archived rent quote into the new rent quote.
- Confirm your entries with OK.
- This opens a dialog window asking if you want to open the newly created rent quote. Confirm the message with Yes to open the rent quote. Select No if you want to stay on the Rent Archive page.
Creating a Sub-Rent Request from a Rent Quote
You can already create a sub-rent request from a rent quote. You can find more information on working with sub-rent requests in the Sub-Rent Requests section. To create a sub-rent request from a rent quote, please proceed as follows:
Note
The rent quote has to be released before a sub-rent request can be created from it. To do this, select Release > Release from the menu bar in the respective rent quote. A rent quote is released when all input fields are faded out.
- Use the quick search (ALT+Q) to find the Rent Quotes page.
- A list containing all rent quotes is displayed.
- Open the rent quote from which you want to create a sub-rent request or create a new quote.
- Mark the desired quote lines for which a sub-rent request should be created.
- In the Lines FastTab, select Purchase > Create Sub-Rent Request from the menu bar.
You might have to click on 'More Options' to view the Sub-Rent option. - The Vendors window opens.
- Select the desired vendor for the delivery of the rent object.
- In the following dialog window, select if you want to open the sub-rent request directly.
- If you want to open the sub-rent request later, click the Sub-Rent > Open Purchase Document option in the menu bar of the Lines FastTab.
If you have already created a sub-rent document from a rent quote, this is displayed via a Yes in the Sub-Rent Document exists column in the Lines FastTab. By selecting Yes, the list of existing sub-rent documents linked to this rent quote is opened.
Calculation Overview in Rent Quotes
In this section you will learn how to open the calculation overview in rent quotes. This provides an overview on the rent amount, amounts from linked sub-rent documents and the contribution margin to be achieved. Additionally, it is displayed if the contribution margin is achieved with these used documents. This overview is useful to see at a glance if the calculation is good or something has to be modified.
Note
The calculation overview is only displayed in rent quotes if:
- the sub-rent functionality on the TRASER Rent Setup page is activated.
- the rent quote is linked to at least one sub-rent request.
- the Unit Price Excl. VAT column is filled in the Lines FastTab of the rent quote.
- the Invoice Frequency field is filled in the Invoice Details FastTab of the rent quote.
The calculation list can be displayed in the FactBox area (ALT+F2). You can find this overview in the Contribution Margin Calculation Worksheet FactBox.
- If the contribution margin set up on the TRASER Rent Setup page has been met, the value in the CM % line is highlighted in green.
- If the set up contribution margin has not been met, the value in the CM % line is highlighted in red.
Depositing Several Contacts in a Rent Quote
You can deposit several contacts in an open rent quote. This way, the person in charge has the option to call another contact person in case the main contact is not available. If the rent quote is converted into a rent contract afterwards, these contacts will also be transferred into the rent contract. To create contacts in a rent quote, please proceed as follows:
- Use the quick search (ALT+Q) to find the Rent Quotes page.
- A list containing all rent quotes is displayed.
- Open the rent quote in which you want to deposit contacts or create a new quote.
You can either select a contact from the contacts linked with the customer or enter a contact manually.
- To deposit a contact linked to a customer, click on the three dots in the Contact Name column in the Contract Contact FastTab.
- The Contacts window opens which shows the contacts linked to the customer from the rent quote.
- Select the desired contact.
- To manually enter a contact into the rent quote, complete the information in the table in the Contract Contact FastTab.
- If the rent quote is converted into a rent contract afterwards, these contacts will also be transferred into the rent contract. You can find more information on further processing the contacts in the rent contract here.
'Toggle Switch' Table
| Icon | Status | Description |
|---|---|---|
 |
Deactivated | The option is not activated and the related function not available. |
 |
Active | The option is activated and the related function available. |