Setup
This chapter describes the installation and setup of Aptean ECM Connect x Continia Expense Management in your system. It is divided into the following sections:
Installation
During installation, the following setup steps are carried out automatically:
- A new Aptean ECM Connect File Box Category named Expense Management with the EXPENSEMANAGEMENT category code is created in Aptean ECM Connect.
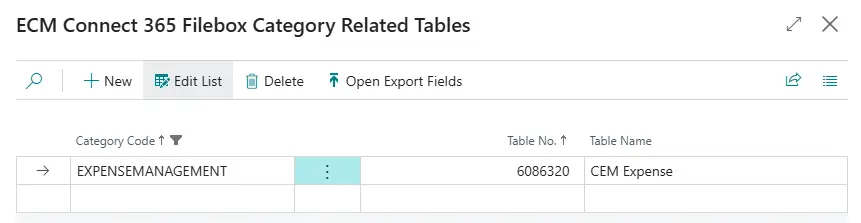
- The Expense Management category is linked to the Continia document table, so that archived documents are automatically assigned to the correct category in the document management.
Manual data migration or table setup is not required.
Note
In the case of a new installation (e.g., after uninstalling and reinstalling), the automatic setup steps are skipped to avoid duplicating existing configuration data.
Setup and Configuration
All configuration for this extension is found on the ECM Connect 365 Setup page, which is expanded to include a new Expense Management section after installation. The following sections describe how to make the necessary settings.
Activating Document Attachment Archiving
In the Expense Management section, you’ll find the Archive Expense Attachments option. If this option is activated, the extension automatically archives all corresponding attachments in the document management system when a document or invoice is posted. By default, this option is deactivated.
Note
This option is only available if the File Box Active toggle switch is activated. If you deactivate the File Box Active option, Archive Expense Attachments is also automatically deactivated.
Checking File Box Category
After installation, make sure that the Expense Management category exists and has been correctly linked to the Continia document table. To do so, proceed as follows:
- Navigate to the Aptean ECM Connect File Box Categories.
- Find the entry with the EXPENSEMANAGEMENT category code and the Expense Management category name.
- Check if the Continia document table is listed in the linked tables.