Basic Setup of TRASER Rental 365
Before using the rent functions for the first time in TRASER DMS 365, it is necessary to prepare the system with the respective basic data. This chapter describes the elementary setup of TRASER Rental 365 in TRASER DMS 365. When setting up a new system, these steps have to be carried out/checked.
Note
The example values listed here apply to the demo environment provided by TRASER Software. The values might differ depending on the environment. If you have any questions, please get in touch with your contact person at TRASER Software or ask an expert at your company.
Note
The following chapters presuppose that TRASER Rental 365 has only just been installed and that nothing has been set up so far.
Installation Check
First, you have to check if TRASER Rental 365 has been correctly installed and activated. This section describes how to check if TRASER Rental 365 has been installed and activated in your instance of TRASER DMS 365. Please proceed as follows:
- Open TRASER DMS 365.
- Login with your credentials.
- Optional Change the company if you do not want to use the live system.
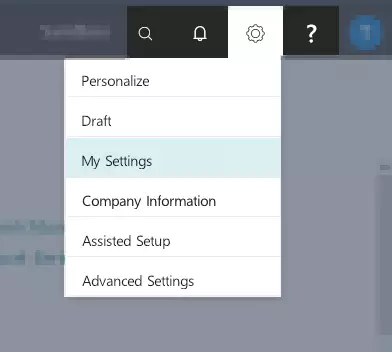
- Click on the wheel icon on the menu bar and select My Settings.
- Click on the button with the three dots next to the Company window.
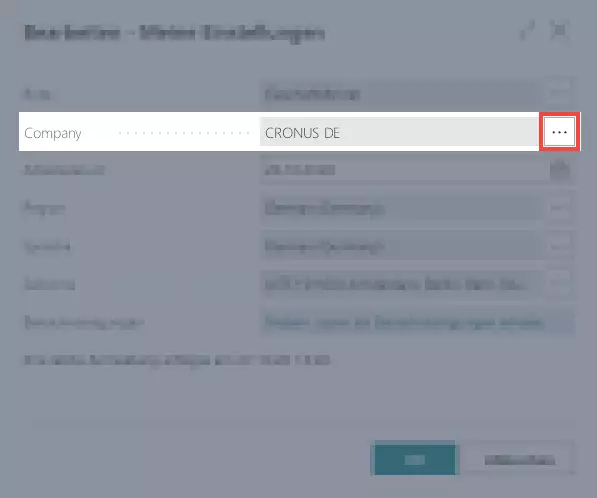
- A list containing all existing companies (= Clients) is displayed.
- Select the desired company and confirm you selection by clicking OK.
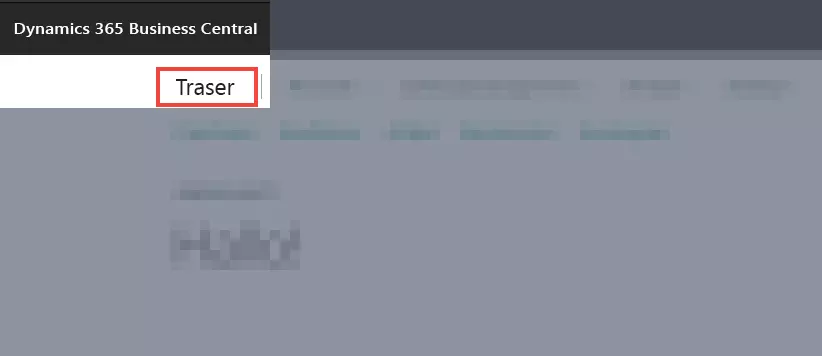
- The system will restart. The company will be displayed beneath the menu bar.
- Use the quick search (ALT+Q) to find the page Extension Management.
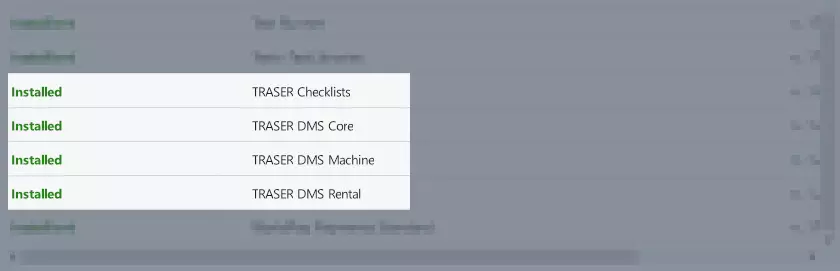
- The page Extension Management will be displayed. The page shows a list of all the existing extensions (applications, modules, plug-ins).
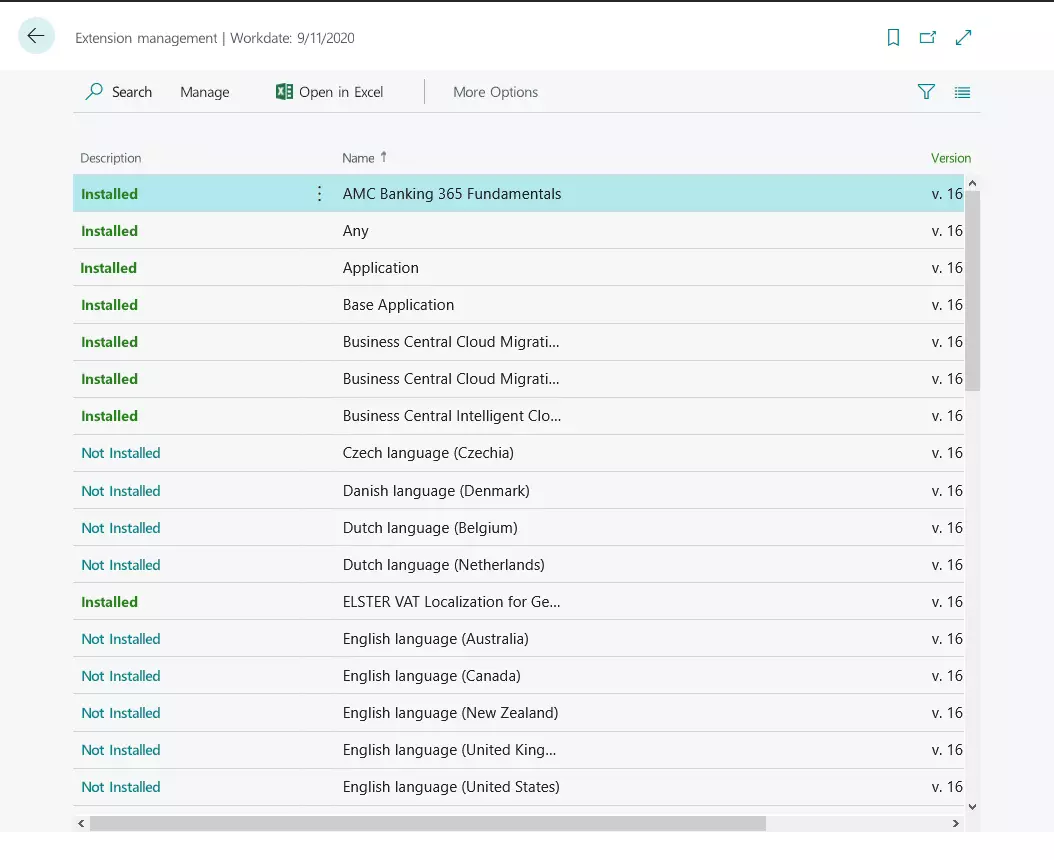
- Scroll to the bottom and search for the following entries: TRASER Checklists, TRASER DMS Core, TRASER DMS Machine and TRASER DMS Rental.
- Please make sure that the description column shows the value Installed.
- If this is the case, TRASER Rental 365 has been fully installed and is ready for use.
- If this isn’t the case, please contact your administrator or your contact person at TRASER Software so that TRASER Rental 365 can be installed.
- Use the quick search (ALT+Q) to find the page Company Information in TRASER DMS 365.
- A list containing all company information for the role is displayed.
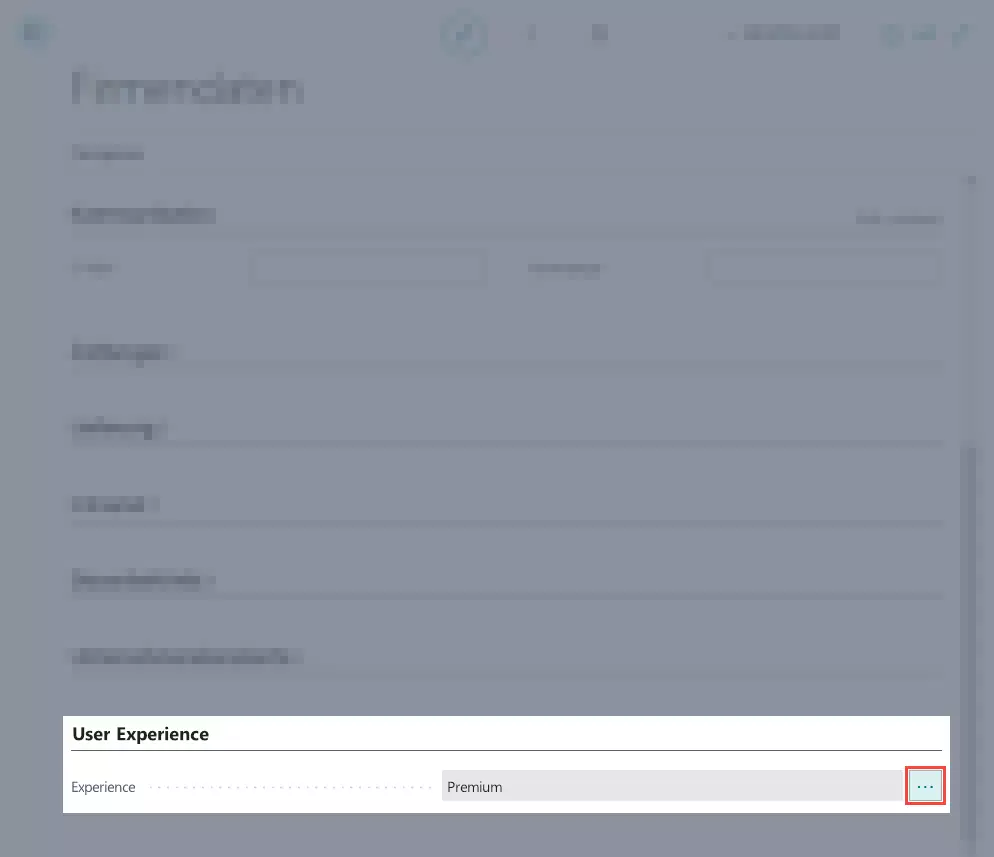
- Scroll to the bottom of the page and search for the User Experience tab.
- Open the entry by clicking on the line.
- Please make sure that the Experience field shows the value Premium.
- If yes, no more steps are necessary.
- If no, click on the three dots and select the Premium option under Experience.
- Close the page Company Information.
You can now see all content of TRASER Rental 365 in TRASER DMS 365.
Now, you have to set up TRASER DMS Rental. There are two ways to set up the base parameters. You can set them up manually or semi-automatically.
The semi-automatic setup will be carried out via the setup wizard. When you use the setup wizard, you can select pre-defined values or set up your own values.
If you want to set up the system manually all steps have to be carried out manually. The manual setup is therefore especially recommended for experienced users. Furthermore, this section can be used as an encyclopedia.
Semi-Automatic Setup
TRASER Rental Setup Wizard
This section describes how to set up the base parameters for the rental functions semi-automatically. Please proceed as follows:
Important!
The setup wizard can only be used if you have not yet set up any entries. Thus, you can only use the wizard once after installing TRASER Rental 365.
- Use the quick search (ALT+Q) to find the page TRASER Rental Setup in TRASER DMS 365.
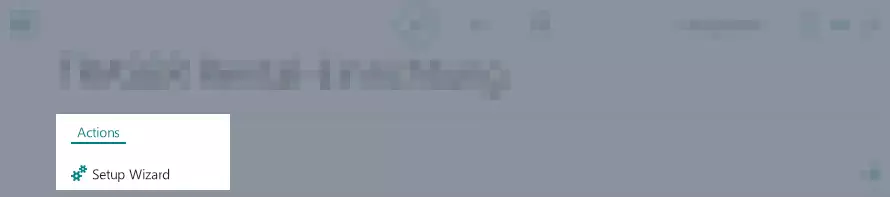
- The page TRASER Rental Setup is displayed. When setting up the system, all fields will be empty at first.
- Select Actions > Setup Wizard.
- Maximize the window so that all fields become visible. Click on the arrow icon on the right-hand side.
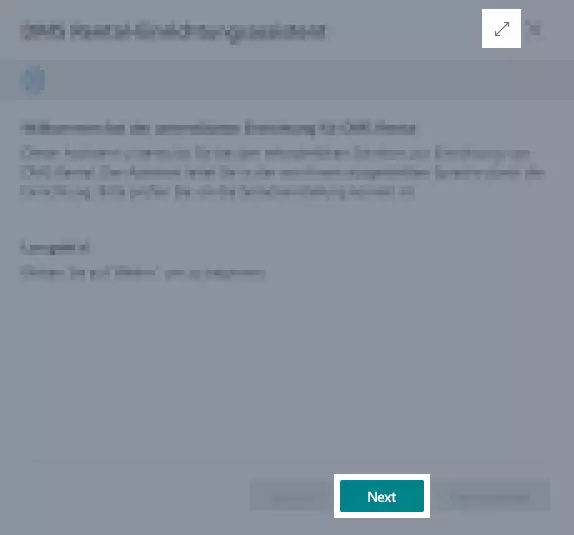
- Click on Next Page to open the next page of the setup wizard.
- Keep the suggested number series or assign new number series by clicking on the arrow to open the drop-down list containing all number series.
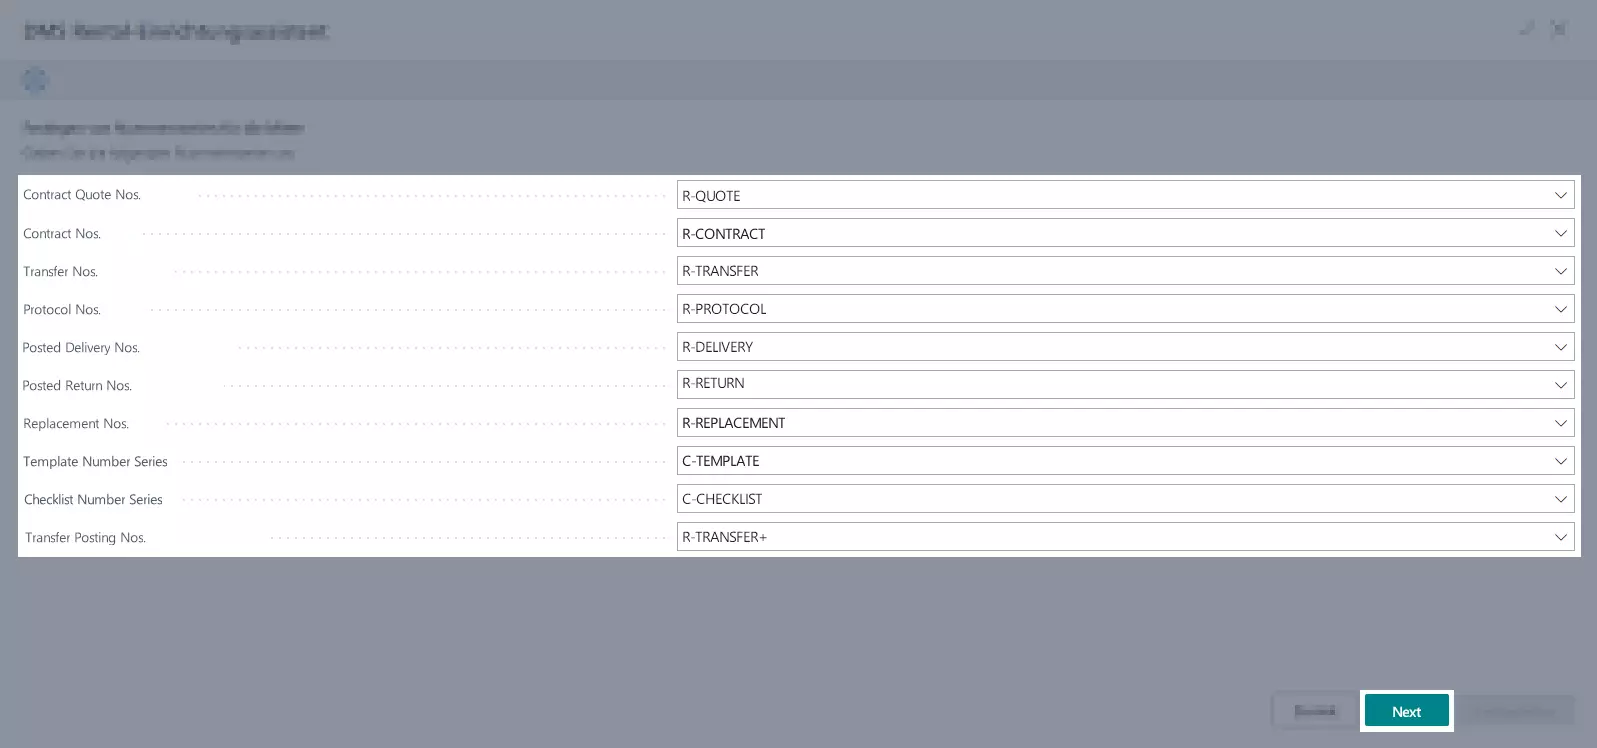
- Click on Next Page to open the next page of the setup wizard.
- Here, select the units of measure by clicking on the arrow to open the drop-down list.
- If you want to create a new unit of measure, click on Create Unit of Measures.
- Then, select the unit of measure you created.

- Click on Next Page to open the next page of the setup wizard.
- Keep the suggested gen. product posting groups or assign new ones by clicking on the arrow to open the drop-down list.
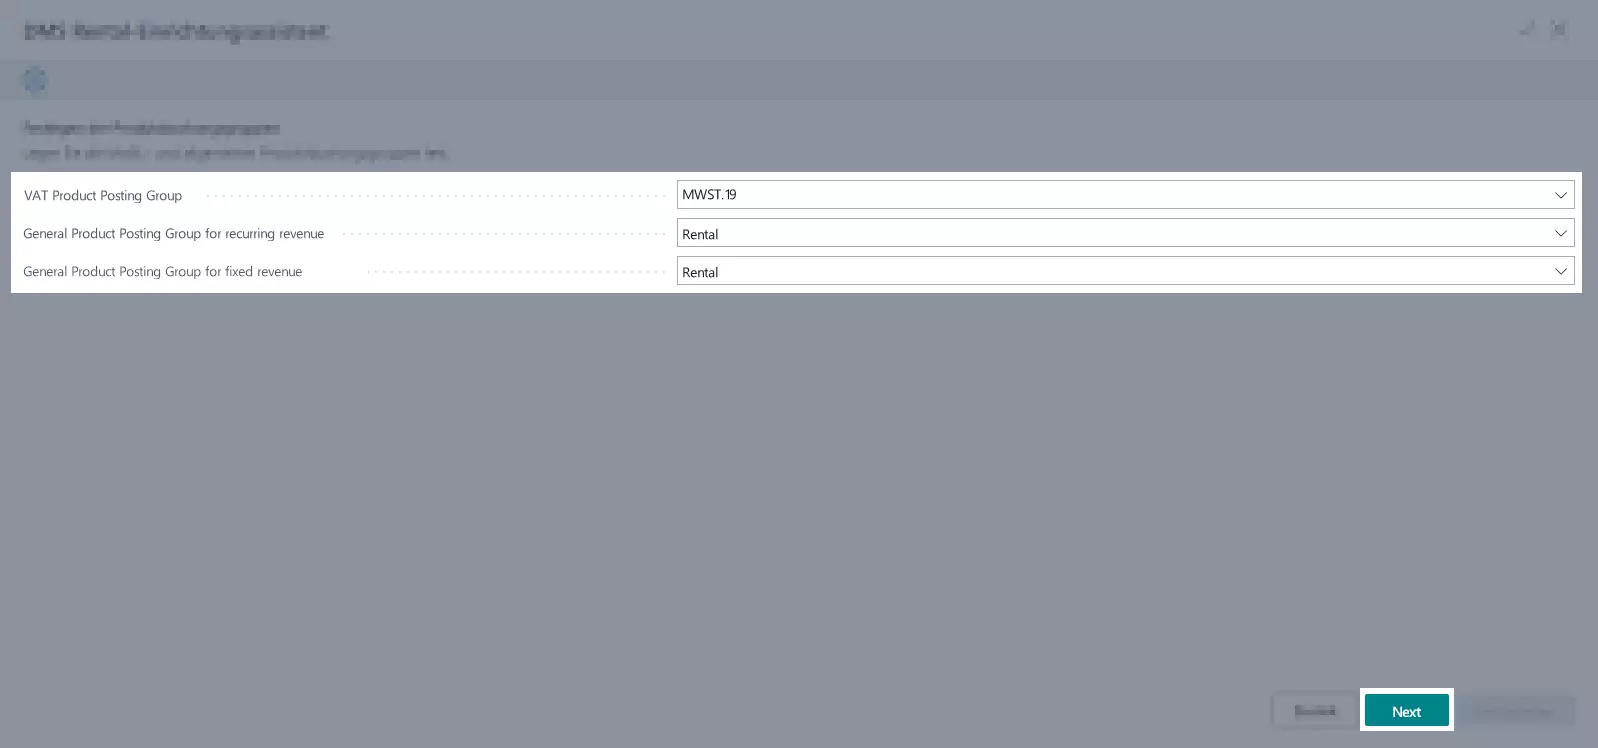
- Click on Next Page to open the next page of the setup wizard.
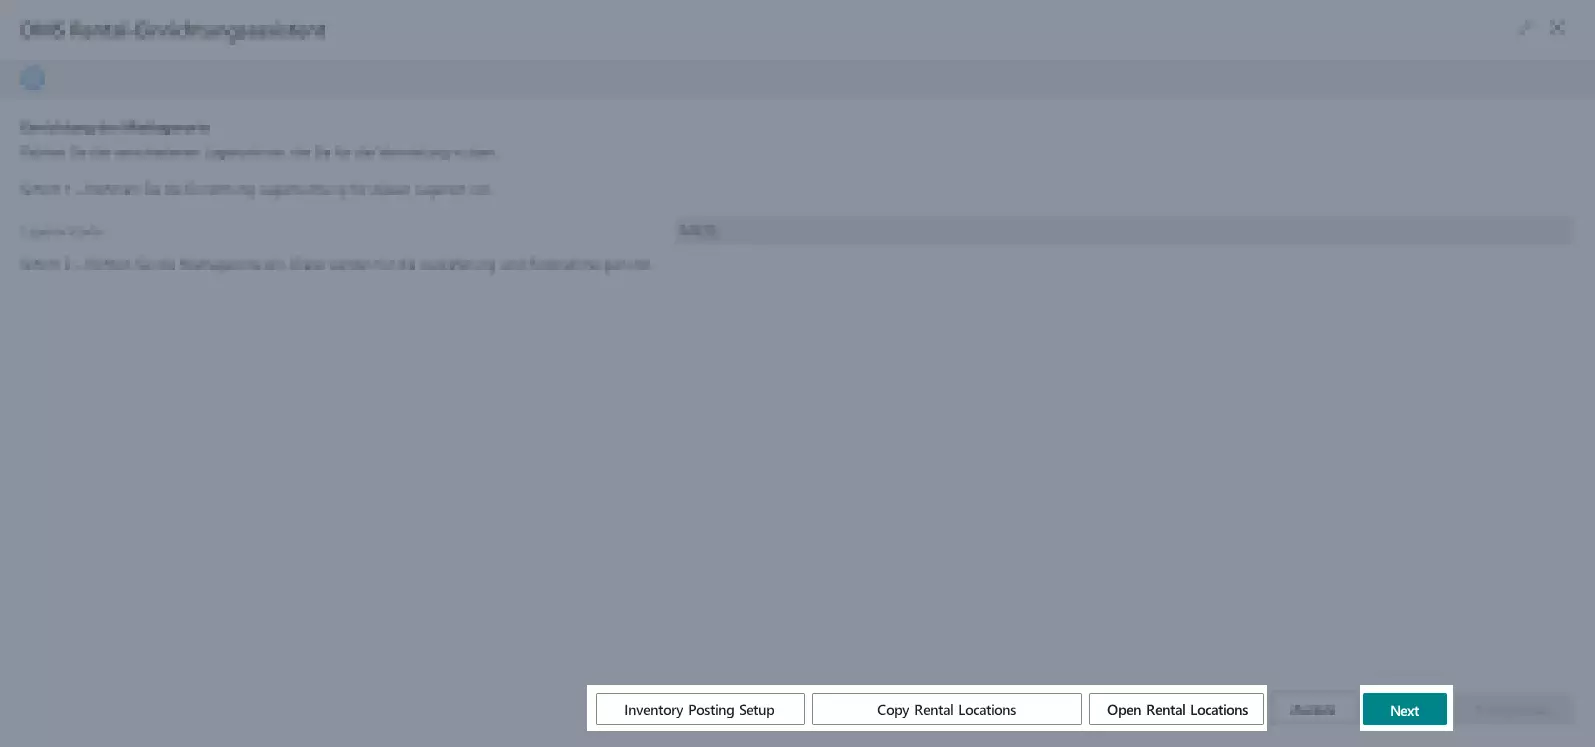
- Click on Inventory Posting Setup to set up the inventory posting.
- The page Edit – Inventory Posting Setup is displayed.
- In the Inventory Posting Group column, enter the group that belongs to the location code RENT.
- In the Inventory Account column enter the account for inventory movements.
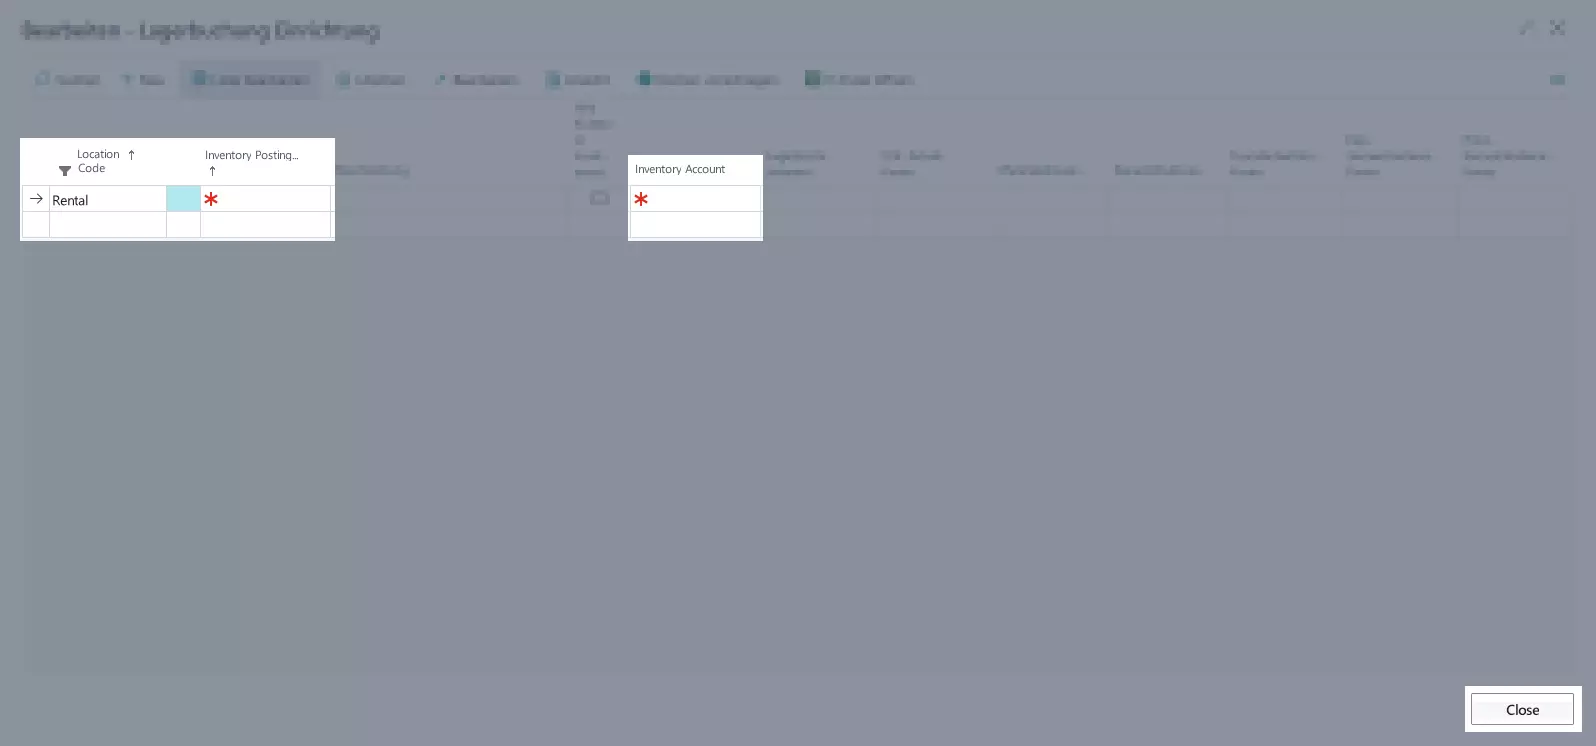
- Close the page Edit – Inventory Posting Setup by clicking Schließen.
- You will return to the rental location setup page.
- Optional If you have already set up locations, click on Copy Rental Locations to mark them as rental locations.
- Click on Open Rental Locations to add new rental locations.
- The page Edit – Rental Location Overview is displayed.
- In the Location Code column, enter a significant code for the new location.
- Use the Description column to enter a description for the location, e. g. a place or a building.
- In the Location Type field, select an option from the list that is not Customer Location. You can set up a location as a Transfer Location, Sales Location or Vendor Location.
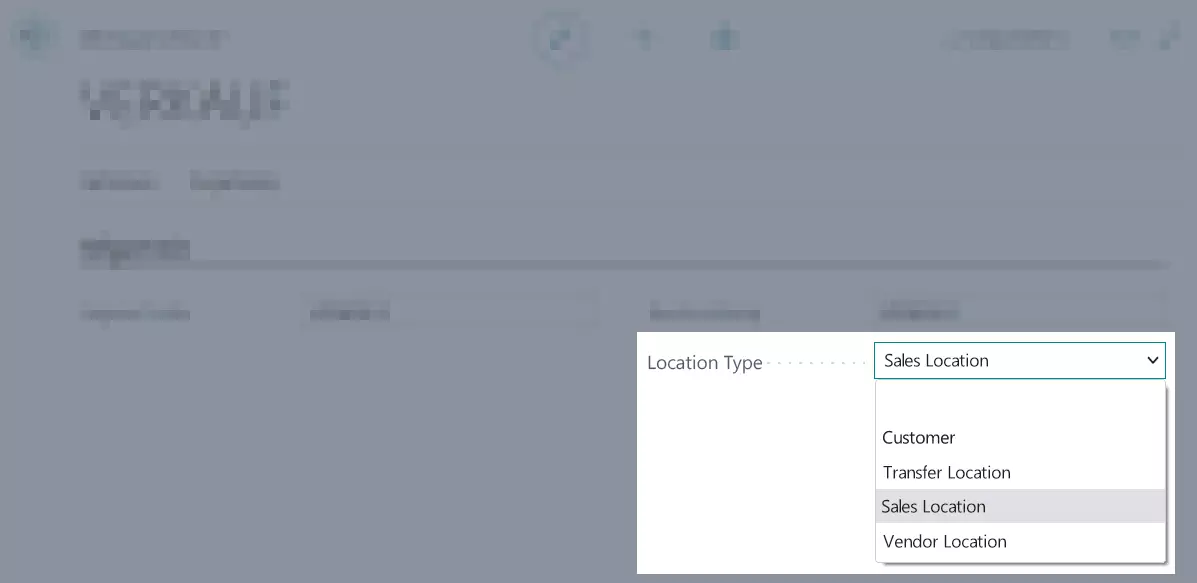
- If you leave the field Location Type empty, you have to fill in the fields in the Location Setup and Address Information registers.
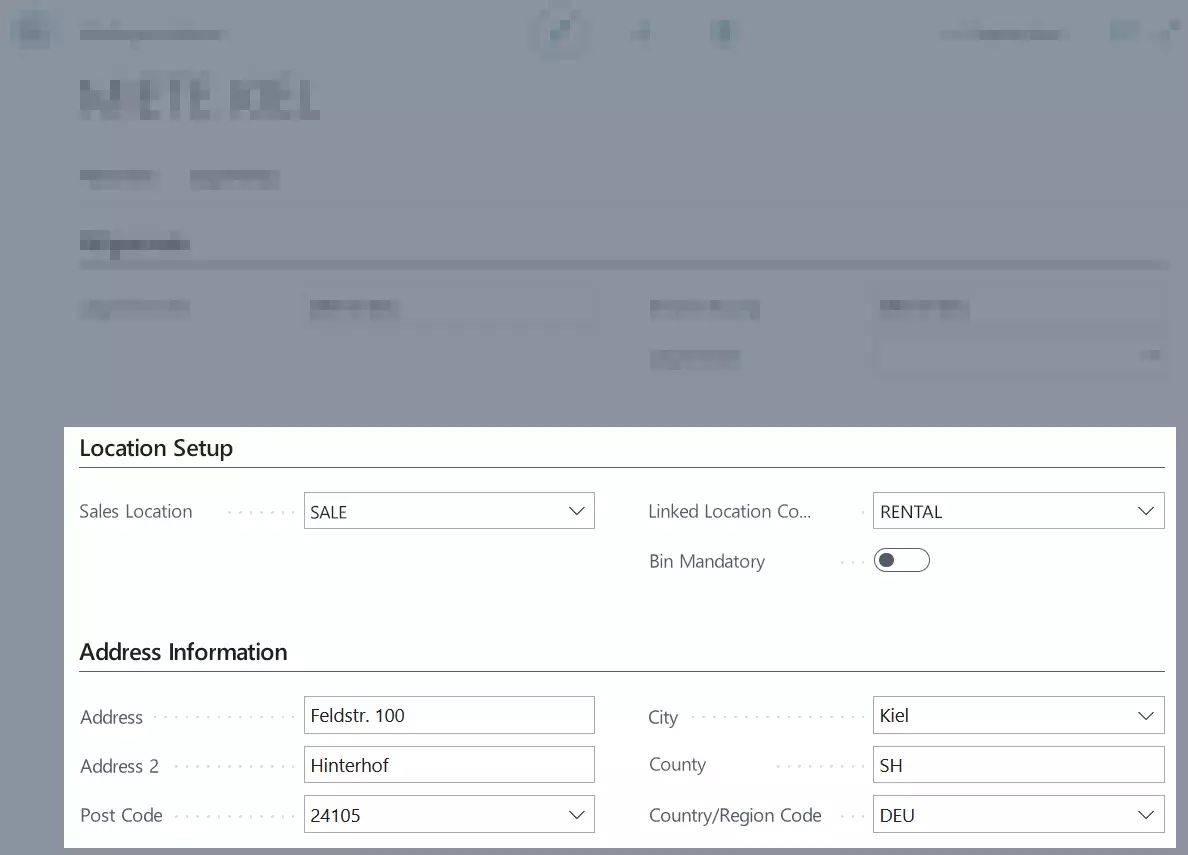
- In the Sales Location field, select a sales location which shall be linked to the rental location.
- Use the Linked Location Code field to enter a location that you want to link to the rental location. The location can be left empty if you’re creating a customer location.
- Activate the slider Bin Mandatory if you want the user to enter a bin every time they select a location, for example in delivery and return protocols. For more information on bins, click on Setup Bins.
- In the Address Information register, enter the address information for the location.
- Close the page Edit – Rental Location Overview by clicking Close.
- You will return to the rental location setup page.
- Click on Next Page to open the last page of the setup wizard.
- Click on Finish to complete the setup wizard.
- The setup has been completed. TRASER DMS Rental is now ready for use.
- Close the TRASER Rental Setup page.
Important!
You can only carry out the setup wizard once. If you want to change any settings after completing the wizard you have to change them manually. For more information on this, go to Manual Setup.
Manual Setup
Important!
If you have not carried out the Semi-Automatic Setup, please follow the following instructions step by step.
If you only want to change certain settings, click on one of the following links:
(Rent-)Locations
In order to use all of the functions in TRASER Rental 365 regarding the trade of rental objects, you have to set up locations. To create (rent-) locations, proceed as follows:
- Use the quick search (ALT+Q) in TRASER DMS 365 to find the page Locations.
- A list containing all locations opens.
- Make sure that there’s at least one location where the check box in the Rental Location column is activated.
- If there is at least one rental location, you can close the window.
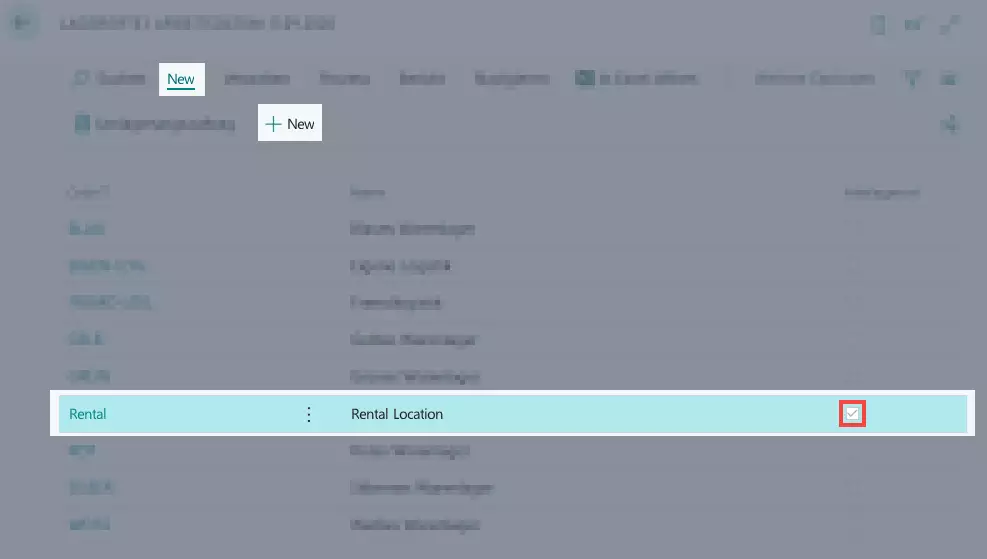
- If no rental location has been set up yet, click New > New to create a new location.
- The Location Card is opened.
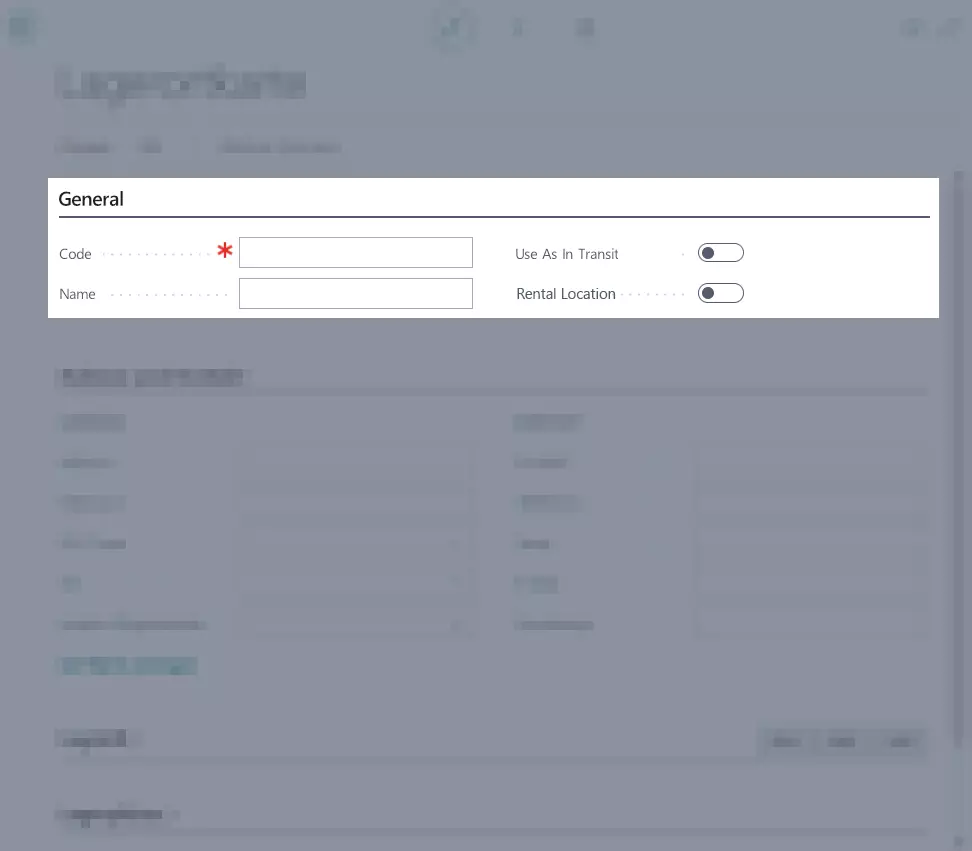
- Use the Code field in the General register to enter a code for the location, e. g. RENTAL, RNT or MIETE.
- Use the Name field in the General register to enter a description for the location, e. g. Rental Location or Rental.
- In the General tab, activate the Rental Location slider to mark the location as a rental location. You can find information on the status of the boolean in the Table 'Boolean'.
- Optional You can also enter more parameters under Address & Contact, Logistics, Bins and Bin Template if required.
- The location is now available as a rental location.
- Close the location card.
- Close the page Locations.
- Use the quick search (ALT+Q) to find the page Inventory Posting Setup in TRASER DMS 365.
- A list containing all inventory posting codes opens.
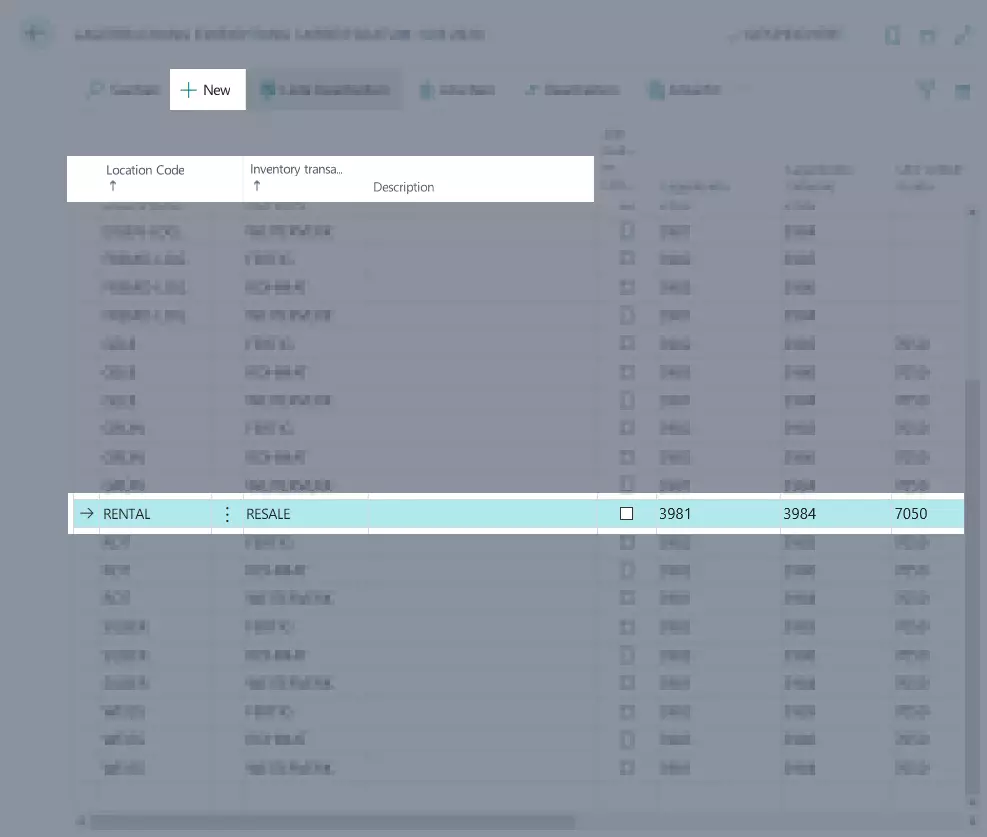
- Click on New to create a new inventory posting code.
- The Inventory Posting Setup Card opens.
- From the Location Code drop-down list, select the rental location you just created.
- From the drop-down list Inventory Posting Group select the value RESALE. A live system might require a different value.
- Optional In the Description field, enter a unique description for the inventory posting.
- Close the Inventory Posting Setup Card.
- Select the relevant accounts. *A live system might require different values. If you want to copy a value from the field above, you can press F8.
- Close the page Inventory Posting Setup.
- Use the quick search (ALT+Q) to find the page Rental Location List in TRASER DMS 365.
- A list containing all rental locations opens.
- Click on New to create a new rental location.
Note
You have to create at least one normal rental location and one customer rental location.
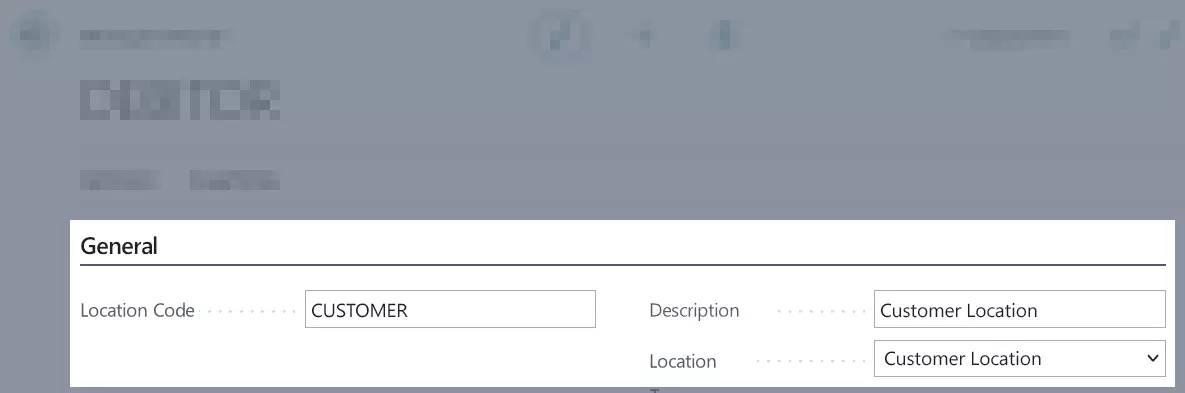
- Use the Location Code column to enter a unique code for the rental location. We recommend to use the name of the rental location.
- Optional Use the Description column to enter a description of the rental location.
- Select the location type Customer Location for at least one rental location.
- If you want to create more rental location, you can also choose the location types Transfer Location, Sales Location or Vendor Location.
- If you leave the field Location Type empty, you have to fill in the fields in the Location Setup and Address Information registers.
- In the Sales Location field, select a sales location which shall be linked to the rental location.
- Use the Linked Location Code field to enter a location that you want to link to the rental location. The location can be left empty if you’re creating a customer location.
- Activate the Bin Mandatory boolean if a bin code needs to be specified for the location during all item transactions, e.g. during commissioning oder decommissioningof an item or in delivery or return protocols. For more information on bins, click on Setup Bins.
- In the Address Information register, enter the address information for the location.
- Close the page Rental Location List.
Bins Setup
You can set up bins for rental location. This section describes how to unlock bins for a location, create bins and enter content. It also describes how you can define which object types require a bin.
To unlock bins for a location, proceed as follows:
- Use the quick search (ALT+Q) to find the page Rental Location List in TRASER DMS 365.
- A list containing all rental locations opens.
- Click on New to create a new rental location or open a rental location from the list.
- Activate Bin Mandatory in the Logistic Setup register.
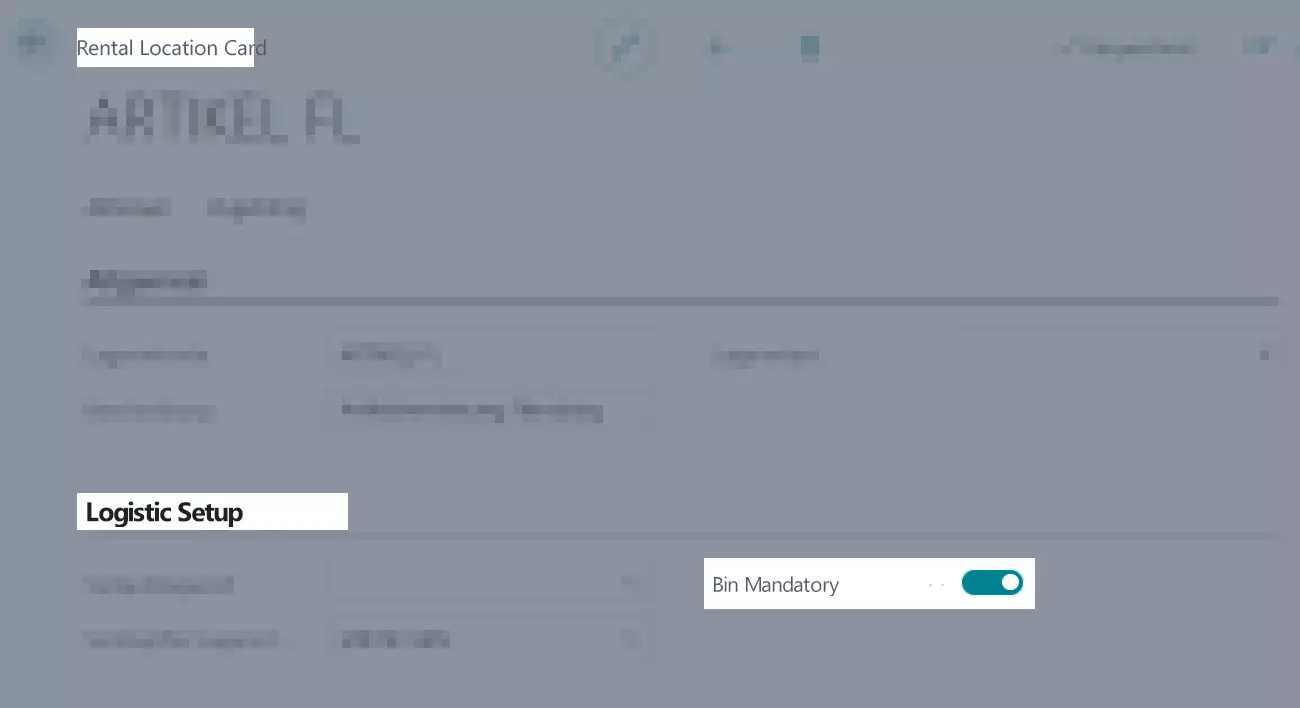
- You can now set up bins for locations.
Note
Use the Default Bin Selection field to define bins. The choices determine how the bin is defined.
- First-used bin means that the bin that was used first during a posting will automatically be set as the default bin. This only applies if you haven’t set up a bin. If you have already set up a bin you can update it accordingly.
- Last-used bin means, that the bin that was used last during a posting will automatically be set as the default bin.
- Empty means that no bin will be set as the default bin during posting of a bin.
To create bins for a location, proceed as follows:
- Use the quick search (ALT+Q) to find the page Rental Location List in TRASER DMS 365.
- A list containing all rental locations opens.
- Click on New to create a new rental location or open a rental location from the list.
- Select Actions > Bins from the menu bar.
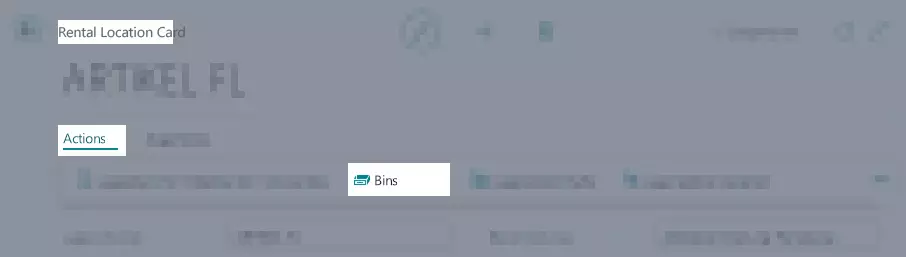
- The window Edit - Rental Bins opens.
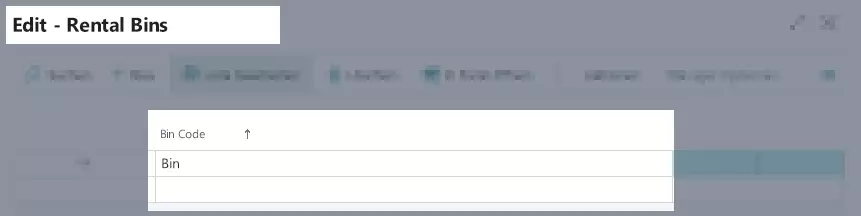
- Use the Bin Code column to enter the code for the bin you are creating.
- To add new lines, click into a new line.
- The changes are saved automatically. You have successfully set up bins for a location.
To enter content for a bin, proceed as follows:
- Use the quick search (ALT+Q) to find the page Rental Location List in TRASER DMS 365.
- A list containing all rental locations opens.
- Click on New to create a new rental location or open a rental location from the list.
- Select Actions > Bins from the menu bar.
- The window Edit - Rental Bins opens.
- Select the bin you would like to enter content for.
- Select Actions > Bin Contents from the menu bar. If you cannot find the Actions button, you might have to click on More Options.
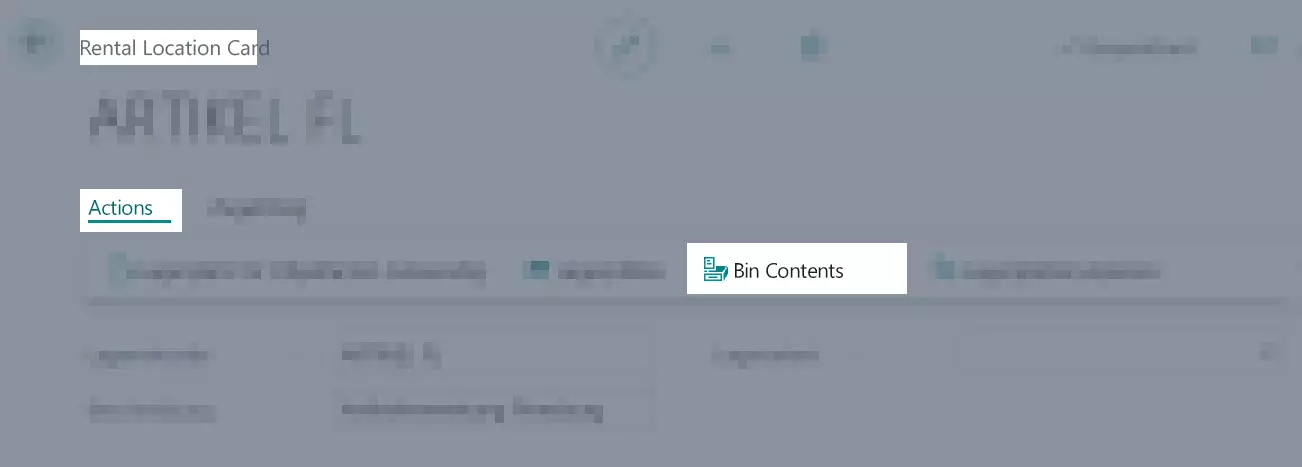
- The window Rental Bin Contents opens.
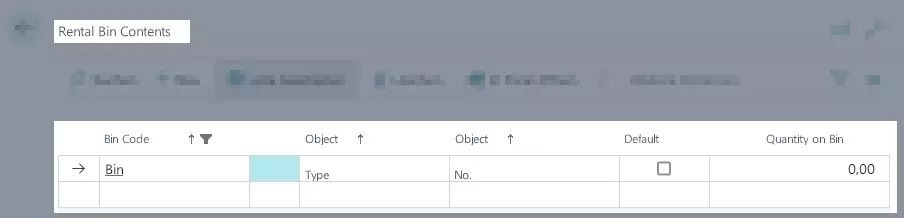
- Use the Object Type column to enter whether this bin contains a (service) item, a resource or a service.
- Select the number of the bin object from the Object No. column.
- Activate the check box in the Standard column if you want the bin to be the standard bin for the entered object type and object number.
- Use the Quantity on Bin column to enter the number of objects on the bin.
- You have successfully added bin contents to this location.
To determine what object types require a bin, proceed as follows:
- Use the quick search (ALT+Q) to find the page Rental Location List in TRASER DMS 365.
- A list containing all rental locations opens.
- Click on New to create a new rental location or open a rental location from the list.
- Select Actions > Bin Mandatory for Object Types from the menu bar.
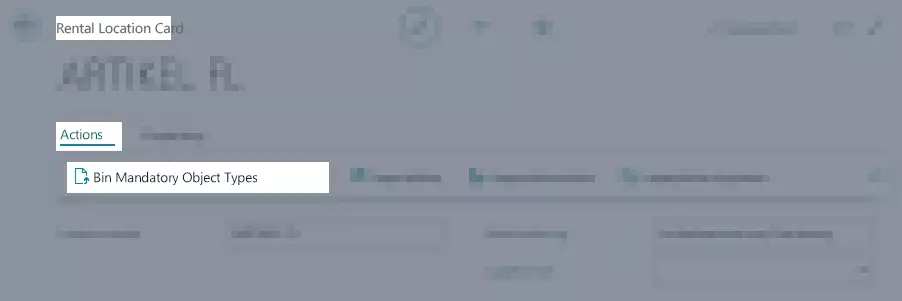
- The window Edit - Bin Mandatory Object Type is displayed.
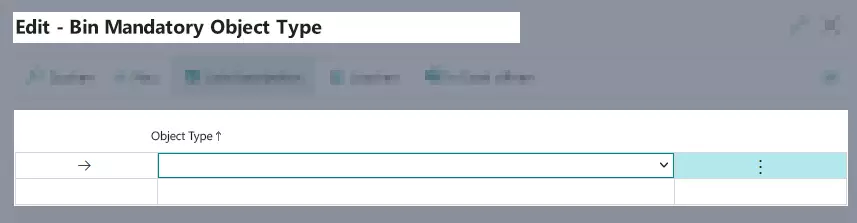
- Use the Object Type column to determine what object types (service item, item, resource, service) require a bin.
- To enter another object type, click on an empty line.
- The changes are saved automatically. You have successfully defined which object types require a bin.
You have successfully set up rental locations that can be used to commission, transfer, deliver and return rental objects. You can now proceed with the next step.
Invoicing
You have to set up certain financing parameters so that the invoicing functionality including reports, postings and billings can be used. This will prevent error messages.
-
Resources are relevant for storing the cost types Recurring Costs and Fixed Price, as daily recurring costs (rent, partial rental insurance, etc.) and one-off costs (delivery, return, cleaning, maintenance) are incurred for a rental.
-
Rent Revenue Items are required to create rent classes. These are used to determine whether a rent class is based on an item, service item, service or resource.
-
A Dummy Contact is needed for certain queries, in this case for rent prices.
-
Number Series are required to clearly number rental quotes, rental contracts, reports, checklists, etc.
-
Journals are required so that rental postings can be made correctly.
-
You use the Contract Invoice Frequencies to define the frequency at which invoices are created by default.
Resources
Important!
Before you can create resources, you have to set up the corresponding invoice unit of measure codes in the TRASER Rental Setup. Please proceed as follows:
- Use the quick search (ALT+Q) to find the page TRASER Rental Setup in TRASER DMS 365.
- The page TRASER Rental Setup is displayed.
- Scroll to the Invoice Setup register and open it.
- Use the Invoice Unit of Measure Day field to enter a unit of measure code for recurring revenues. By default, use the value Day.
- Use the Invoice Unit of Measure Month field to enter a unit of measure code for recurring revenues. By default, use the value Month.
- Use the Invoice Unit of Measure for fixed revenues field to enter a unit of measure code for fixed prices. By default, use the value Piece.
- Close the TRASER Rental Setup page.
- Use the quick search (ALT+Q) to find the page Resources in TRASER DMS 365.
- A list containing all resources opens.
- Click on New > New to create a new resource.
- An empty resource card opens.
Note
Two resources have to be created.
- a resource with Recurring Revenues that will be used for rental objects and rent insurances,
and- a resource with Fixed Price that will be used for delivery, return and other one-off revenues.
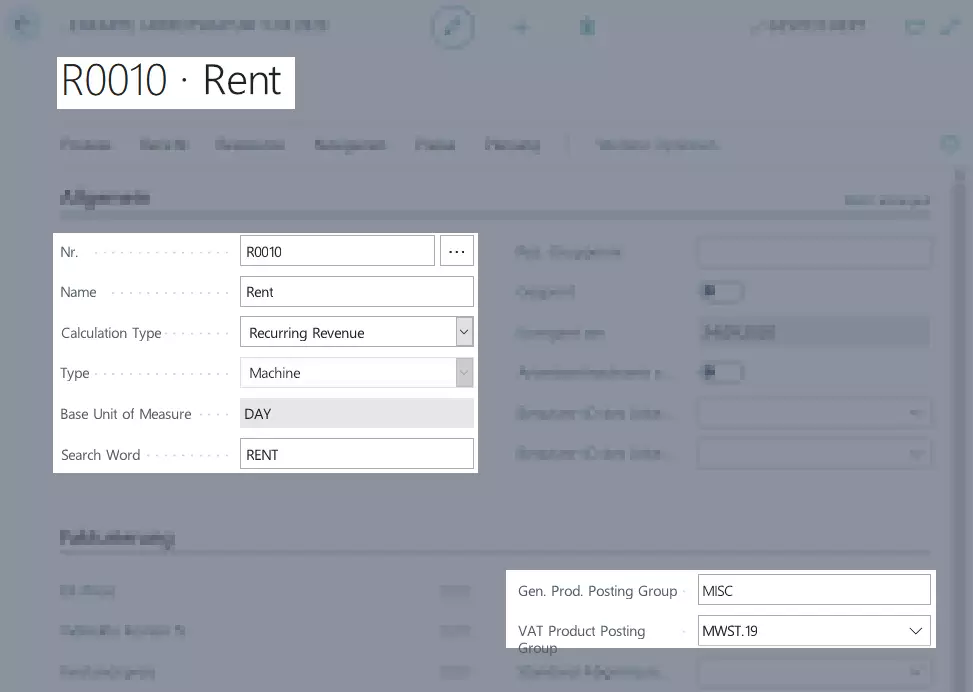
- First, set up the resource for Recurring Revenues.
- From the drop-down list Type select the value Machine.
- Use the No. field to enter a resource number or keep the number that is automatically created by the system.
- Use the Name field to enter a description for the resource, e. g. Rent, Rental or Recurring. The Search Word field will be filled automatically with the applicable description.
- From the drop-down list Calculation Type select the value Recurring Revenue.
- For the Gen. Product Posting Group, select the entry OTHER. The field VAT Prod. Posting Group will be filled automatically. A live system might require a different value.
- Optional Fill in the rest of the fields as required.
- Click on the plus icon
on the resource card. You can find it in the header.
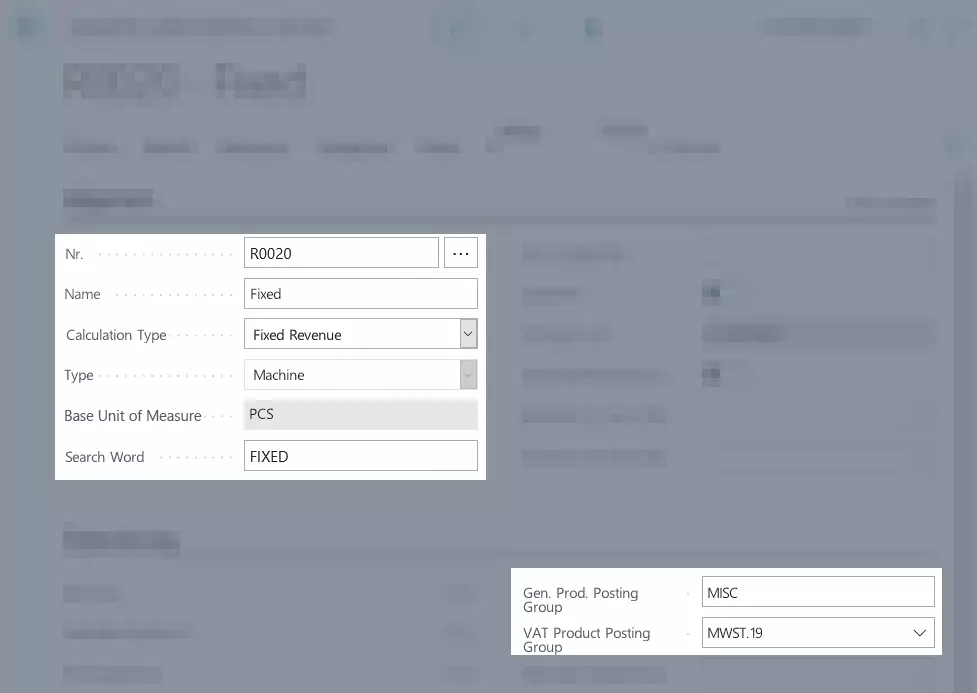
- Next, create a resource for Fixed Prices.
- From the drop-down list Type select the value Machine.
- Use the No. field to enter a resource number or keep the number that is automatically created by the system.
- Use the Name field to enter a description for the resource, e. g. Fixed, Fixed Price or One-Off Cost. The Search Word field will be filled automatically with the applicable description.
- From the drop-down list Calculation Type select the value Fixed Revenue.
- For the Gen. Product Posting Group, select the entry OTHER. The field VAT Prod. Posting Group will be filled automatically. A live system might require a different value.
- Optional Fill in the rest of the fields as required.
- Close the resource cards.
- The pageResources should show the following resources:
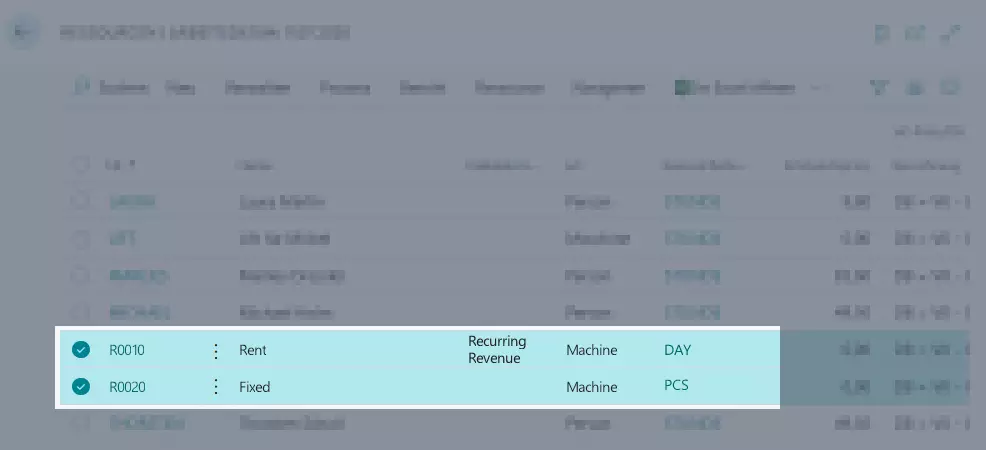
- If this is the case, you don’t have to perform any other steps.
- If the page doesn’t show the right resources, please follow the instructions listed under Resources.
- Close the page Resources.
Rent Revenue Items
- Use the quick search (ALT+Q) in TRASER DMS 365 to find the page Rent Revenue Items.
- A list containing all rent revenue items opens.
- You can also keep the values that have already been assigned. A live system might require different values.
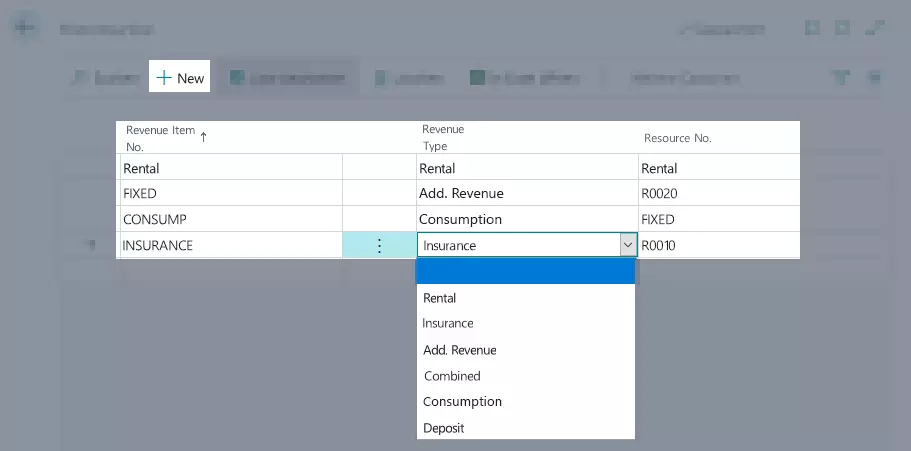
- Optional Click on New or in an empty line to create a new rent revenue item.
- Optional Use the Revenue Item No. column to enter a unique code for the revenue item, e. g. Rental, Insurance, Logistics or Combined.
- Optional From the drop-down list Revenue Type select the corresponding revenue type. You can choose between the revenue types Rental, Insurance, Add. Revenue, Combined, Consumption and Deposit.
Important!
You have to define at least one revenue item number per revenue type.
- From the drop-down list Resource No. select the corresponding resource.
If you select the revenue type Rental, Insurance and Combined you have to select the resource Recurring Revenues.
If you select the revenue type Add. Revenue or Consumption, you have to select the resource for Fixed Prices. - Close the page Rent Revenue Item.
You have now set up one resource for recurring and one resource for nonrecurring revenues. Furthermore, the resources have been linked to the corresponding rent revenue items. You can now proceed with the next step.
Dummy Contact
- Use the quick search (ALT+Q) to find the page Contacts in TRASER DMS 365.
- A list containing all contacts opens.
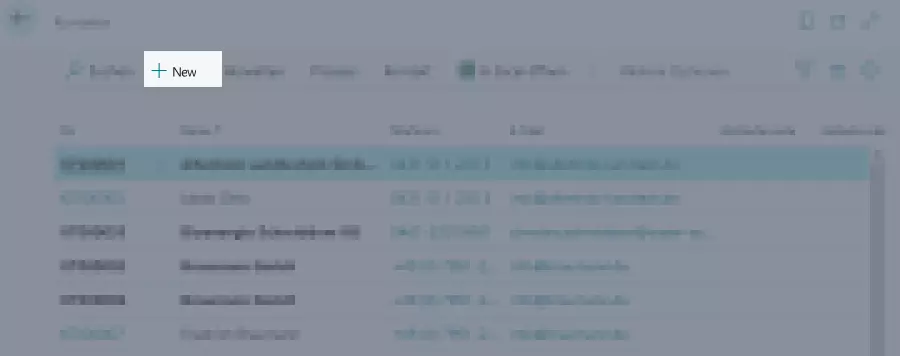
- Click on New to create a new contact.
- An empty contact card opens.
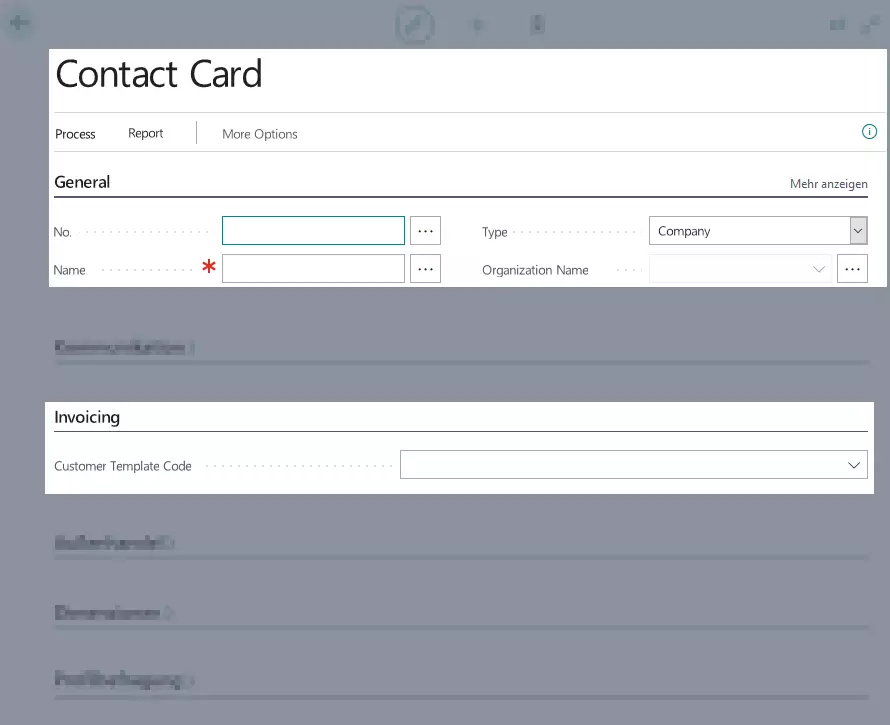
- In the No. field under the General register, enter a number for the dummy contact, e. g. the number that is automatically created by the system or DUMMY.
- Use the Name field to enter a description for the dummy contact, e. g. Dummy or Rent Price Check.
- From the drop-down list Type select the value Person.
- Scroll to the Invoicing register.
- Open the drop-down list Customer Template Code and click on Select from full list.
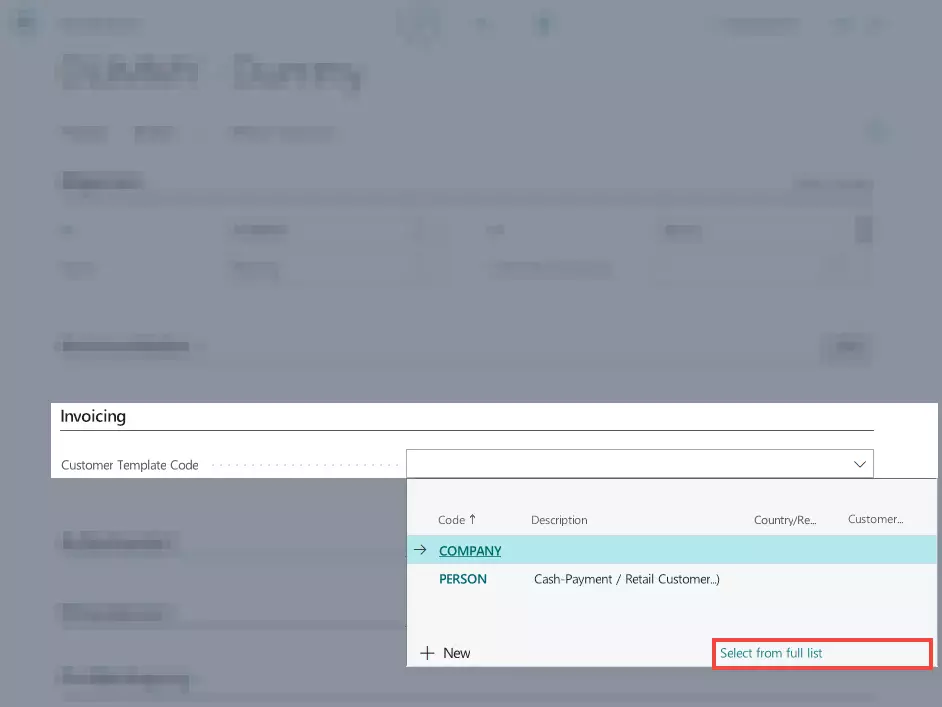
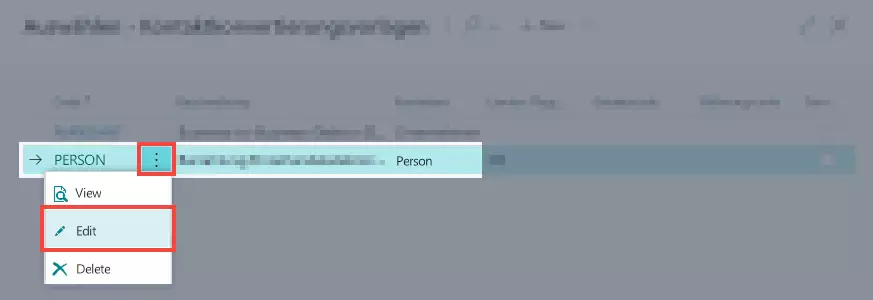
- The page Edit - Contact Conversion Templates opens.
- In the line with the entry PERSON, click on the three vertical dots and then on Edit.
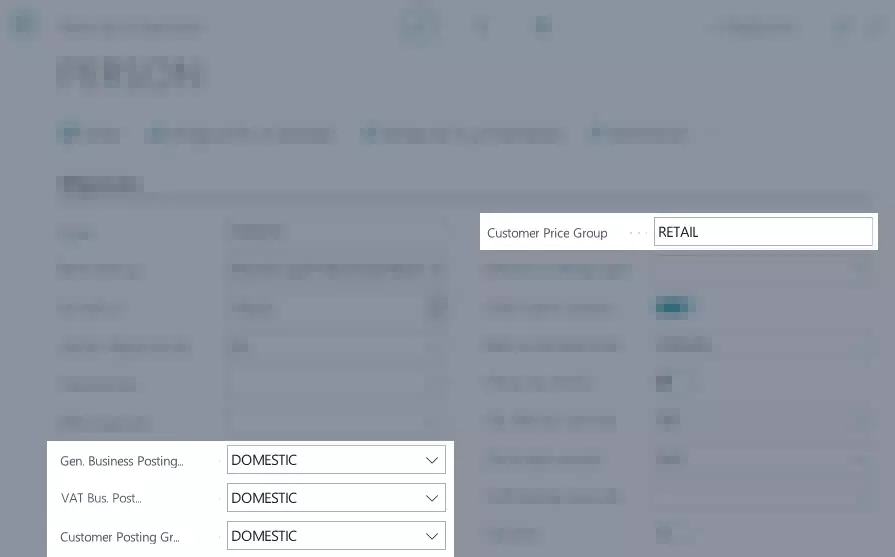
- The Customer Template Card for the contact template = PERSON opens.
- From the drop-down list Gen. Business Posting Group select the value DOMESIC.
- From the drop-down list VAT Business Posting Group select the value DOMESIC.
- From the drop-down list Customer Price Group select the value DOMESIC.
- Optional From the drop-down list Customer Price Group* select the value TRADE.
- Close the Customer Template Card.
- Check on the Edit - Contact Conversion Templates page whether the line PERSON has been selected.
- If the line has been selected, click OK.
- If not, mark the line PERSON and click on OK.
- Close the Contact Card of the dummy contact.
- Close the page Contacts.
Number Series
- Use the quick search (ALT+Q) to find the page No. Series in TRASER DMS 365.
- A list containing all number series opens.
- Optional If you are unable to edit the list, click on Edit List in the header.
- Click on New to create a new number series for rental processes.
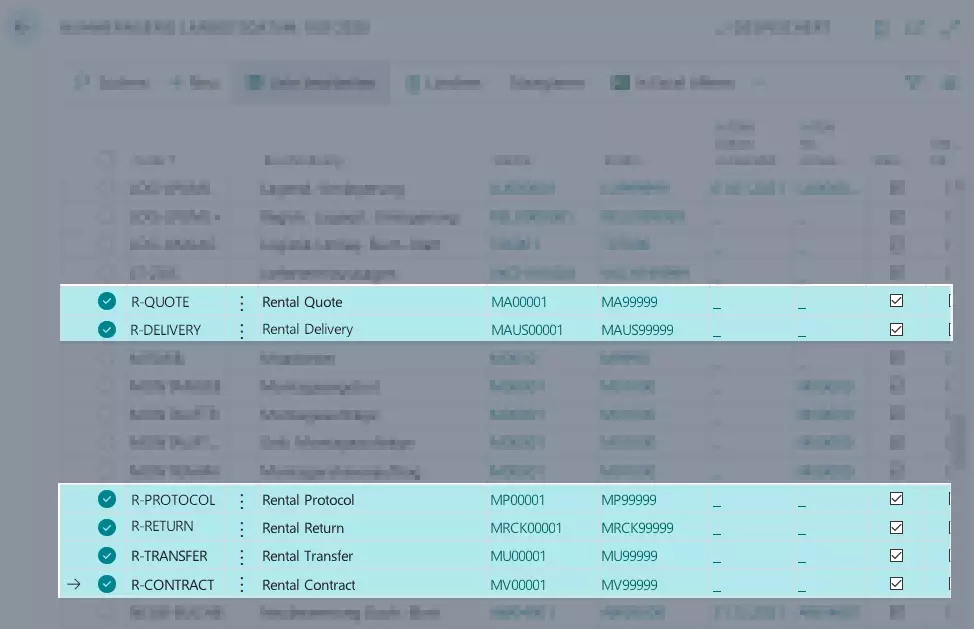
- Set up the following number series according to the given scheme and activate the check box Standard No. for all number series.
| Code | Description | Starting No. | Ending No. |
|---|---|---|---|
| R-QUOTE | Rental Quote | MA-00001 | MA-99999 |
| R-CONTRACT | Rental Contract | MV-00001 | MV-99999 |
| R-Template | Rental Template | MVO-00001 | MVO-99999 |
| R-TRANSFER | Rental Transfer | MU-00001 | MU-99999 |
| R-TRANSFER+ | Rental Transfer Journal | MUP-00001 | MUP-99999 |
| R-PROTOCOL | Rental Protocol | MP-00001 | MP-99999 |
| R-DELIVERY | Rental Delivery | MAUS-00001 | MAUS-99999 |
| R-R-RETURN | Rental Return | MRCK-00001 | MRCK-99999 |
| R-REPLACEMENT | Rental Replacement Object | ME-00001 | ME-99999 |
| R-CONSUMPTION | Rental Consumption Report | MVB-00001 | MVB-99999 |
| R-KBEL | Rent Deposit Document | MKB-000001 | MKB-999999 |
| M-DI | Rent Deposit Invoice | MKR-000001 | MKR-999999 |
| R-KG | Rent Deposit Memo Credit | MKG-000001 | MKG-999999 |
| R-PICK | Rent Picklist | MPL00001 | - |
| C-Template | Checklist Template | CV-00001 | CV-99999 |
| C-CHECKLIST | Checklist | CL-00001 | CL-99999 |
- If everything was set up correctly, your number series table should look like the following table.
- Please check if the check box Starting No. has been activated for all number series. If it hasn’t been activated, please check the boolean.
- Close the page Number Series.
All relevant number series for rental processes will be created. You can now proceed with the next step.
Journals
- Open the page Item Reclassification Journals via the quick search (ALT+Q) in TRASER DMS 365.
- If someone has already created reclassification journals, the page Journal Templates List is displayed showing all the existing journals.
- Select a journal.
- The page Item Reclassification Journal of the respective journal is displayed.
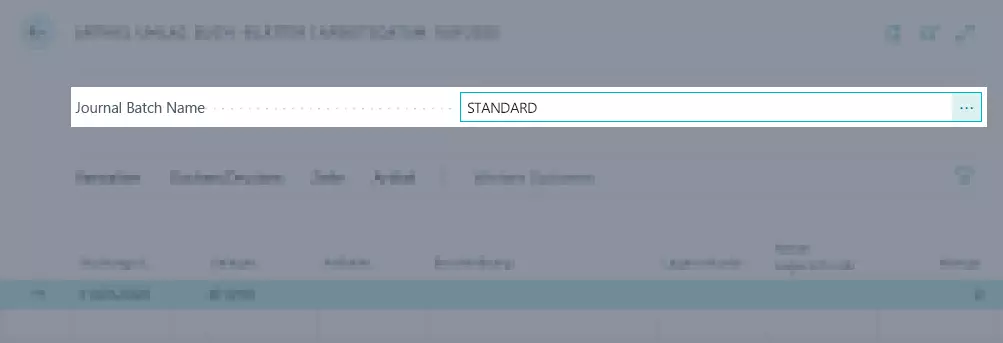
- Click on the three dots next to the Journal Batch Name field.
- The page Item Journal Batch Name is displayed.
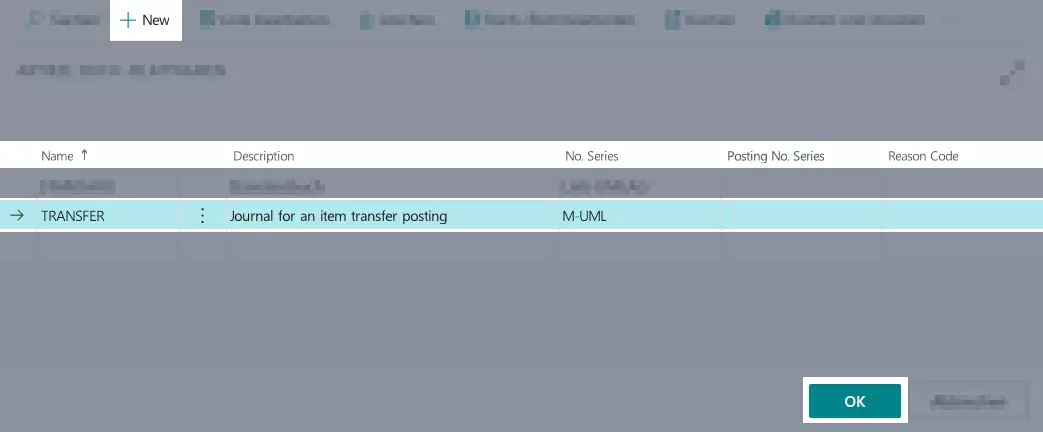
- To create a new transfer journal batch click on New.
- Use the Name field to enter a unique name, e. g. Transfer.
- Optional Use the Description column to enter a description, e. g. Journal for an item transfer posting.
- In the No. Series column, select the number series R-TRANSFER and click on OK.
- Close the page Item Reclassification Journals.
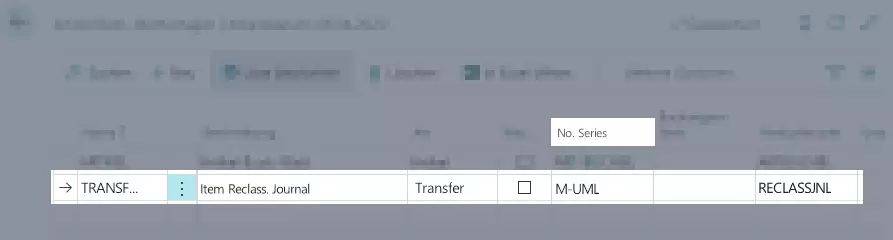
- Use the quick search (ALT+Q) to open the page Item Journal Templates in TRASER DMS 365.
- A list containing all templates for item postings is displayed.
- In the Transfer line, select the value M-UMLAGERUNG for the Number Series column.
- Close the page Item Journal Templates.
- Use the quick search (ALT+Q) to find the page Report Selection – Rental in TRASER DMS 365.
- A list containing all quote/contract reports is displayed.
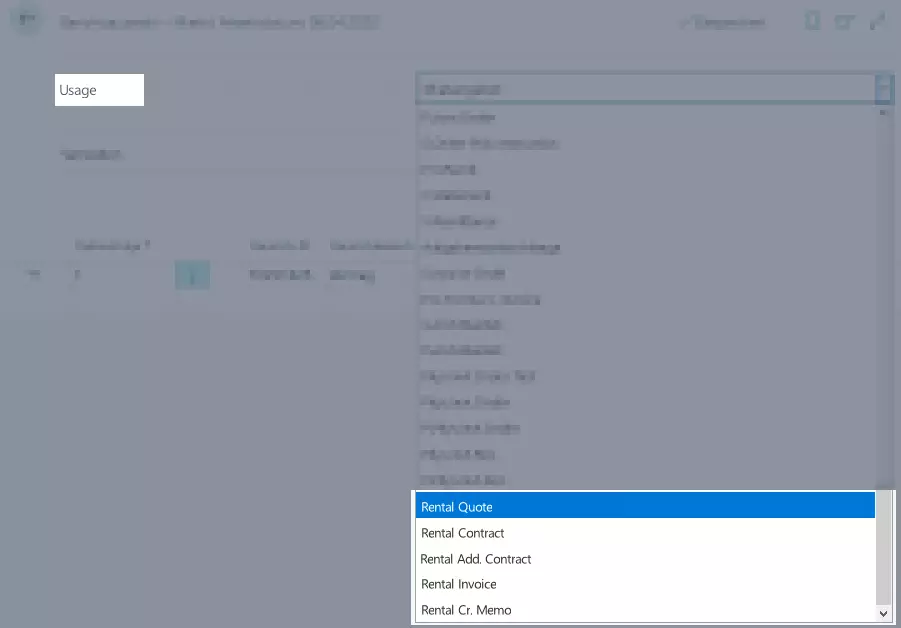
- From the drop-down list Usage select the value Rental Contract.
- In the Manage tab, click into the first line and enter the value 70251625 into the Report ID column. A live system might require a different value.
- From the drop-down list Usage select the value Rental Quote.
- In the Manage tab, click into the first line and enter the value 70251625 into the Report ID column. A live system might require a different value.
- From the drop-down list Usage select the value Rental Add. Contract.
- In the Manage tab, click into the first line and enter the value 70251625 into the Report ID column. A live system might require a different value.
- From the drop-down list Usage select the value Rental Invoice.
- In the Manage tab, click into the first line and enter the value 206 into the Report ID column. A live system might require a different value.
- From the drop-down list Usage select the value Rental Credit Memo.
- In the Manage tab, click into the first line and enter the value 207 into the Report ID column. A live system might require a different value.
- Close the page Report Selection – Rental.
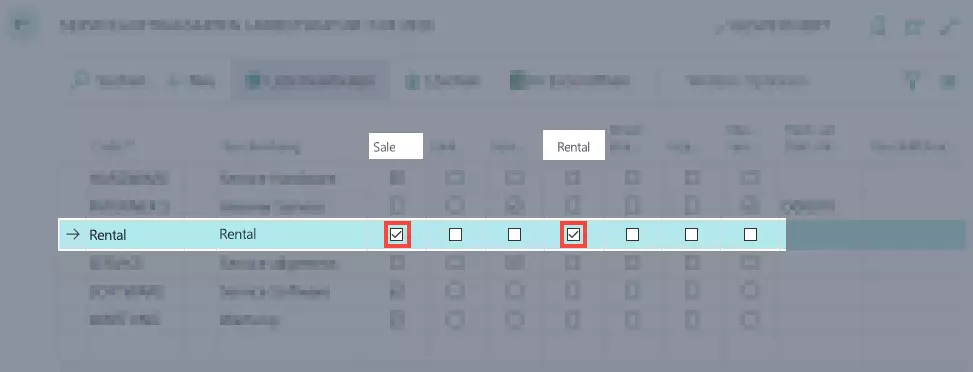
- Use the quick search (ALT+Q) to find the page Service Order Types in TRASER DMS 365.
- A list containing all service order types opens.
- Check whether there is a service order type where the check boxes Sale and Rental are enabled.
- If so, you don’t need to create a new service order type.
- If not, please create a new service order type. For more information on this, go to Setting Up Service Order Types.
- Close the page Service Order Types.
You have set up the means to post item transfers, create reports and create rent orders. You can now proceed with the next step.
Contract Invoice Frequencies
- Use the quick search (ALT+Q) to find the page Contract Invoice Frequencies in TRASER DMS 365.
- A list containing all contract invoice frequencies is displayed.
- Click on New to create a new invoice frequency.
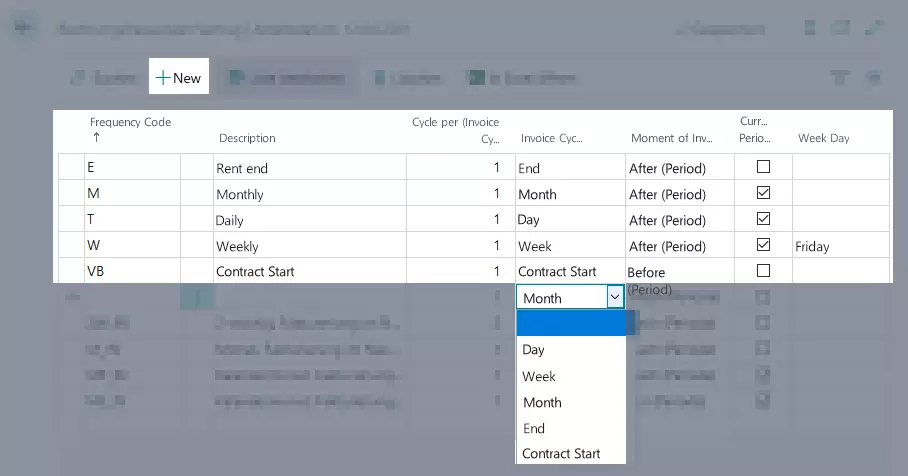
- Use the Frequency Code column to enter a specific code for the invoice frequency, e. g. D for daily, W for weekly, M for monthly, 2xM for twice a month or E for end.
- Optional Use the Description column to enter a description for the frequency code.
- Use the Cycle per (Invoice Cycle) column to enter the invoicing cycle.
The value 1 means that one invoice is created per invoicing cycle. The value 2 means that two invoices are created at the same distance from each other in each invoice cycle etc. - You can select the invoicing cycle via the drop-down list in the Invoice Cycle column.
| Invoice Cycle | Parameters |
|---|---|
| Day | An invoice will be created daily. |
| Week | An invoice will be created every week. Via the Cycle per (Invoice Cycle) you can set up the number of invoices per week. The invoicing period is always 7 Days, e. g. Wednesday till Tuesday. If you activate the check box Current Period the invoice period will always be from Monday till Sunday. Use the Week Day column to enter the day the invoice will be created and sent. |
| Month | An invoice will be created every month. Via the Cycle per (Invoice Cycle) you can set up the number of invoices per month. The invoicing period always runs until the day before the following month, e. g. February 12 until March 11 or August 20 until September 19. If you activate the Current Period checkbox, the cycle will always run from the first until the last day of the month, e. g. February 1 until February 28 or August 1 until August 31. |
| End | An invoice will be created after a rental contract has been closed. |
| Contract Start | An invoice will be created on the contract start date. |
- From the drop-down list in the Moment of Invoice column, select whether the invoice should be created and sent * at the start of the invoice cycle (Before (Period)) or at the end of the invoice cycle (After (Period)).
- Close the Contract Invoice Frequencies page.
You have successfully set up all relevant invoice frequencies for a rental contract. You can now proceed with the last step.
Price Base
You should set up the price base for rent classes during the basic setup. You can find more information on the concept of price bases under Price Base.
The price base Day or Month for recurring costs is set up in the Rent Classes. For more information on this, go to Set Up Rent Class.
The Number of Days in Month for the price base Month is set up in the TRASER Rental Setup via the Invoice setup tab. For more information on this, go to TRASER Rental Setup.
For more information on the base calendar, click Set up Base Calendar.
Note
To be able to select the base calendar in rental contracts, please activate the slider Rental Calendar.
Important!
Please keep in mind that when it comes to invoicing, the Number of Days in Month value on the Base Calendar Card takes precedence over the Number of Days in Month value in the TRASER Rental Setup. The following hierarchy applies:
1. Number of Days in Month for Base Calendar. If this value is set to = 0,00, the value for 2 will apply.
2. Number of Days in Month in TRASER Rental Setup. If this value is set to = 0,00, the value for 3 will apply.
3. If you don’t enter a number of days in month, the total number of days in the month will be automatically used.
The last section explained the difference between the two price bases and what price base to use for your needs. You can now proceed with the last step.
TRASER Rental Setup
This page shows all parameters that have been set up so far. The data you enter here will be applied to all elements. If you have selected different parameters for your quotes or contracts the system might generate error messages. However, these can be ignored.
To conclude the basic setup of TRASER Rental 365, proceed as follows:
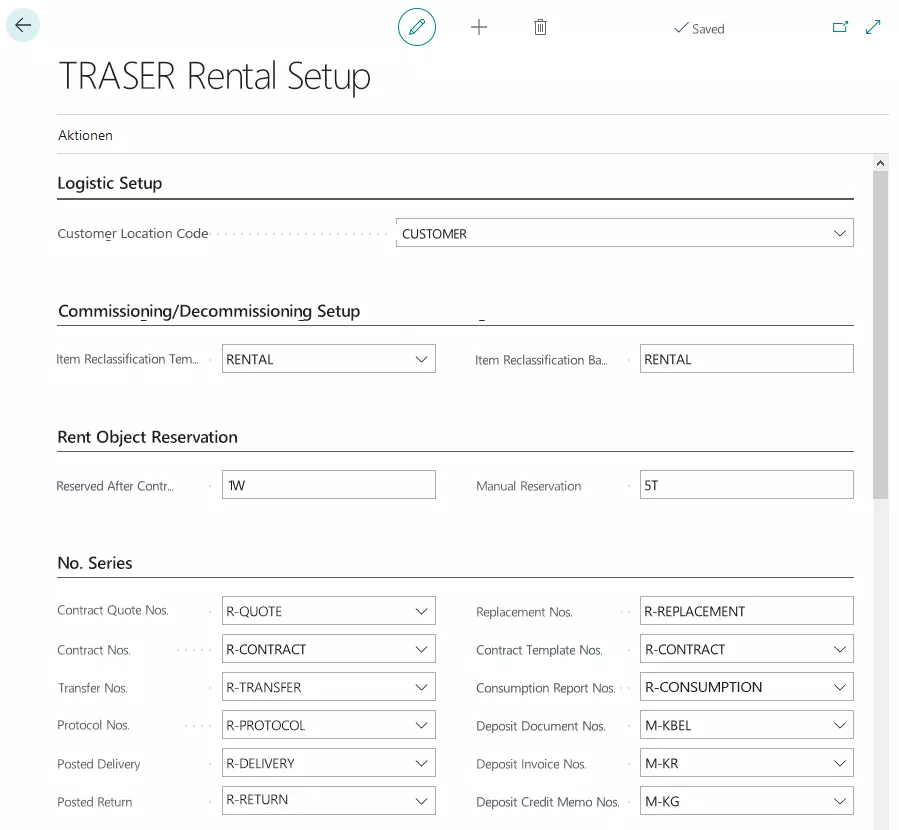
- Use the quick search (ALT+Q) to find the page TRASER Rental Setup in TRASER DMS 365.
- The setup page is displayed.
- Please fill in the fields according to the table below to complete the basic setup.
Note
If you leave a field empty, no default value will be set up. For every process (rental quote, rental contract, transfer, invoicing etc.), the values have to be entered manually.
Mandatory fields must be filled out.
Mandatory fields are marked as bold.
| Area | Option | Action | Link |
|---|---|---|---|
| Logistic Setup | Customer Location Code | Here, select the customer location code for rental processes. | (Rent-)Locations |
| Use Owner Locations | Specifies whether multiple locations for storing the commissioned objects can be used and functionality is activated for moving stock between owner locations. | (Rent-)Locations | |
| Date Validity Period Before | This field specifies the period before the working date that is accepted as a valid date in a rental contract. You can enter days, weeks, months and even years. For example, if you want the period to last one week, enter “1W”. | ||
| Date Validity Period After | This field specifies the period after the working date that is accepted as a valid date in a rental contract. You can enter days, weeks, months and even years. For example, if you want the period to last one week, enter “1W”. | ||
| Commissioning/Decommissioning Setup | Item Reclassification Template | Here, select the item journal for the item transfer. | Journals |
| Item Reclassification Batch | Here, select the item journal for the item transfer. A live system might require a different value. |
||
| Rent Object Reservation | Reserved After Contract End | Here, enter how long the rental object should be marked as reserved after the contract ends. Enter here an integer number as the value directly followed by the unit of measure, e.g. 5D equals 5 days incl. weekends and holidays or 1M equals 1 month. The following units are possible: T = Day WT = Working Day W = Week M = Month Q = Quartal J = Year |
|
| Manual Reservation Period | Here, select the default reservation period for a rent object. Enter here an integer number as the value directly followed by the unit of measure, e.g. 5D equals 5 days incl. weekends and holidays or 1M equals 1 month. The following units are possible: T = Day WT = Working Day W = Week M = Month Q = Quartal J = Year |
||
| Number Series | Rent Class Nos. | Here, select the number series M-KLASSE. | Number Series |
| Rent Class Package Nos. | Here, select the number series M-PAKET. | Number Series | |
| Contract Quote Nos. | Here, select the number series M-ANGEBOT. | Number Series | |
| Contract Nos. | Here, select the number series M-VERTRAG. | Number Series | |
| Transfer Nos. | Here, select the number series M-UMLAGERUNG. | Number Series | |
| Protocol Nos. | Here, select the number series M-PROTOKOLL. | Number Series | |
| Posted Delivery Nos. | Here, select the number series M-AUSLIEFERUNG. | Number Series | |
| Posted Return Nos. | Here, select the number series M-RÜCKNAHME. | Number Series | |
| Replacement Nos. | Here, select the number series M-ERSATZ. | Number Series | |
| Contract Template Nos. | Here, select the number series ANL. | Number Series | |
| Consumption Report No. | Here, select the number series M-VERBRAUCH. | Number Series | |
| Deposit Document Nos. | Here, select the number series R-DEP. | Number Series | |
| Deposit Invoice Nos. | Select the number series M-DEPI here. | Number Series | |
| Deposit Credit Memo Nos. | Select the number series M-DEPC here. | Number Series | |
| Internal Movement Nos. | Here, select the number series ANL. | Number Series | |
| Owner Movement Nos. | Here, select the number series ANL. | Number Series | |
| Pick Nos. | Here, select the number series ANL. | Number Series | |
| Contract Settings | Quote Validity Calculation | Here, enter the default validity period for a quote. Enter here an integer number as the value directly followed by the unit of measure, e. g. 5D equals 5 days incl. weekends and holidays or 1M equals 1 month. The following units are possible: T = Day WT = Working Day W = Week M = Month Q = Quartal J = Year |
|
| Expiring Contract Warning Period | Specifies the period before the 'Estimated Contract End Date' for the contract to appear in the expiring contracts tile in the role center. You can enter days, weeks, months and even years. For example, if you want the period to last one week, enter “1W”. | ||
| Contract Print Check Active | Specifies if a rental contract can be printed more than once. If you activate this function, the system will check whether a contract has already been printed. If a contract has already been printed, you will only be able to print the saved report. If a user has the permission to do so, they can print another version. | ||
| Multiple Service Items/Resources on one contract line allowed | Activate this slider if you want to be able to process multiple service items in one contract line. This function is important if you want to be able to link/unlink lines in a contract. By default, this slider is deactivated. You can find information on the status of the boolean in the Table 'Boolean'. |
||
| Selecting of Object No. in contract allowed | Activate this slider if you want to be able to select a specific rent object in the contract lines. By default, this slider is deactivated. You can find information on the status of the boolean in the Table 'Boolean'. |
Assign specific Object Numbers to Lines | |
| Use Attributes in Contracts | Specifies whether attributes can be setup in rent classes and be used in rental quotes and contracts. | Add Attributes | |
| Base Calendar | Here, select the calendar that should be used for global contract-based customized calendars. If you select a base calendar, you can, for example, set up holidays that are valid for the entire contract. The selected calendar should not contain any customizations. | For more information on this, go to Set Up Base Calendar. | |
| Calendar Synchronization On Contract Release | Specifies if the calendar synchronization should be performed every time a contract is released. | ||
| Automatic Holidays in Contracts | Specifies if holidays should be automatically entered as free days in the contract. | ||
| Default Address for Holidays | Specifies which address is used for the transfer of the holidays into the contract. This can be edited in the contract. | ||
| Holiday Period | Specifies how long after the estimated contract end date the holidays are taken into account. The value should be based on the average contract length. If this period is too short it is possible update the holidays manually in case the contract runs longer than expected. | ||
| Default Skip Holidays for Month Price | Sets the field "Skip Holidays" in the contract line if a month price is selected. | ||
| Dummy Contact No. | Here, select the contact that you set up for the rent price check. | Dummy Contact | |
| Logistics | Alternative rent classes allowed | If you activate this field, alternative rent classes will be available for delivery. | Alternative Rent Class in Rent Contracts |
| Create Protocol Pro Contract Only | If you activate this field, you will only be able to create delivery or return protocols for single contracts. If you deactivate this field, you can add more than one contract to a protocol. | ||
| Protocol Order Status Mandatory | If you activate this field, the order status field in protocols will be mandatory. | ||
| Rent End Report Fields Mandatory | If you activate this field, the fields Rent End Reported On Date and Rent End Reported On Time have to be filled in the lines of a return protocol before the protocol can be further processed. | Set Rent End Date in a Protocol | |
| Invoice Setup | Advanced Pricing Active | If you activate this field, rent classes will be managed via price codes instead of rent prices. | Set up Price Codes |
| Standard Contract Duration | Enter if day prices based on contract duration should consider all days or only calendar days for determining the price in the contract period. This can however always be overwritten by the invoice calendar selected in the rental document. | ||
| Default Contract Invoice Frequency | Here, select the default contract invoice frequency. | Contract Invoice Frequencies | |
| Base Calendar | Here, select the calendar that should be used for contract-based and user-based calendars. If you select a base calendar, you can, for example, set up holidays that are valid for the entire contract. | Setting up Base Calendar | |
| Number of Days in Month | Here, select the default number or rent days in a month. If you select the value 0,00, the price will be calculated according to the number of days in a month. If you select a value like 1,00 the rent price will be calculated according to this number. This field is only relevant if you have selected the value Month for the price base. |
Price Base | |
| Invoice Unit of Measure Day | Here, select the unit of measure for recurring costs in rental contracts. Usually, the invoice unit of measure for recurring costs is Day. | ||
| Invoice Unit of Measure Month | Here, select the unit of measure for recurring costs in rental contracts. Usually, the invoice unit of measure for recurring costs is Month. | ||
| Invoice Unit of Measure for fixed revenues | Here, select the unit of measure for fixed revenues in rental contracts. Usually,, the invoice unit of measure for fixed revenues is Day. | ||
| Invoice Plan Duration | Provided that the object hasn’t been returned, use this field to specify how many days a rental item will be charged for after the end of the rental period. This is to prevent that the customer only receives the invoice after returning the object. Enter here an integer number as the value directly followed by the unit of measure, e. g. 5D equals 5 days incl. weekends and holidays or 1M equals 1 month. The following units are possible: T = Day WT = Working Day W = Week M = Month Q = Quartal J = Year |
||
| Posting Option | Here, select whether the rental invoice should be posted directly after it has been created. If you select indirect posting, you have to manually post the invoice at a later time. If you select Direct Posting + Send the rental invoice will be posted and sent after it has been created. | ||
| Do not combine invoice and credit lines | Activate this slider if you want two different documents for invoice and credit memo lines. By default, this slider is deactivated. You can find information on the status of the boolean in the Table 'Boolean'. |
||
| Create Invoice Per Period | Activate this slider if you want the system to create a posted document for every line with the same Invoice Until Date. If this slider is deactivated, a single document will be created for all invoice lines. By default, this slider is deactivated. You can find information on the status of the boolean in the Table 'Boolean'. |
||
| Revenue FactBox Setup | Specifies whether the revenue factbox shows the rental revenue and rental purchase cost separate or as a combined value | ||
| Final Invoice | Specifies if final invoices can be created via the batch invoicing or if they should be excluded. | ||
| Add Final Invoice Summary | Specifies if the final invoice includes a contract summary. | Final Invoice Summary Setup | |
| Sales & Service Setup | Add summary lines to a Sales Order | Activate this boolean if you want to add the information Rent Start Date and Ship-To Address as text lines in sale orders created for a contract. You can find information on the status of the boolean in the Table 'Boolean'. |
|
| Copy Delivery Address to Service Order | Activate this boolean if you want to copy the delivery address of the rental contract into the service order. You can find information on the status of the boolean in the Table 'Boolean'. |
||
| Rent Deposit Setup | Deposit Functionality Active | Activate this slider if you want to activate the rent deposit function. By default, this slider is activated. You can find information on the status of the boolean in the Table 'Boolean'. |
|
| Check Deposit Before Delivery | Activate this slider if the deposit has to be paid before delivery. By default, this slider is activated. You can find information on the status of the boolean in the Table 'Boolean'. |
||
| Deposit Gen. Prod. Posting Gr. Code | Specifies the Gen. Prod. Posting Group Code for posting of the deposit amount. | ||
| Deposit VAT Prod. Posting Gr. Code | Specifies the VAT Prod. Posting Group Code for posting of the deposit amount. | ||
| Interruption Setup | Interruption Discount Rounding Direction | This field specifies whether the value of the interruption discount is rounded up (up) or rounded down (down). If you select the option nearest, the system will either round up or down depending on whether the value is lower or higher than 5. | |
| Interruption Discount Rounding Precision | This field specifies the rounding precision for the interruption discount. | ||
| Insurance in Rent Break Allowed | Activate this boolean if insurance lines should be part of a rent break. By default, this slider is deactivated. You can find information on the status of the boolean in the Table 'Boolean'. |
||
| Default Rent Break Discount | Select here if discount set in the Default Rent Break Discount in % field should be granted partially or completely. | ||
| Default Rent Break Discount in % | Enter here the desired percentage default rent break discount. This discount will be automatically stored in a Rent Break Request. | ||
| Rent Break Posting Needed | Activate this slider if the rent break should only be started after posting the return of the relevant rental object. This only applies to service items. By default, this slider is deactivated. You can find information on the status of the boolean in the Table 'Boolean'. |
||
| Repair Discount | Here, select whether a repair discount should be granted to the customer. If you leave this field empty, no discount will be applied. If you select partial, a partial discount will be applied. You can view the discount in the Discount Repair % field. If you select Full the full rent price will be refunded for the time of repair/replacement. |
||
| Repair Discount Applies To | Here, select what lines the repair discount should be applied to. You can either apply the repair discount to all recurring amounts or only to to amounts regarding rental. | ||
| Discount Repair % | If you selected partial in the Repair Discount field, specify the discount percent here. The values |
||
| Swap Discount | Here, select whether a swap discount should be granted to the customer. If you leave this field empty, no discount will be applied. If you select partial, a partial discount will be applied. You can view the discount in the Discount Swap % field. If you select Full the full rent price will be refunded for the time of repair/replacement. |
||
| Swap Discount Applies To | Here, select the lines the swap discount should be applied to. You can either apply the swap discount to all recurring amounts or only to to amounts regarding rental. | ||
| Discount Swap % | If you selected partial in the Swap Discount field, specify the discount percent here. The values |
||
| Report Setup | Print GTC with Contract | Activate this slider if you want the GTC to be visible on rental contract print-outs. By default, this slider is activated. You can find information on the status of the boolean in the Table 'Boolean'. |
|
| Print GTC with Add. Contract | Activate this slider if you want the GTC to be visible on add. contract print-outs. By default, this slider is activated. You can find information on the status of the boolean in the Table 'Boolean'. |
||
| Print GTC with Quote | Activate this slider if you want the GTC to be visible on rental quote print-outs. By default, this slider is activated. You can find information on the status of the boolean in the Table 'Boolean'. |
||
| Use Of Email Editor Allowed | Activate this boolean if it should be allowed to use the email editor with which emails can be edited before sending rental documents per email. | Sending rental documents via email | |
| Interfaces Setup | Rent Board Active | Activate this slider if you want to activate the RentBoard application. By default, this slider is deactivated. You can find information on the status of the boolean in the Table 'Boolean'. |
|
| Rent Board - Add Object to Contract | Specifies whether the selected object no. will be added to the contract or will only be reserved. | ||
| Consumption | Advanced Consumption Active | Activate this slider to activate the advanced consumption functionality. The advanced consumption functionality allows you to set minimum and maximum consumption values in rental contracts and unlocks the consumption pool functionality. By default, this slider is deactivated. You can find information on the status of the boolean in the Table 'Boolean'. |
|
| Do not Invoice Zero Consumption Line | If this boolean is activated, a consumption invoice line with 0 value is not added to the invoice. But this line will be shown as closed manually during the creation of invoices. | ||
| DMS Service Item History Intergration Active | Activate this slider if you want to be able to view the registered values from the consumption entries in the DMS service item history. Consumption types that have a consumption interface type are then synchronized with the service item history. By default, this slider is activated. You can find information on the status of the boolean in the Table 'Boolean'. |
||
| Rental Purchase | Rental Purchase Active | Specifies whether the rental purchase function is active. The rental purchase functionality provides i.e. the possibility to rent objects from vendors and have the vendor ship the objects directly to the customer. | Rental Purchase Contracts |
| Minimum Contribution Margin (%) | Here, enter the minimum contribution margin between the rental contract and the linked rental purchase contracts. If the contribution margin has been reached, it will be shown in green. If the contribution margin cannot be reached, the margin will be highlighted in red. This way, the user will be able to check if the calculation is correct or needs updating. | ||
| Contribution Margin Rounding Direction | This field specifies whether the value of the contribution margin is rounded up (up) or rounded down (down). If you select the option nearest, the system will either round up or down depending on whether the value is lower or higher than 5. | ||
| Contribution Margin Rounding Precision | This field specifies the rounding precision for the contribution margin. | ||
| Last Records Viewed | Number of Last Records to be Saved | Specifies the number of records to be displayed in the Last Records Viewed list in the Insights cue. |
Mandatory fields are marked as bold.
- Close the TRASER Rental Setup page.
Rental Permissions in TRASER Rental 365
To control the permissions regarding rental features, you can grant different permissions to users. Please proceed as follows:
- Use the quick search (ALT+Q) to find the page User Setup in TRASER DMS 365.
- A list containing all users opens.
- Select the user you would like to change the permissions for by clicking on the line.
- Click Card in the menu bar.
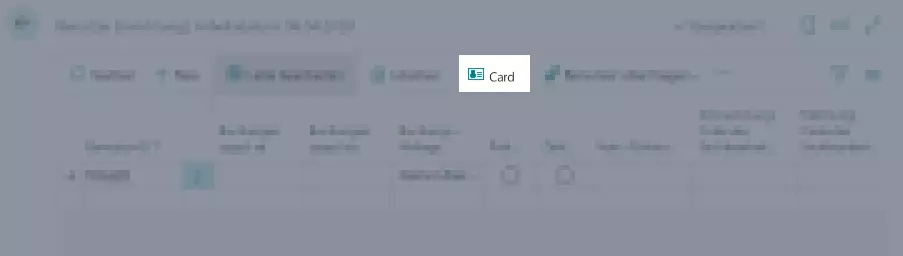
- The user permission card for the selected user will be displayed.
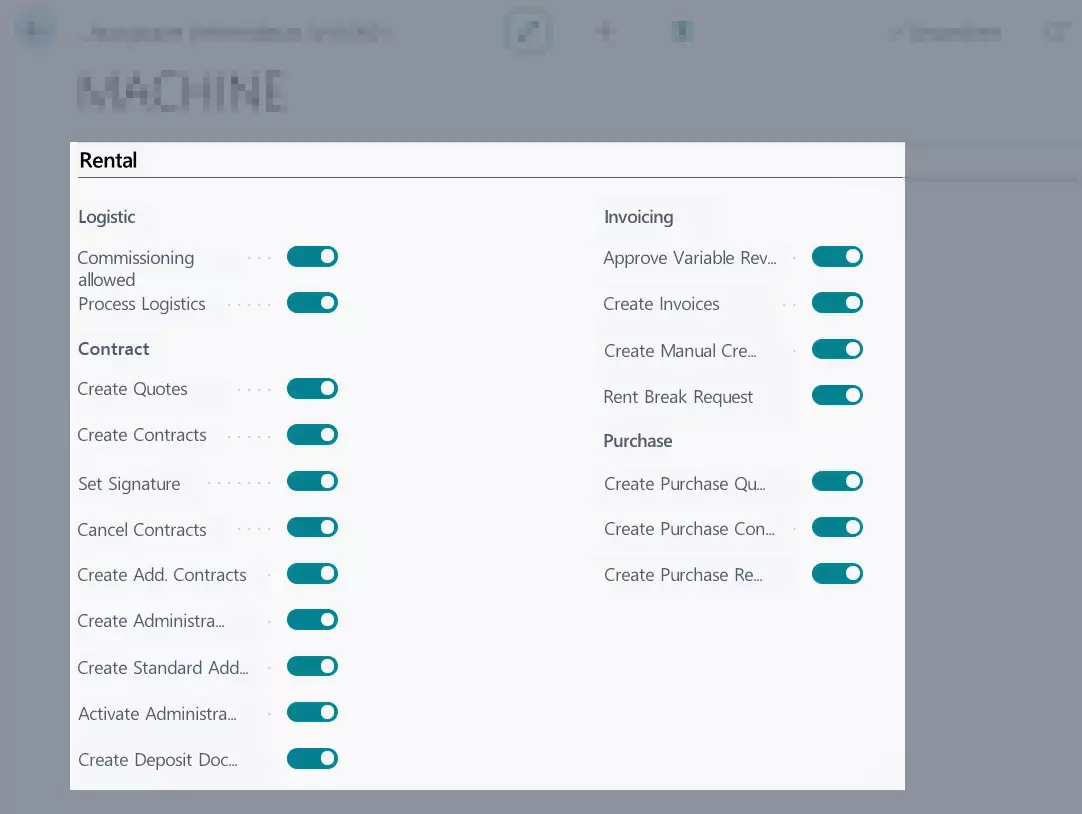
- Scroll to the Rental tab and open it, if needed.
- Here, you can define the permissions for the selected user.
- If the slider is activated, the user will be able to carry out the action. You can find information on the status of the boolean in the Table 'Boolean'.
- If the slider is deactivated, the user won’t be able to carry out this action. You can find information on the status of the boolean in the Table 'Boolean'.
| Option | Permission | |
|---|---|---|
| Logistics | Commissioning allowed | Activate this slider if the user should be granted the permission to commission/decomission (service) items. |
| Post Owner Movement | Activate this slider if the user should be granted the permission to commission/decomission (service) items. | |
| Process Logistics | Activate this slider if the user should be granted the permission to carry out logistic processes such as transfer orders. | |
| Contract | Create Quotes | Activate this slider if the user should be granted the permission to create and edit quotes. |
| Create Contracts | Activate this slider if the user should be granted the permission to create and edit contracts. | |
| Set Signature | Activate this slider if the user should be granted the permission to create and print contracts. | |
| Cancel Contracts | Activate this slider if the user should be granted the permission to cancel contracts. | |
| Create Contract Reprint | Activate this slider if the user should be granted the permission to print a contract that has already been printed. | |
| Create Add. Contracts | Activate this slider if the user should be granted the permission to create and edit add. contracts. | |
| Create Administrative Add. Contracts | Activate this slider if the user should be granted the permission to create and edit administrative additional contracts. | |
| Activate Standard Add. Contract | Activate this slider if the user should be granted the permission to activate add. contracts. | |
| Activate Administrative Add. Contract | Activate this slider if the user should be granted the permission to activate administrative add. contracts. | |
| Create Deposit Documents | Activate this slider if the user should be granted the permission to create and edit deposit documents. | |
| Invoicing | Approve Variable Revenue Line | Activate this slider if the user should be granted the permission to approve a variable revenue line for a contract. |
| Create Invoices | Activate this slider if the user should be granted the permission to create and edit invoices. | |
| Create Manual Credit Memos | Activate this slider if the user should be granted the permission to create credit memos. | |
| Approve Rent Break Request | Activate this slider if the user should be granted the permission to approve rent break requests. | |
| Rental Purchase | Create Purch. Request | Activate this slider if the user should be granted the permission to create and edit rental purchase requests. |
| Create Purch. Contracts | Activate this slider if the user should be granted the permission to create and edit renal purchase contracts. | |
| Approve Rental Purch. Contract | Activate this slider if the user should be granted the permission to approve rental purchase contracts. |
- Close the User Setup page.
The basic setup of TRASER Rental 365 in TRASER DMS 365 has been completed.
'Boolean' Table
| Symbol | Status | Description |
|---|---|---|
 |
Disabled | The option is not activated and the related function not available. |
 |
Active | The option is activated and the related function available. |
In the next chapter you will learn everything you need to know about managing rent class types.
Continue with the next chapter