Rent Objects
All objects that are a value component to a rental contract are referred to as rental objects in TRASER Rental 365. Basically this includes all items or service items which are reffered to as rental objects once they have been activated for rent. The term Rental Object is used synonymously to Rent Object in other modules.
Here you can find the relevant sections on managing rental objects:
- Identifying and editing the rent status of a rent object
- Creating and assigning rent object categories for rent objects
- Commissioning a rent object
- Decommissioning a rent object
- Transferring rent objects between rental locations
- Marking a rent object as rent component
- Assigning rent classes for specific objects
- Setting a replacement price for rent objects
- Linking Rental Objects
Identifying and editing the rent status of a rent object
Note
This section is currently under construction.
The rent status specifies if a rent object is in a rentable state or needs repair etc.
Creating a rent status for rent objects
You can create different rent statuses for being able to see if a rent object is rentable, rentable to a limited extend, or not rentable. Furthermore, you can specify if this rent status can be selected in for example checklists or service orders. To create a new rent status, please proceed as follows:
- Use the quick search in Dynamics NAV (ALT+Q) to find the page Rent Status.
- A list of all created Rent Statuses is displayed..
- Fill in the columns according to the following table to create a new rent status or to edit an existing rent status.
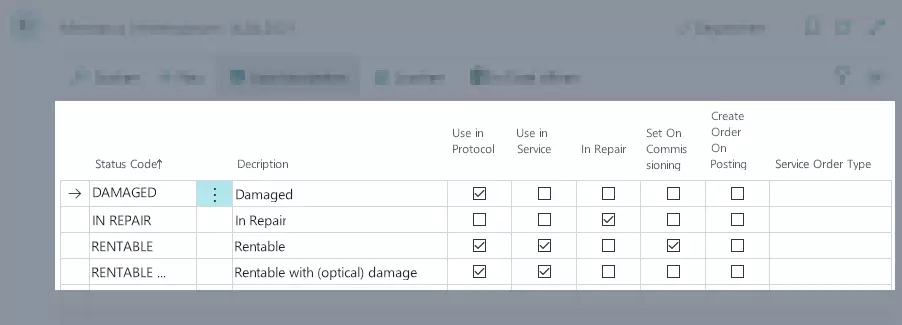
| Column | Description |
|---|---|
| Status Code | Here you can enter a specific code for the rent status. |
| Description | In this column you can enter a significant description of the rent status, e.g. if the rent object has visible damages. |
| Use in Protocol | Activate the checkbox if the rent status should be selectable in a return protocol. |
| Use in Service | Activate the checkbox if the rent status should be selectable in a service order. |
| In Repair | Activate the checkbox for the rent status which should automatically be assigned to a service item once a service order is created. Only one rent status can be activated in this column. |
| Set On Commissioning | Activate the checkbox for the rent status which should automatically be assigned to a service item once it is activated. Only one rent status can be activated in this column. |
| Create Order On Posting | Activate the checkbox if a rent order should be created once the rent status is set during posting of a protocol. |
| Service Order Type | In this column, enter the service order type that should be linked to the rent status. This service order type is inserted automatically when a service order including a rent object with this rent status is created. |
Identifying and editing the rent status of a rent object
The rent status of a rent object can for example be viewed in the service item list. This is useful to be able to see at once which service items are rentable and which have to be repaired first.
If you want to edit the rent status of a service item you can either do so in the item card of the service item or in a service order or in a return protocol. Both options are described below.
To change the rent status via the service item card, please do the following:
- Use the quick search in Dynamics NAV (ALT+Q) to find the page Service Items.
- A list of all created service items is displayed.
- Select an already existing service item or create a new one.
- Choose Rental > New Rent Status from the menu bar.
- The window Rent Status opens with a list of the rent statuses that can be selected.
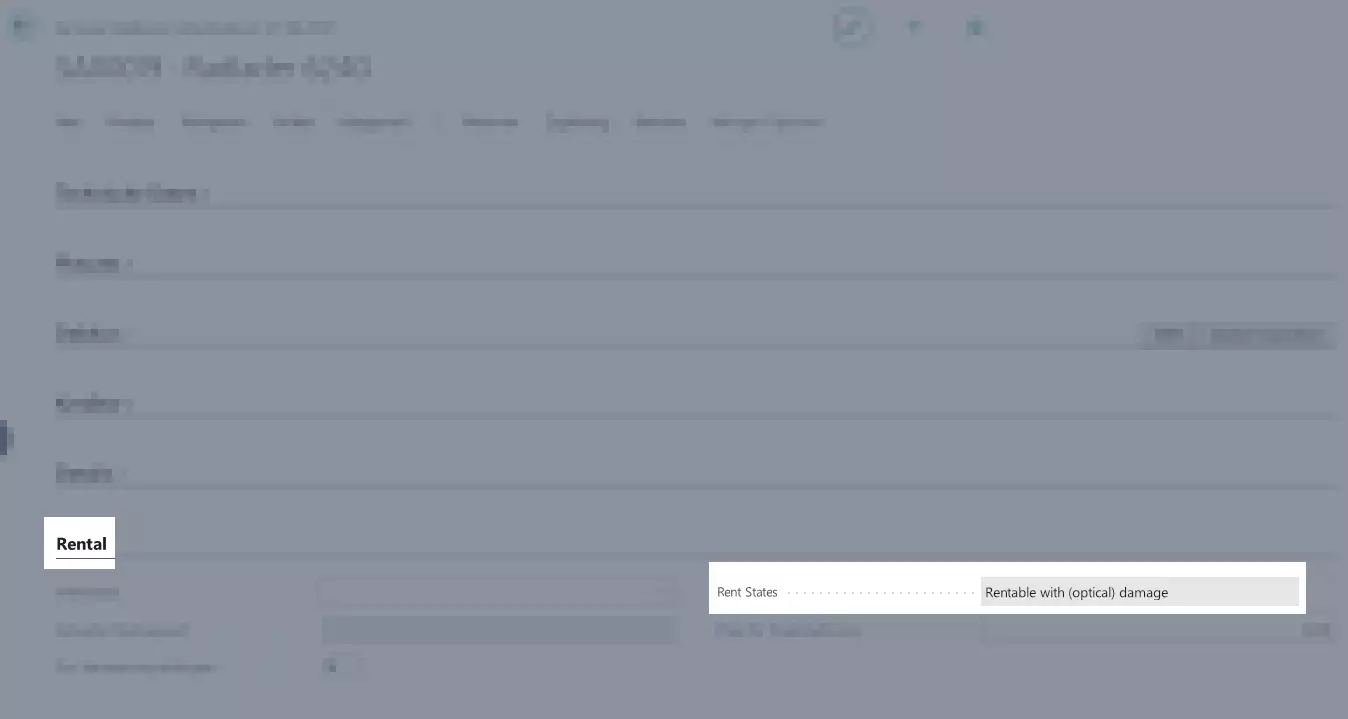
- Select the respective rent status by clicking on the name in the Status Code column.
- The rent status is automatically inserted on the service item card under the Rent register in the Rent Status field. The rent status is also shown in the Service Item List in the Rent Status column.
To change the rent status via a service order, please do the following:
- Use the quick search in Dynamics NAV (ALT+Q) to find the page Service Orders.
- A list of all created service orders is displayed.
- Select an already existing service order or create a new one.
- From the Lines register, select a new rent status from the list in the New Rent Status Object column.
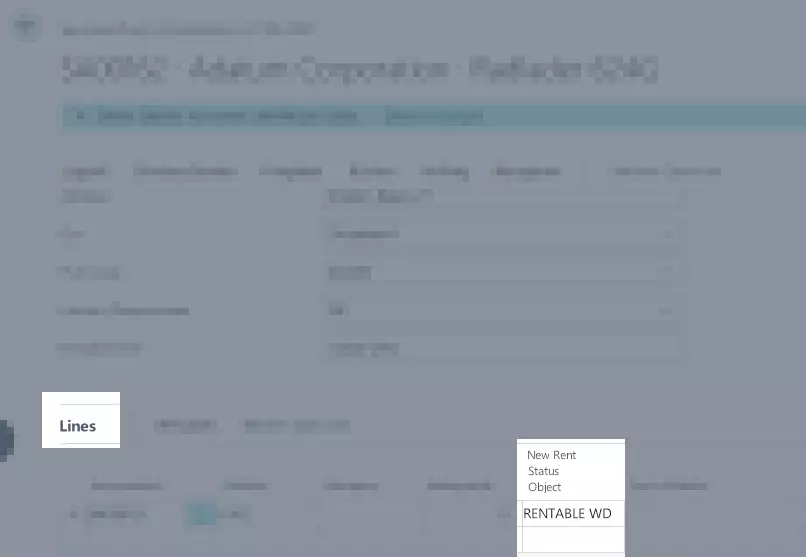
- The rent status is now also shown on the item card of the respective service item under the Rent register. The rent status is also shown in the Service Item List in the Rent Status column.
To change the rent status via a return protocol, please do the following:
- Use the quick search in Dynamics NAV (ALT+Q) to find the page Return Plan.
- A list of all created return contracts is displayed.
- Select the desired return contract.
- To create a new protocol, select Next Status > Process Next Status from the menu bar or select Protocol > Open Protocol to open an already existing protocol.
- This opens the Protocol Card.
- From the Return Lines register, select a rent status from the list in the New Rent Status Object column.
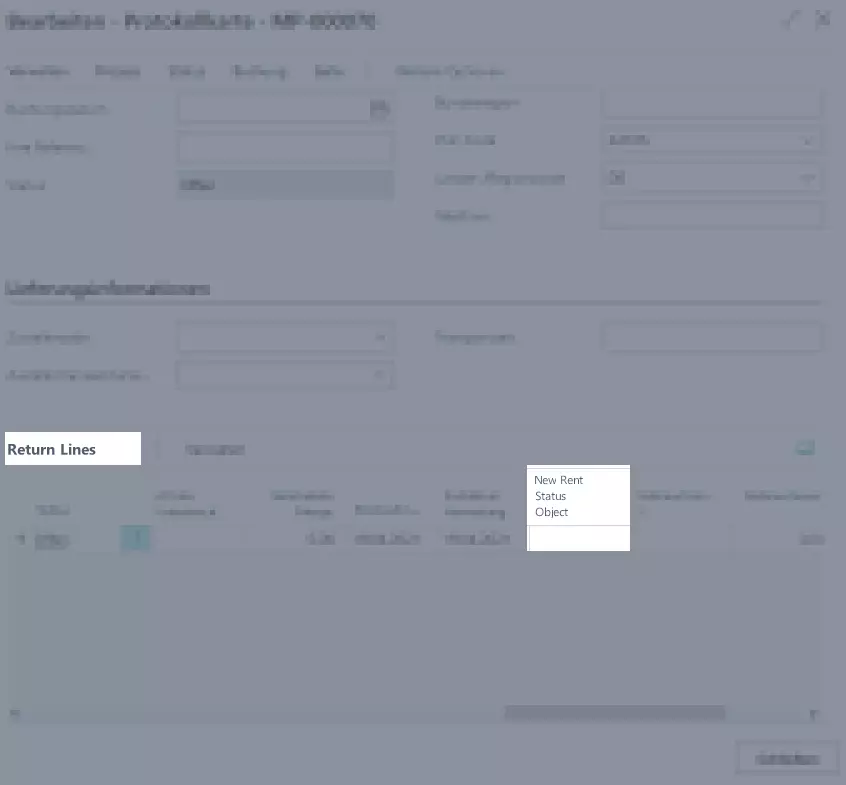
Note
If the object in the return plan is a service item, the New Rent Status Object must be filled.
Note
If you cannot select the desired rent status in the return protocol, check if the checkbox for this rent status has been activated on the Rent Status page (for more information also see Creating a rent status for rent objects).
Checking the utilization of a rent object
By using the utilization overview you can see how high the utilization of your individual rent objects is. To check the utilization of a rent object, please proceed as follows:
- Use the quick search (ALT+Q) to find the page Items or Service Items in TRASER DMS 365.
- A list containing all items or service items is displayed.
- Open the item or service item for which you want to view the utilization.
- Navigate to the Utilization register and open it in case it is closed.
- The Utilization Chart is displayed.
- The middle area (in this case: 17.12.20..17.01.21) specifies the time period that is shown in the chart.
- The last part (in this case: Week) specifies the type of time period that is shown in the chart.
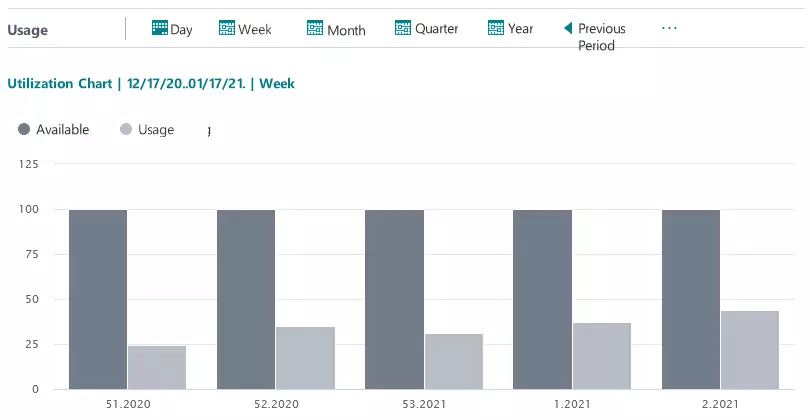
- You can filter the utilization by Day, Week, Month, Quarter or Year.
- Via the Previous Period button, you can view the utilization for the previous period.
- Via the Next Period button, you can view the utilization for the next period.
- The x-axis shows the exact date of the selected period.
- The y-axis shows the availability and the utilization of the item or service item in percent.
- Move your mouse pointer over one of the bars in the chart to view the percentage.
- Close the item card or service item card.
- Close the page Items or Service Items.
Creating and assigning rent object categories for rent objects
You can set up different rent object categories which can be assigned to the rent objects later. This makes it easier for example to filter rent objects while adding rent objects.
Creating rent object categories for rent objects
To define rent object categories, please proceed as follows:
- Use the quick search (ALT+Q) to find the page Rent Object Category in TRASER DMS 365.
- The page for setting up rent object categories is opened.
- Click on New to define a new category.
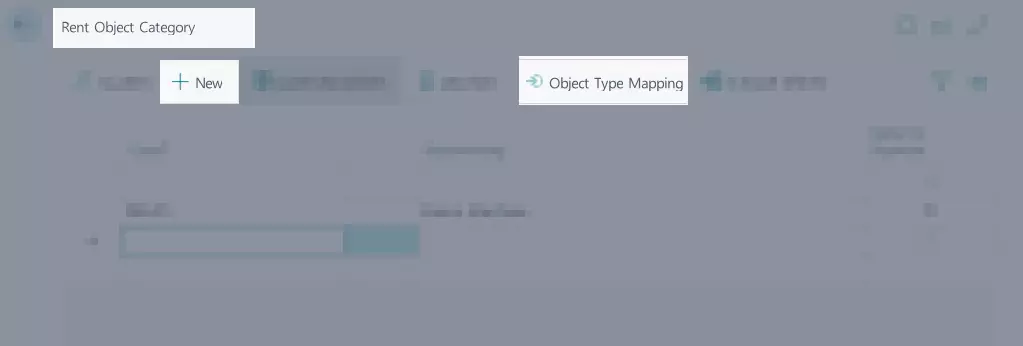
- Enter a significant code for the category in the empty field of the Code column.
- Optional Enter a significant description for the category in the empty field of the Description column.
- Optional Select Object Type Mapping from the menu bar for setting which object types can be assigned to the category.
- Your entries will be saved automatically.
- Close the page Rent Object Category.
Assigning categories to rent objects
After having created rent object categories, you can now assign these categories to the rent objects. The category of a rent object can be viewed and changed in the item card. Please proceed as follows:
- Use the quick search (ALT+Q) to find the page Items or Service Items in TRASER DMS 365.
- Select New to create a new item or open an existing item for which you want to assign a rent object category.
- Navigate to the Rental register.
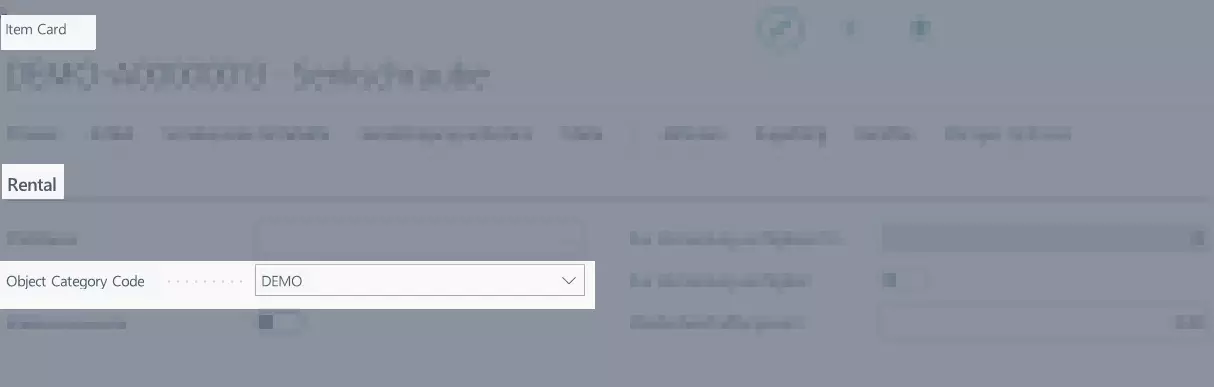
- Under Object Category Code, select the category you want to assign to the rent object.
- Your changes are saved automatically.
- Close the Item Card page.
Commissioning a rent object
In this section you learn how to activate a (service) item.
After Commissioning, a rent object is exclusively available for rent and is maintained independently of the sales stock.
This section describes how to commission a rent object using the screenshots of an item. Commissioning a service item works the same.
To commission a rent object, please proceed as follows:
- Use the quick search (ALT+Q) to find the page Items or Service Items in TRASER DMS 365.
- A list containing all items or service items is displayed.
- Open the card of the item or service item that you want to commission.
Warning
The item or service item has to be in stock, purchased or ordered to be commissioned as an rent object.
- Select Rental > Commissioning.

- The commission/decommission wizard will open.
- The table shows what quantity of the selected rent objects is available at which location.
- To view a list of available rental locations, click on the button under To Rental Location.
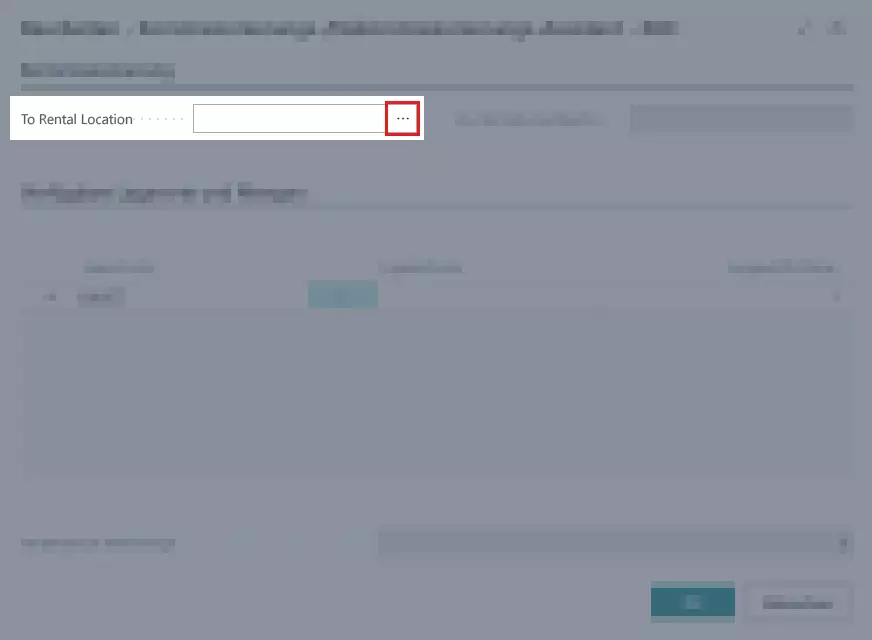
- A window opens where you will be able to pick the rental location.
- Select the desired target rental location from the table and click OK in case the window is not closed automatically.
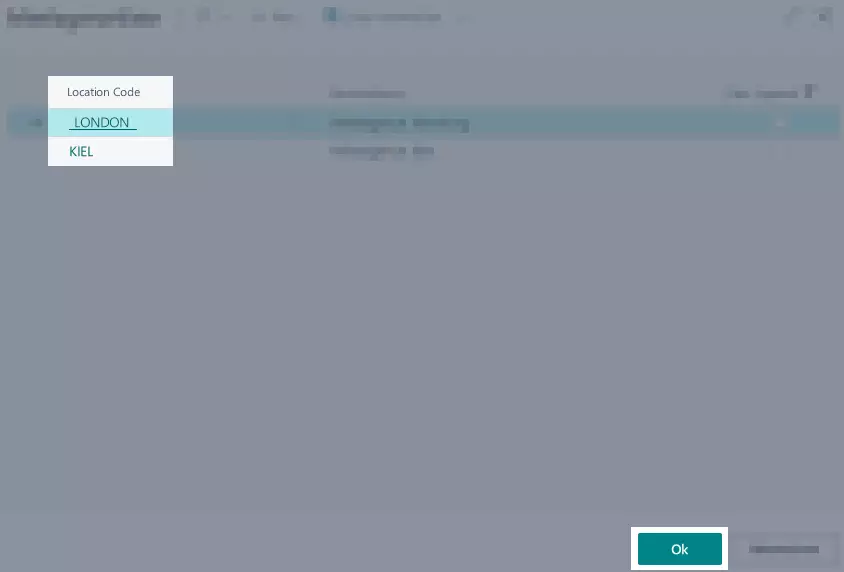
- The selected target rental location is shown under To Rental Location.
- Finally, click OK.

- Confirm the pop-up window by clicking OK.
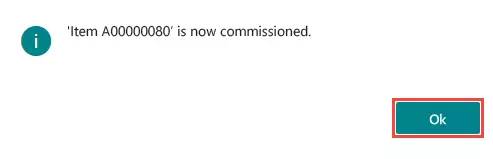
- The rent status in the Rental register is updated to Rentable.
- The rent object is now commissioned and can be rented.
- Close the page Items or Service Items.
Note
A commissioned (service) item can neither be sold nor transferred between sales locations. It has to be decommissioned first.
Decommissioning a rent object
In this section you learn how to decommission a (service) item.
After Decommissioning, the respective (service) item is available again for selling, transferring or scrapping.
This section describes how to decommission a rent object using the screenshots of an item. Decommissioning a service item works the same.
To decommission a rent object, please proceed as follows:
- Use the quick search (ALT+Q) to find the page Items or Service Items in TRASER DMS 365.
- A list containing all items or service items is displayed.
- Open the card of the rent object that you want to decommission.
Warning
The rent object must not be reserved, planned or rented. It has to be available in the rental location to be decommissioned.
- Check in the Rental area of the rent object if it is available for rent. You can find information on the status of the boolean in the Table 'Boolean'.
- If the rent object is available for rent, it can be decommissioned.
- For decommissioning, select Rental > Decommission from the menu bar.

- The commission/decommission wizard will open.
- Please fill in the fields according to the specifications in the table below to decommission the rent object.
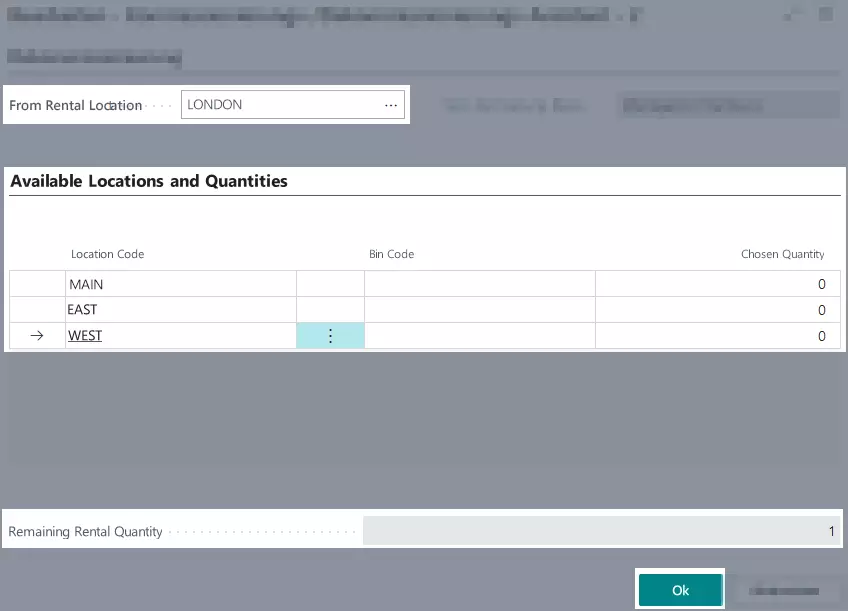
| Register | Option | Action |
|---|---|---|
| Decommissioning | From Rental Location | Reference Here the source location is displayed at which the rent object is commissioned at the moment. |
| Available Locations and Quantities | Location Code | Select here at which location the rent object shall be decommissioned. For this, click in the respective line. |
| Bin Code | Optional Here you can select the exact bin code at which the rent object should be decommissioned. More information on rent locations you will find here. |
|
| Chosen Quantity | Enter here the quantity to be decommissioned. The selected quantity cannot be more than the remaining rental quantity. |
|
| Remaining Rental Quantity | Reference Here is stated which quantity of the rent object is still commissioned for rent. |
- Finally, click OK.
- Confirm the following pop-up window by clicking OK.
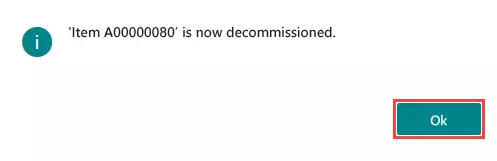
- The rent status under the Rental register is reset from the previous status to [empty].
- The rent object is now decommissioned and can be sold, transferred or scrapped.
- Close the page Items or Service Items.
Transferring rent objects between rental locations
In this section you will learn how to transfer rent objects between their rental locations or how to cancel a rental transfer order.
To create a rental transfer order, please proceed as follows:
Post Shipment
Note
To proceed with this process, the following conditions have to be met:
- More than one rental location is set up.
(Rental locations were created during the initial setup by TRASER Software GmbH.)- The rent object to be transferred is commissioned at the source rental location.
- The rent object to be transferred is not planned, reserved or rented.
- Use the quick search (ALT+Q) to find the page Rental Transfer Orders in TRASER DMS 365.
- A list of all active rental transfer orders is displayed.
- Click New.

- The empty input field Rental Transfer Order is displayed.
- Please fill in the fields according to the table below to create a rental transfer order.
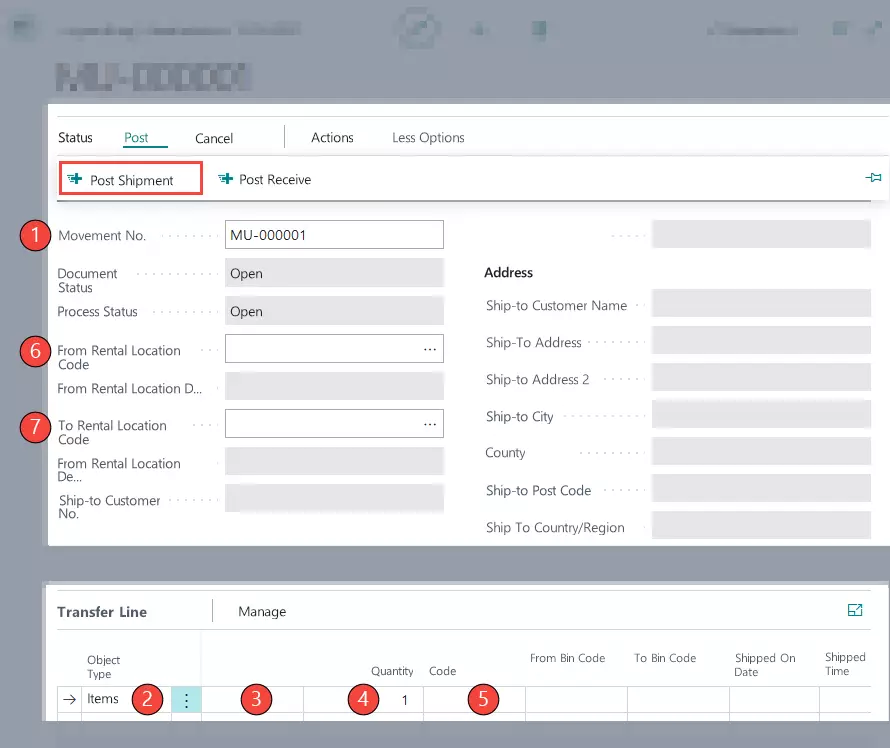
| No. | Option | Action |
|---|---|---|
| 1 | Movement No. | Please enter a number for the rental transfer order. |
| 2 | Type | Select here if a rent object of type item or service item should be transferred. You may have to click into the line of 'From Rental Location Code' or 'To Rental Location Code' for adding a line to the table. |
| 3 | No. | Select here the rent object to be transferred. |
| 4 | Quantity | Enter here the quantity to be transferred. |
| 5 | Unit of Measure Code | Select here a unit of measure. |
| 6 | From Rental Location Code | Enter the source rental location here or select the source rental location from the drop-down list. |
| 7 | To Rental Location Code | Enter the target rental location here or select the target rental location from the drop-down list. |
- Select Post > Post Shipment in the menu bar.
- In the Transfer Line table, the fields Shipped On Date, Shipped On Time and Qty. Shipped are automatically filled with the current data.
- The input fields are faded out and can no longer be edited.
- The shipment has been posted.
- Close the Rental Transfer Orders page.
Post Receive
Once the rent object has arrived at the target rental location, the receive has to be posted. Only then the rent object will be available at the target rental location.
Note
To proceed with this process, the following condition has to be met:
- There exists a posted shipment, which means the fields Shipped On Date, Shipped On Time and Quantity Shipped are filled.
Note
It is not possible to transfer a rent object to a sales location. In this case, the rental ledger entry that should be transferred must be selected.
- Use the quick search (ALT+Q) to find the page Rental Transfer Orders in TRASER DMS 365.
- A list of all active rental transfer orders is displayed.
- Select the rental transfer order for which you want to post the receive.
- The input field of the rental transfer order is opened.
- Check the information in the rental transfer order.
- If everything is in order, select Post > Post Receive.

- Confirm the pop-up window by clicking OK.
- The rental transfer order is now completed and the rent object has been commissioned at the target rental location.
- Close the Rental Transfer Orders page.
Cancel Shipment
If a shipment was falsely created or you want to make changes to a rental transfer order, you can cancel a posted shipment.
In this case the shipment will be reset and the input field can be edited again.
To cancel a shipment, please proceed as follows:
Note
To proceed with this process, the following condition has to be met:
- There exists a posted shipment, which means the fields Shipped On Date, Shipped On Time and Quantity Shipped are filled.
- Use the quick search (ALT+Q) to find the page Rental Transfer Orders in TRASER DMS 365.
- A list of all active rental transfer orders is displayed.
- Select the rental transfer order for which you want to cancel the shipment.
- The input field of the rental transfer order is opened.
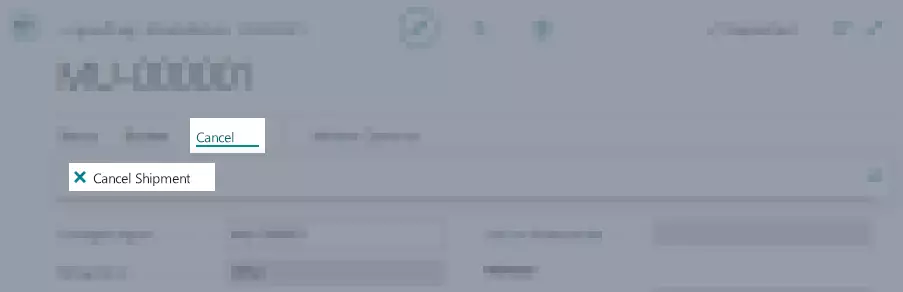
- Select Cancel Shipment to cancel the shipment.
- Confirm the pop-up window by clicking OK.
- The input field of the rental transfer order is now shown in edit mode.
- You can now edit the rental transfer order and post a new shipment or optionally delete the rental transfer order via the bin symbol at the top of the screen.
- Close the Rental Transfer Orders page.
Warning
If a rental transfer order it cannot be restored.
Marking a rent object as rent component
If a rent object is marked as a rent component, this item can be included in a contract as a contract component via a rent class or rent class package. For more information on how to assign contract components to a rental class or rental class package, click here. To mark a rent object as a rent component, please proceed as follows:
- Use the quick search (ALT+Q) to find the page Items in TRASER DMS 365.
- A list of all created items is displayed.
- Select the item which you want to mark as a rent component or create a new item.
- In the Rental tab, activate the Rent Component field.
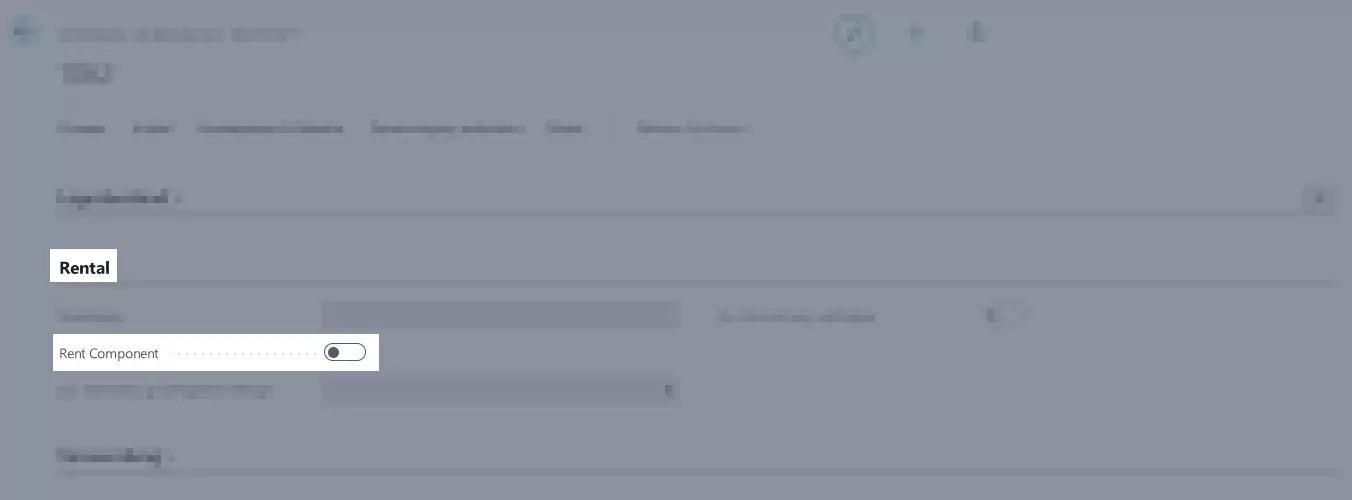
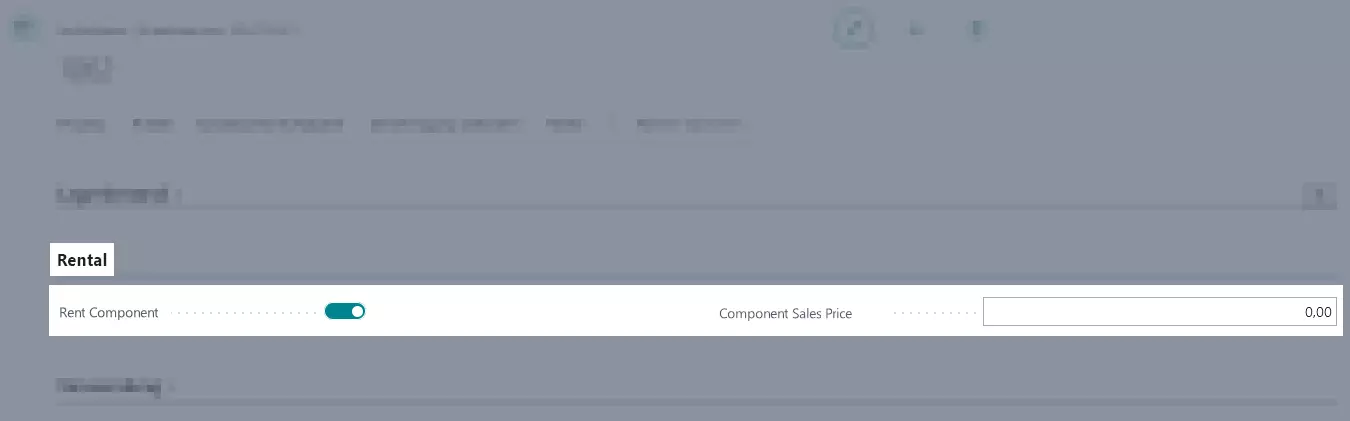
- If the field Rent Component is active, all the other fields in the Rental tab will be hiden and the field Component Sales Price appears.
- Optional Enter the sales price of the component here. You can also change the sales price on the rent class card.
Assigning rent classes for specific objects
Rent objects can be assigned specific rent classes in their (service) item card. In this case only this rent class can be selected for this rent object in rental contracts. This way, errors will be minimized. To assign a specific rent class to a rent object, please proceed as follows:
- Use the quick search (ALT+Q) to find the page Items or Service Items in TRASER DMS 365.
- A list of all created (service) items is displayed.
- Open a (service) item or create a new one.
- Select Rental > Create Rent Class from the menu bar.
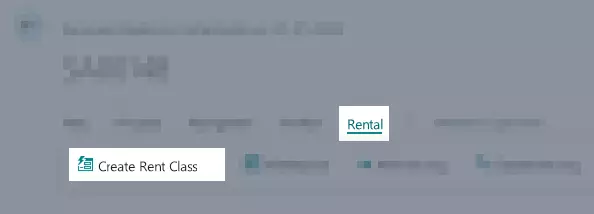
- A window for editing the newly created rent class is displayed where the information of the rent object are already deposited in the General register.
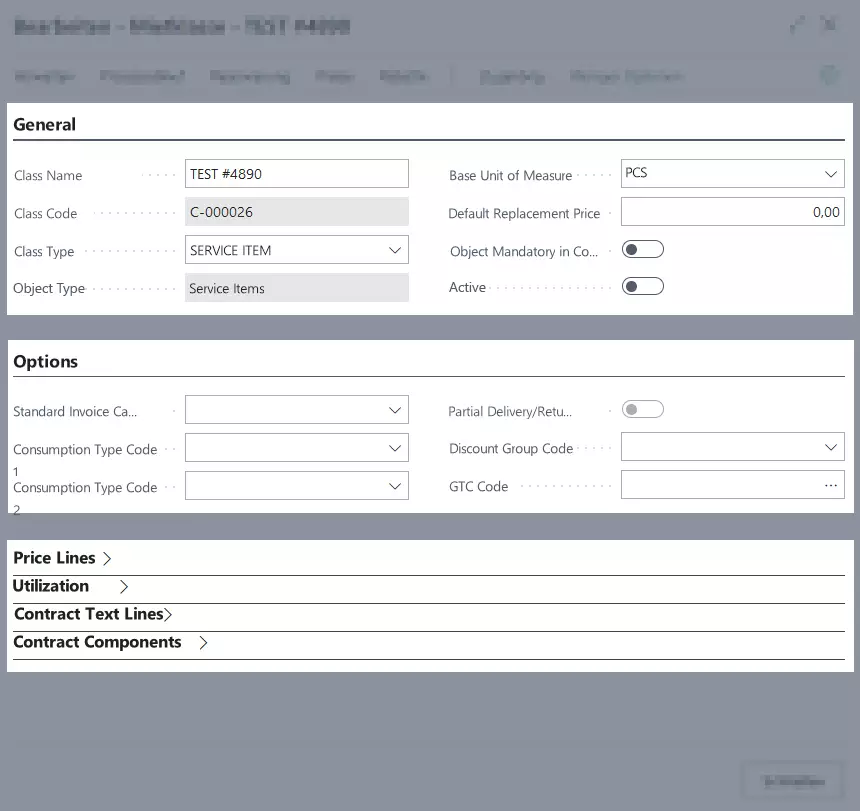
- You will now be able to edit the rent class as described in Creating Rent Class.
- Then, activate the rent class by activating the slider in the General tab. You can find information on the status of the boolean in the Table 'Boolean'.
- Close the window.
- The rent class you just created will be automatically entered in the Rent Class field under the Rental register of the rent object.

-
If this rent class is now added to a rental contract, the object number of the rent object will also be filled into the contract lines. This also applies if the rent class is part of a rent class package.
-
Optional In the next setp you can now commission the rent object.
Setting a replacement price for rent objects
You can set up a price for (service) items which will be used if the (service) item has to be newly purchased. To set up a replacement price for (service) items, please proceed as follows:
- Use the quick search (ALT+Q) to find the page Items or Service Items in TRASER DMS 365.
- A list of all created (service) items is displayed.
- Open a (service) item or create a new one.
- In the Rental tab, in the Replacement Price field, enter a set price.

Linking Rental Objects
You can link rent objects to mark them as an optional, necessary or recommended component.
Please proceed as follows:
- Use the quick search (ALT+Q) to find the page Service Items or Items in TRASER DMS 365.
- A list containing all items or service items is displayed.
- Open the desired (service) item.
- The respective item card opens.
- You can select the rent object to be linked in the Linked Rent Objects register.
The following fields are available:
| Option | Description |
|---|---|
| Linked Object Type | Specifies the type of the rent object to be linked. |
| Linked Object No. | Specifies the object number of the linked rent object. |
| Rent Class | Specifies the rent class of the linked rent object. |
| Description | Specifies the description of the linked rent object. |
| Description 2 | Specifies an additional description of the linked rent object. |
| Quantity | Specifies the quantity of the linked rent objects. |
| Unit of Measure Code | Specifies the unit of measure code of the linked rent object. |
| Available for Rent | Specifies if the rent object is available for rent. |
| Requirement | Specifies if the rent object is a necessary, optional or recommended component of the rental contract. |
- Your changes are saved automatically.
- Close the Item Card page.
You have sucessfully linked two rent objects.
'Boolean' Table
The following table describes the boolean status for this chapter.
| Symbol | Status | Description |
|---|---|---|
 |
Disabled | The option is not activated and the related function not available. |
 |
Active | The option is activated and the related function available. |
In the next chapter you will learn everything important about managing resources.
Continue with next chapter