Email Setup Rental
In order to be able to send rent documents via email, various setup steps are necessary. We recommend sticking to the order in this setup description to avoid errors later.
This chapter is divided into the following sections:
Storing an email account in Business Central
First, an email account has to be stored in Business Central which serves as the sender address. Please proceed as follows:
Note
In this manual it is assumed that a SMTP account linked to a Google Mail (“Gmail”) account is used.
To avoid error messages it is important for the Gmail account be set up exactly as it is described in this manual.
- Use the quick search (ALT+Q) to find the page Email Accounts.
- The Email Accounts page is displayed.
- To deposit a new email account, select New > Add an Email Account from the menu bar.
- The Email Wizard is opened.
- To start the wizard click Next.
- Select the account type SMTP from the list and click Next.
- The Set up SMTP account window opens. Complete the fields according to the table below.
| Field | Description |
|---|---|
| Account Name | In this field, enter the email account that was set up in Google (e.g. test@gmail.com). |
| Sender Name | In this field, enter the name that should be shown as the sender’s name in emails. |
| Email Address | In this field, enter the email account that was set up in Google (e.g. test@gmail.com). |
| Server URL | In this field, enter the following URL: smtp.gmail.com. |
| Server Port | In this field, enter the following port: 587. In case this port does not work, please use the port: 465. |
| Authentication | In this field, select the following authentication: Basic. |
| User Name | In this field, enter the email account that was set up in Google (e.g. test@gmail.com). |
| Password | In this field, enter the password that was generated in Google (see section Setting up a Gmail account). |
| Secure Connection | Activate this boolean if your SMTP mail server setup requires a secured connection which uses a cryptography or safety protocol. |
Setting up a Gmail account
- Login to your Gmail account or create a new account.
- Open the account management.
- In the left menu bar, select the Safety option.
- In the Signing in to Google register, activate the fields Use your phone to sign in and 2-step verification.
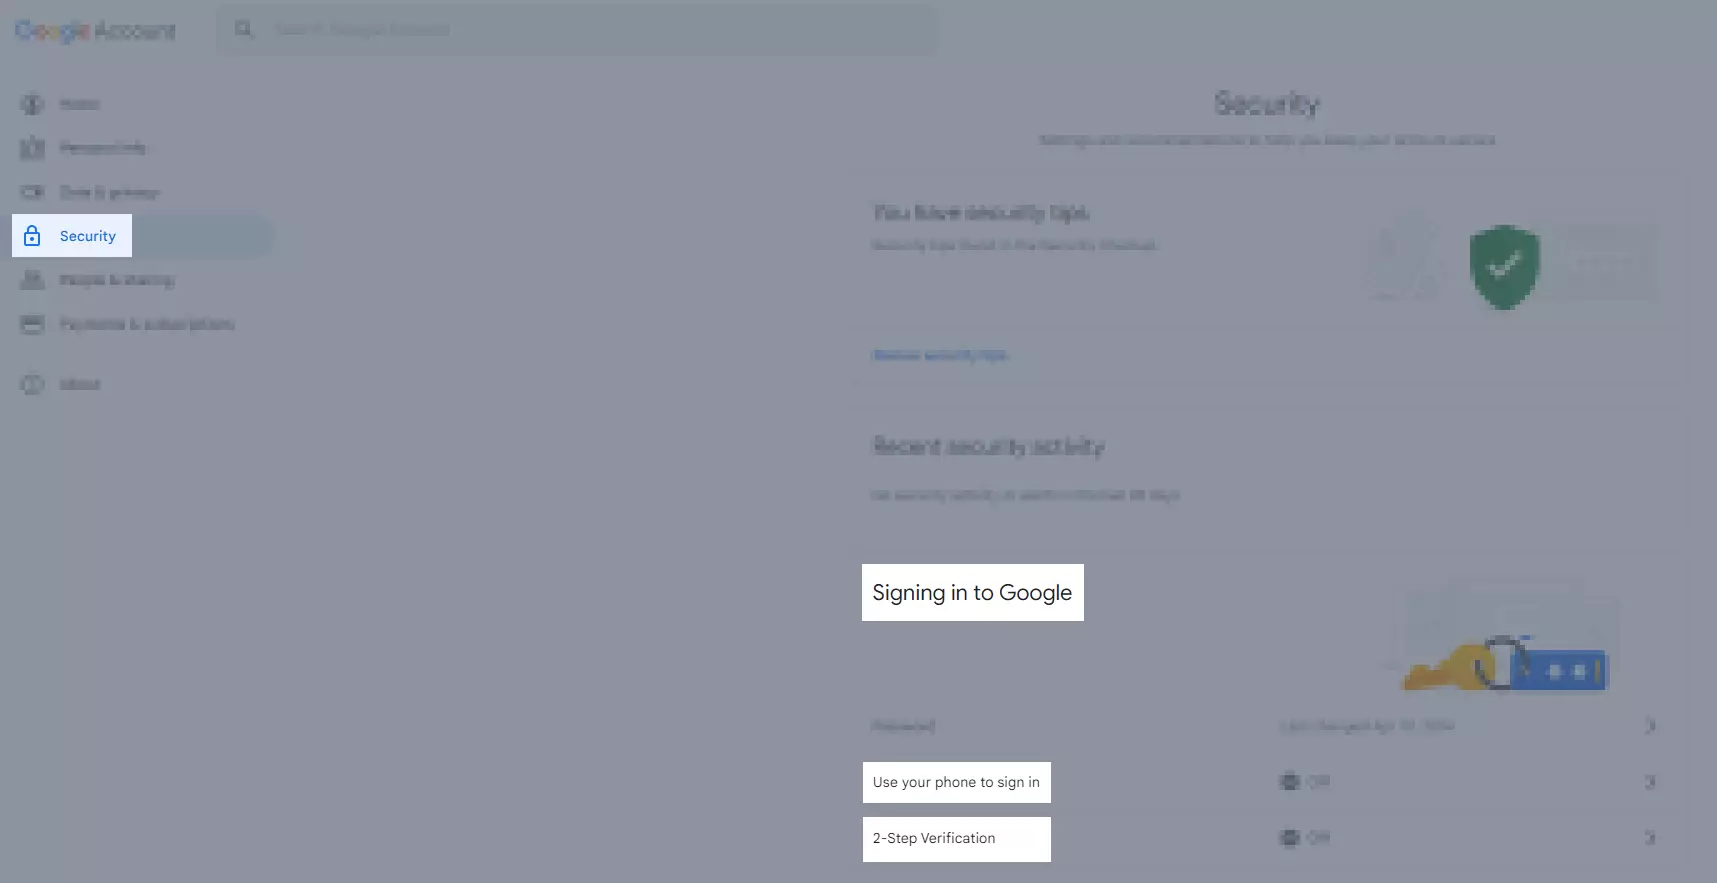
- If you have set up everything correctly, a new field App Passwords is displayed.
- You need this generated password for the Password field in Business Central (see section Storing an email account in Business Central).
Email Setup
- Use the quick search (ALT+Q) to find the page Rental Email Setup List.
- The Rental Email Setup List page is displayed.
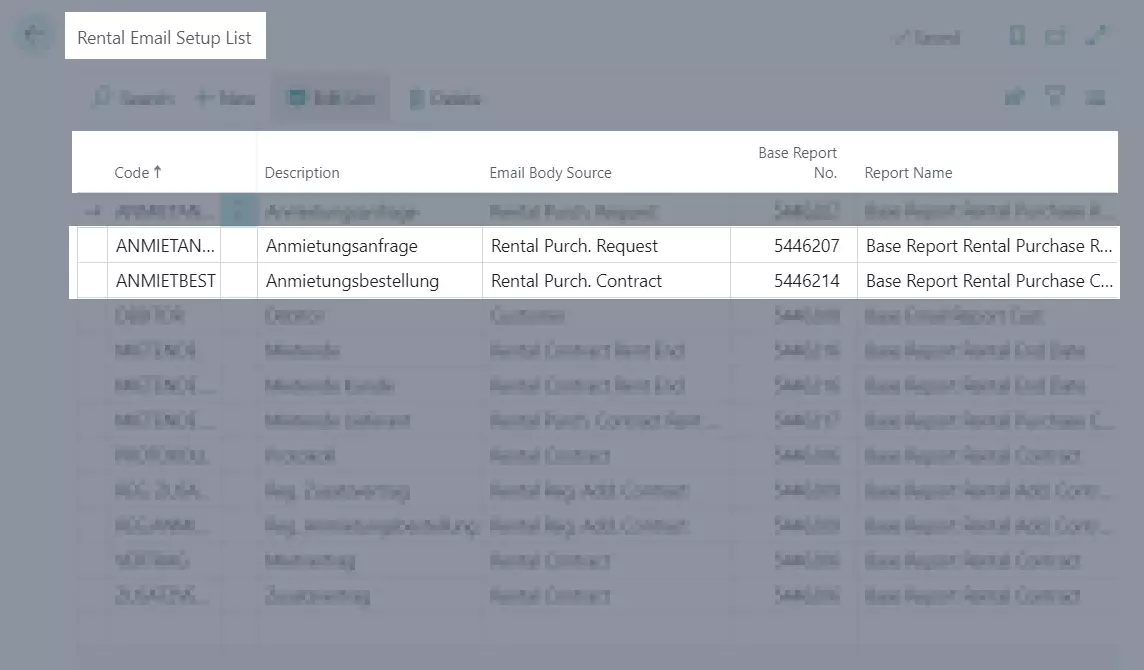
- Use the Code column to enter a significant name.
- Use the Description column to enter a significant description.
- In the Email Body Source column, select from the drop-down list which record should be collected for the usage in the base report number. The base report number must be designed for this source record.
- The columns Base Report No. and Report Name are filled automatically by the system.
Storing Email Templates
- Use the quick search (ALT+Q) to find the page Rental Email Templates.
- The Rental Email Templates page is displayed.
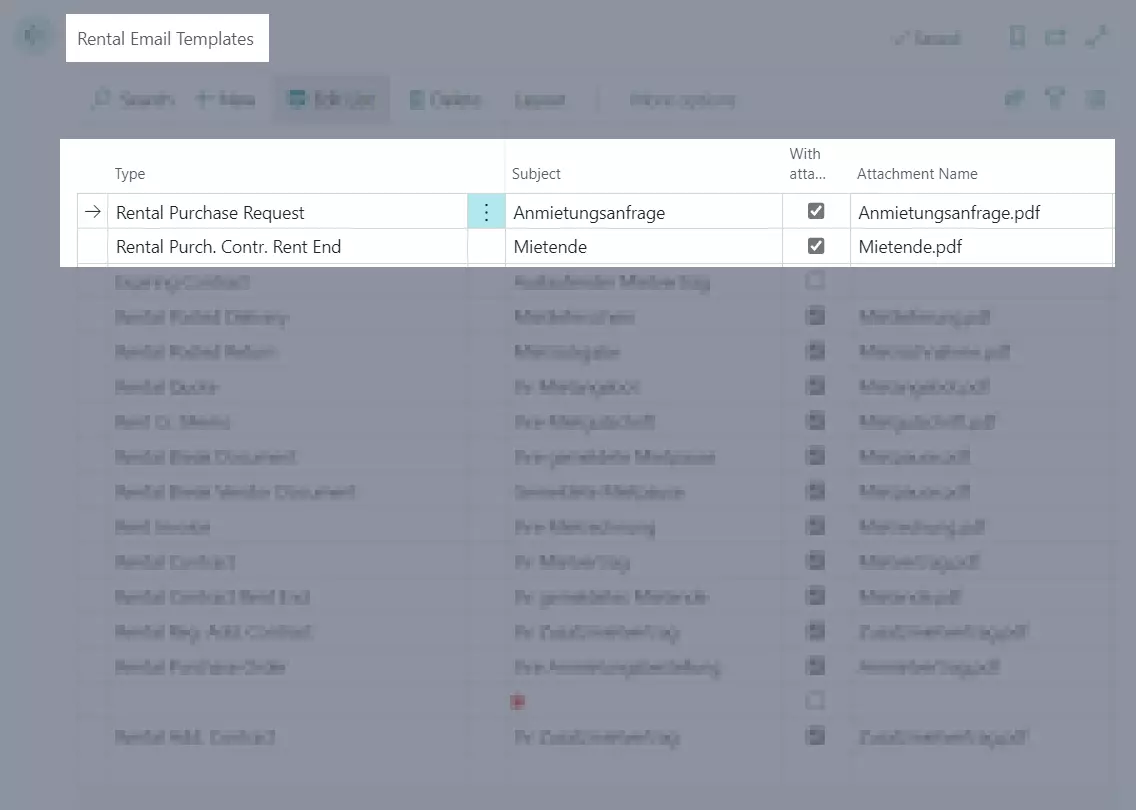
- In the Type column, select from the drop-down list to which document type the email template should apply.
- In the Subject column, enter the text that is to be displayed in the subject line of the email.
- Activate the checkbox in the With Attachment if the email should be sent with an attachment.
- In the Attachment Name column, enter what the attachment file should be named. Attention: It is important to write .pdf behind the name of the attachment file.
- In the Email Setup Code column, select the desired setup code which you have created in the Rental Email Setup section. This specifies which report is used in the background.
- In the Custom Report, select a customized report layout. The field in the Description of Report Layout column is filled automatically by the system.
- Optional In the Email Protocol Type column, select from the drop-down list the protocol type the email protocol shall be marked with.
The email setup is now complete. Rental documents can now be sent via email.
Assign Email Scenarios
You can assign different Email scenarios to an Email account set up by you. Depending on the scenario, the sender can be different when sending different Emails.
Email scenarios are areas in TRASER DMS 365 which include an Email feature.
To send assign an Email scenario to an Email account, please proceed as follows:
- Use the quick search (ALT+Q) in TRASER DMS 365 to find the Email Scenario Assignment page.
- The Email Scenario Assignment page is shown.
- Select the desired Email account.
- Click on Assign Scenarios in the menu bar.
- The Assign Scenarios to Account (selected Email Account) page is shown.
- Select the desired Email scenarios from the list which you wish to assign to the Email.
- Click OK to confirm your selection.
- The assigned Email scenario is shown below the Email account.
You have successfully assigned an Email scenario to an Email account.
Add Email Setups to Contacts
You can already add the sender Email address to the contact which will then be used to send the respective document. If said contact is then used in a rental contract or rental purchase contract, the deposited Email addresses and settings will automatically be transferred to the rental contract or rental purchase contract.
Note
This feature is only available to contacts of the Company type.
To do so, please proceed as follows:
- Use the quick search (ALT+Q) to find the page Contacts in TRASER DMS 365.
- The page Contacts is displayed.
- Select a contact of the Company type or create a new contact.
- Click on Contact > Email Setup Rental Documents in the menu bar of the Contact Card.
- The Contact Rent Email Setup page is displayed.
- Select the desired Email scenario in the Type field.
- Enter the Email address of the sender Email to be used for this email scenario into the Email field. You can also choose from the Emails deposited in the contact card by clicking on the three dots.
- Your entries will be saved automatically.
You have successfully added Email settings to a contact.
Sending rental documents via email
The condition for sending rental documents via email is an existing email template for this document type. To send a rental document via email, please proceed as follows:
Note
Emails are primarily sent to the email address stored in the rental document under the General register. If there is no stored email address, the emails are sent to the email address that is stored for the customer.
- Open the desired rental document that you want to send via email.
- Select Print/Send > Email... from the menu bar.
- The email is sent automatically to the email address stored in the rental document according to the stored email template.
Sending emails as batch
If rental documents are about to expire, several emails, e.g. reminders, can be sent to several customers at once by using a set filter. To setup and send batch emails, please proceed as follows:
- Use the quick search (ALT+Q) to find the page Batch Email Setup List.
- The Batch Email Setup List page is displayed.

- Use the Code column to enter a clear name for the batch.
- In the Description column, enter a significant description for the batch.
- In the Email Template column, select from the drop-down list the desired template which should be used for the emails. For more information on creating email templates, click here.
- Select in the Date Field to which date in the rental document the batch processing should refer to. You can choose from the options Contract Start Date, Start Date Add. Contract, Requested Rent Period Start Date, Estimated Estimated Contract End Date and Quote Valid To Date. The column can also be left empty.
- In the Start Period Formula, enter the earliest period (e.g. 1W = 1 week) from which an email should be sent.
- In the End Period Formula, enter the latest period (e.g. 1W = 1 week) until an email should be sent.
- The Filter View column is automatically filled by the system once you have created a filter view for this batch.
- Subsequently, activate the checkbox in the Active column if you want to activate and use the batch.
To create a filter view, please proceed as follows:
- Mark a batch that is not activated or deactivate a batch.
- Select Create Filter View from the menu bar.
- The Contract Batch Email window opens. Here you can further limit the rental documents to be processed by using several filter.
- To apply the filter, comfirm with OK.
To execute the batch, please proceed as follows:
- Mark an activated batch from the list.
- Select Run Batch from the menu bar.
- The Contract Batch Email window opens. Here you can further adjust the pre-set filter and therefore further limit or expand the rental documents to be processed.
- Confirm with OK.
- The batch processing starts. Subsequently, a dialogue window is displayed which shows how many emails have been sent in total in this batch.
In the next chapter you will learn everything important about managing rent quotes.
Continue with the next chapter