Repairs, Replacement, Consumption
This chapter covers all important topics regarding repair, replacement and consumption.
If a delivered rent object is defective and has to be repaired, this can also be reflected in the rental contract. This process is described in the Returning a rent object for repair section.
If the rent object is to be delivered back to the customer afterwards, this can also be reflected. The invoice parameters are automatically adjusted in this case. This process is described in the Redelivering a rent object after repair section.
If a delay caused by the repair is not acceptable for the customer, a replacement object can be delivered and marked as the new rent object. This process is described in the sections Replacing a rent object and Swapping a rent object.
It is also possible during delivery and return to raise clearly defined consumption values for the rent object. That way, mileage and consumption of operating fluids can be measured, for example, based on operating hours, covered kilometers or worked hectares. This process is described in the Tracking consumption or mileage section.
You can create checklists and assign these to rent classes. These have then to be filled out before a rent object can be delivered or returned. This is to ensure that important topics in connection with rent objects are not forgotten. This process is described in the Viewing and processing checklists section.
This chapter is divided into the following sections:
- Returning a rent object for repair
- Redelivering a rent object after repair
- Replacing a rent object
- Swapping a rent object
- Tracking consumption or mileage
- Viewing and processing checklists
Returning a rent object for repair
This section describes how to return a rent object that is defective or in need of repair and how to credit the customer for the downtime. Please proceed as follows:
Note
To be able to return a rent object, the rent object must have the status Object has been delivered in the Contract Objects register. You can find more information on rent statuses here.
- Open an already existing rental contract or create a new contract.
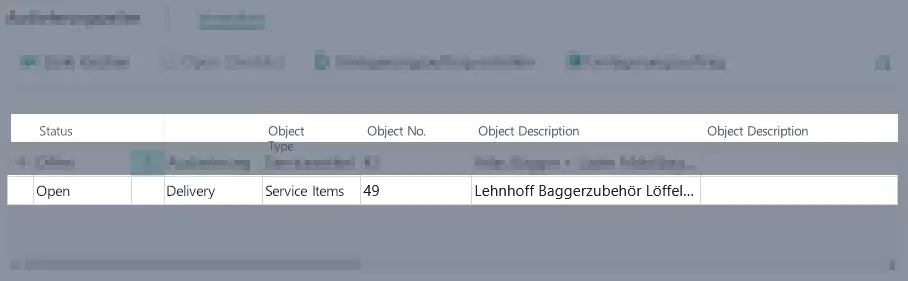
- Select the rent class in the Contract Objects register which you want to return for repair.
- In the Return Location Code column under the Contract Objects register, enter the location where the rent object should be returned to.
- In the Return Date column under the Contract Objects register, enter the date when the rent object was returned.

- Select Manage > Process Next Status from the menu bar.
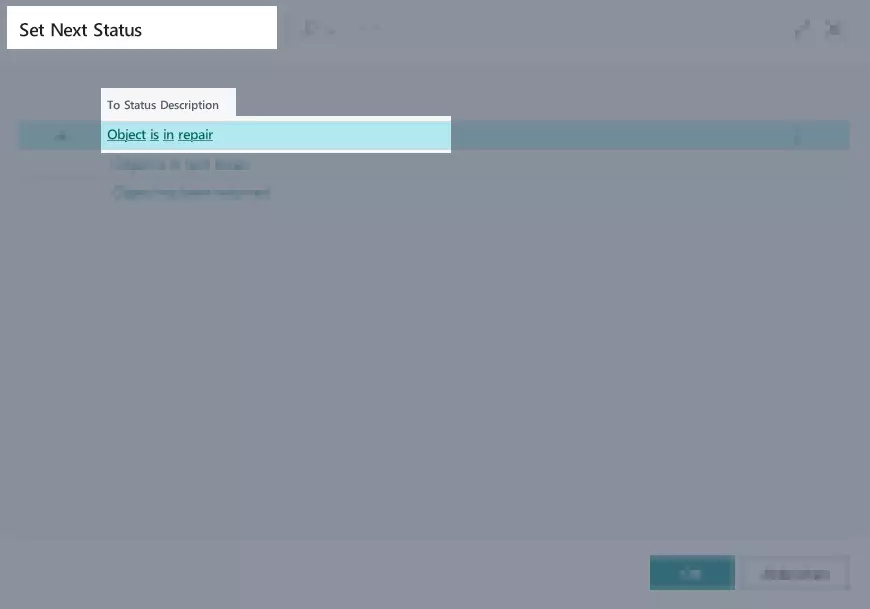
- If the respective column in the contract lines is empty, a dialogue window will open where you can select the next status.
- If you want to return the rent object for repair, then select Object is in repair.
- A message appears indicating that a protocol has been created. Confirm the message with Yes to open the protocol.
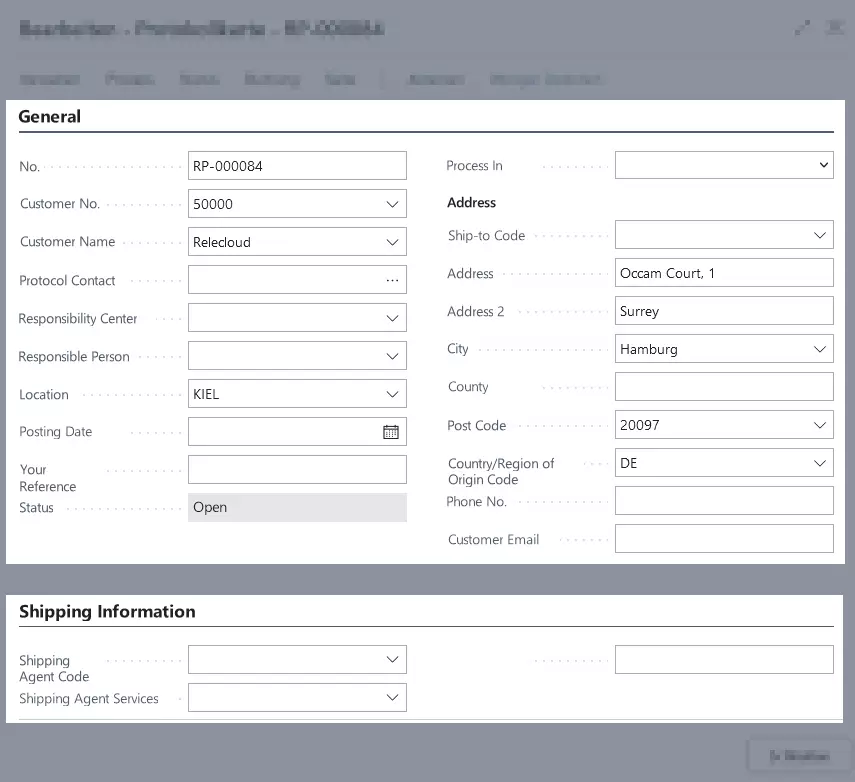
- Under the General and Shipping Information registers of the protocol card, you can enter more information on returning the rent object which were not automatically copied from the contract data into the return protocol. You can find more information on the fields of the protocol card here.

- In the Return Lines register, all information that is important for further processing the return are entered.

Note
If several rent objects in the rental contract have the same source or target location as well as the same delivery dates, you can process all of them in one protocol.
- To do so, click on Process > Add another line in the open protocol.
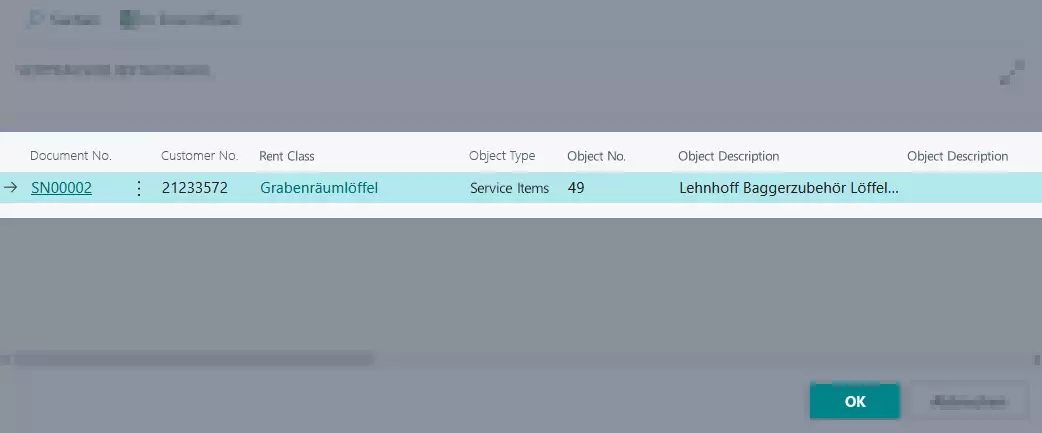
- A new window with all other rental contract lines opens.
- Select an object line you would like to add to the protocol and then click OK.
- The additional line will be added to the Return Lines register and can be processed in the same protocol.

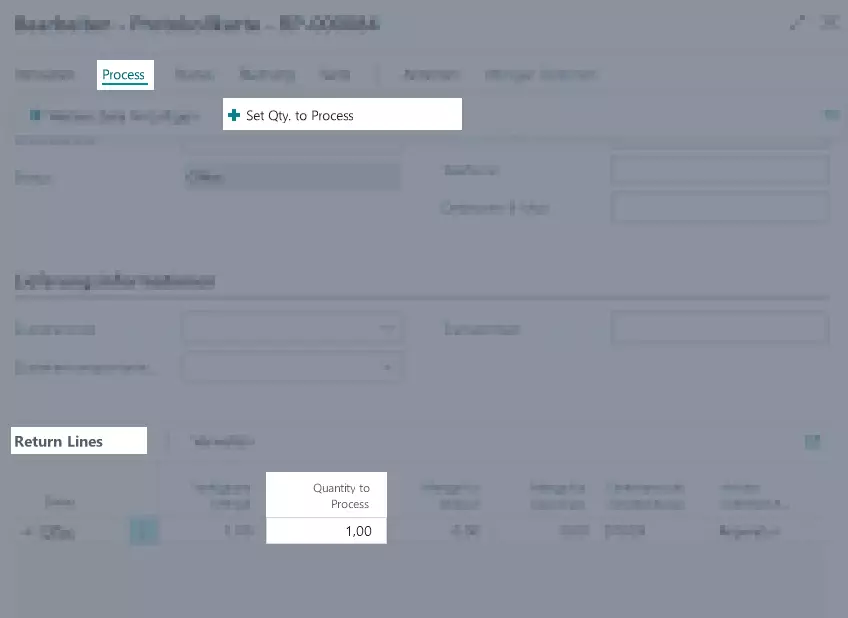
- Enter the quantity you want to return in the Quantity to Process column. You can also select the Actions > Set Qty. to Process command in the menu bar. This will automatically fill the quantity to be processed with the value that is stated in the Available Quantity column.
- You can also define if returned rent objects are to be reselled or are no longer usable and have to be declared as scrap by using the Quantity to Sell and Quantity to Scrap columns. This step is only possible if a sales location has been assigned to the selected location. If the rent object should be rented out again, you can leave this column empty.
Note
If an order type with the subtype Rent with Sales Option was assigned to the rental contract, then the Quantity to Sell column has be filled. You can find more information on the rental order types here.
- If a service item is returned, then a new rent status must always be assigned to the returned rent object in the New Rent Status Object column. In this column you can for example define whether the rent object is damaged and cannot be rented anymore.
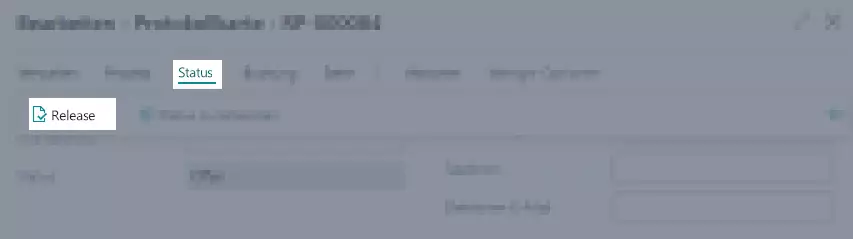
- Once you have filled in the necessary columns, you release the protocol. To do this, choose Process > Release from the menu bar.

- To post the protocol afterwards, select Post > Post from the menu bar.

- The return of the rent object has been posted and the status inside the rental contract is now Object has been returned.
Note
If you want to make changes to the return protocol before posting it, select Status > Reset Status from the menu bar to make the protocol editable again.
Note
If the completion of a checklist was set in a rent class, you have to release the checklist first before posting the protocol. You can find more information on creating checklists here.
Creating a service order from a rental contract
This section describes how to create a service order from a rental contract in case a rent object was damaged for example. This saves valuable time. Please proceed as follows:
Note
You can only create a service order from a rental contract for a service item. If you have selected an item in the Contract Objects of the rental contract, the menu option Create Service Order cannot be selected.
- Use the quick search in Dynamics NAV (ALT+Q) to find the page Rental Contracts.
- A list of all created rental contracts is displayed.
- Select the desired rental contract.
- Under the Contract Objects register, select Service > Create Service Order from the menu bar.
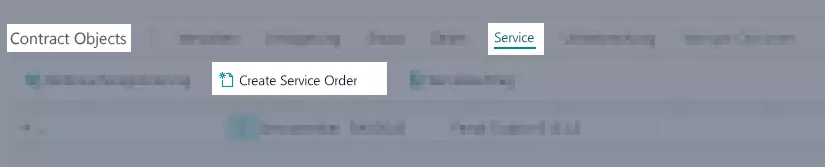
- The window Service Order Types opens with the service order types that can be selected.
- Select the desired service order type by clicking on the code name.
- Confirm the following dialogue window to open the service order directly.
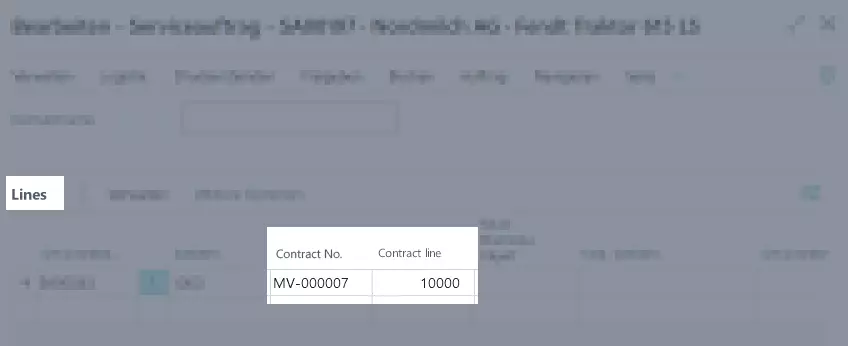
- The newly created service order is opened. In this service order, the columns Contract No. and Contract Line No. under the Lines register are already prefilled with the values from the rental contract. You can now further process the service order.
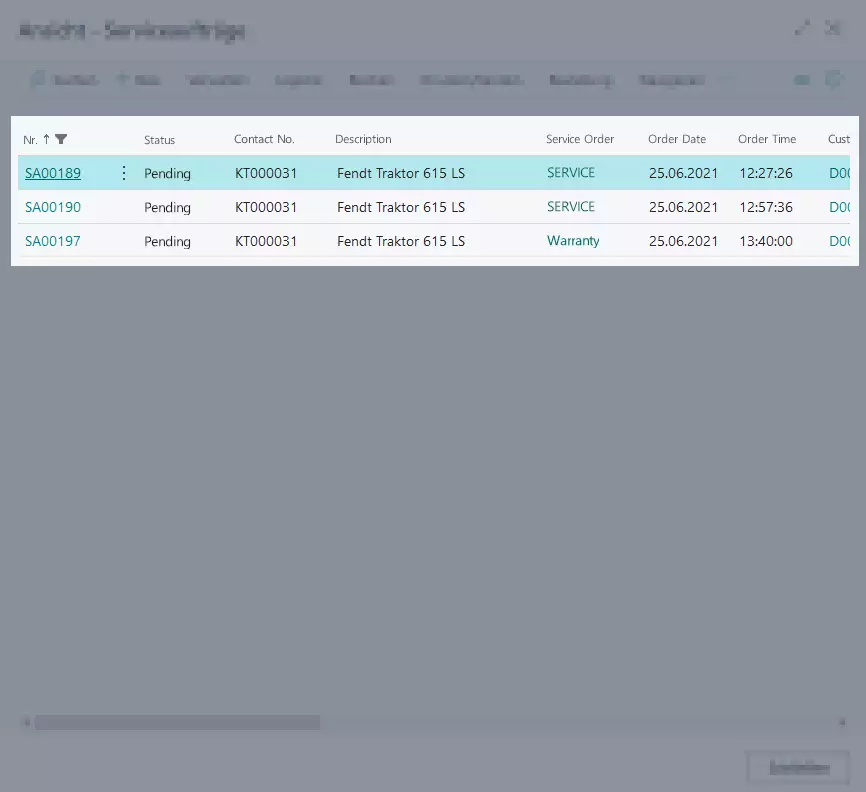
- To reopen the linked service orders from the rental contract at a later time, select the menu option Service > Service Order in the rental contract under the Contract Objects register.
- If there is only one service order linked to the rental contract, it will open immediately. If several service orders have been created on this rental contract, a window including a list will open where you can select and open the desired service order.
Creating a service order during or after the return
This section describes how to create a service order during (e.g. by using a return protocol) or after the return of a service item. This can also be automated. Please proceed as follows:
- Use the quick search in Dynamics NAV (ALT+Q) to find the page Rent Status.
- A list of all created rent statuses is displayed.
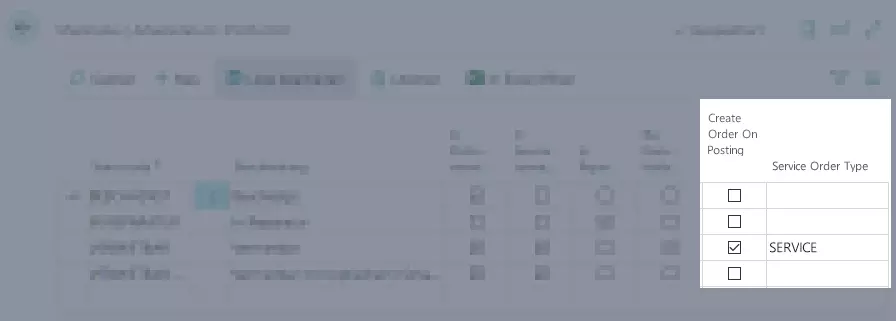
- Activate the checkbox in the Create Order On Posting column for the rent status for which you want to activate this function. This change will be saved automatically. If this rent status is now being set for a service item during the return process and the return protocol is posted afterwards, then a service order is created automatically.
- Use the Service Order Type column to enter a service order type that will be used for the service order. This field has to be filled once the checkbox in the Create Order On Posting column is activated.
Entering rent parameters in the service worksheet
You can enter useful information about the service item on the worksheet. This includes for example damages to the service item, service intervals or information on rental contracts and the rent status of the service item.
To access the Worksheet window, please proceed as follows:
- Use the quick search in Dynamics NAV (ALT+Q) to find the page Service Orders.
- A list of all created service orders is displayed.
- Open the desired service order or create a new service order.
- Select the desired service line in the Lines register.
- Select Line > Worksheet from the menu bar.
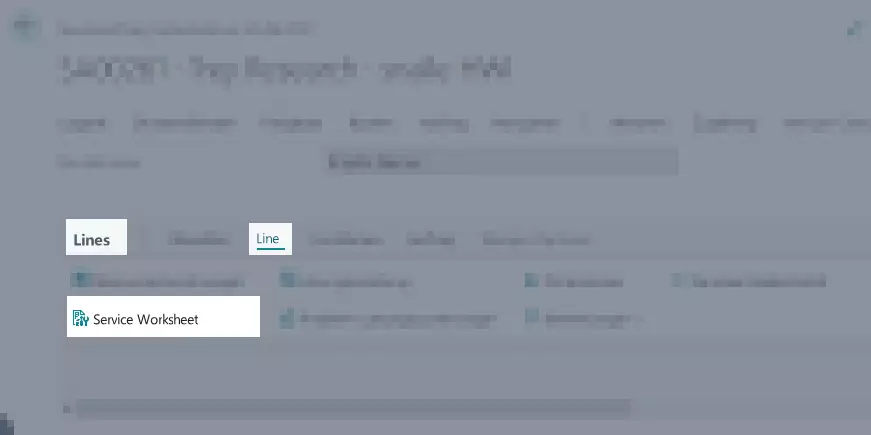
- The Worksheet window is displayed.

- In the Rental register of the worksheet you now can fill on the following rent parameters:
| Field Name | Description |
|---|---|
| Rental Contract No. | In this field you can link a rental contract to a service item line of the service order. If the service order was created from a rental contract, then this field is already pre-filled with the data from the related rental contract. |
| Line No. Rental Contract | In this field you can link a rental contract line to a service item line of the service order. If the service order was created from a rental contract, then this field is already pre-filled with the data from the related rental contract. |
| Rent Status Object | This field shows the current rent status of the service item. For more information on rent statuses, click Rent Status. |
| New Rent Status Object | Use this field to assign a rent status to the service item if necessary. For more information on rent statuses, click Rent Status. |
- Once you have entered the desired rent parameters, close the worksheet window.
Redelivering a rent object after repair
This section describes how to redeliver a repaired rent object to the customer. Please proceed as follows:
Note
To be able to return a rent object, the rent object must have the status Object is in repair in the Contract Objects register. You can find more information on rent statuses here.
- Open an already existing rental contract or create a new contract.
- Select the rent class in the Contract Objects register which you want to deliver to the customer after repair.
- In the Delivery Location Code column under the Contract Objects register, enter the location from where the rent object should be delivered.
- In the Delivery Date column under the Contract Objects register, Enter the date on which the rent object should be delivered.

- Select Manage > Process Next Status from the menu bar.
- If the respective column in the contract lines is empty, a dialogue window will open where you can select the next status.
- If you want to return the rent object for repair, then select Object has been delivered.
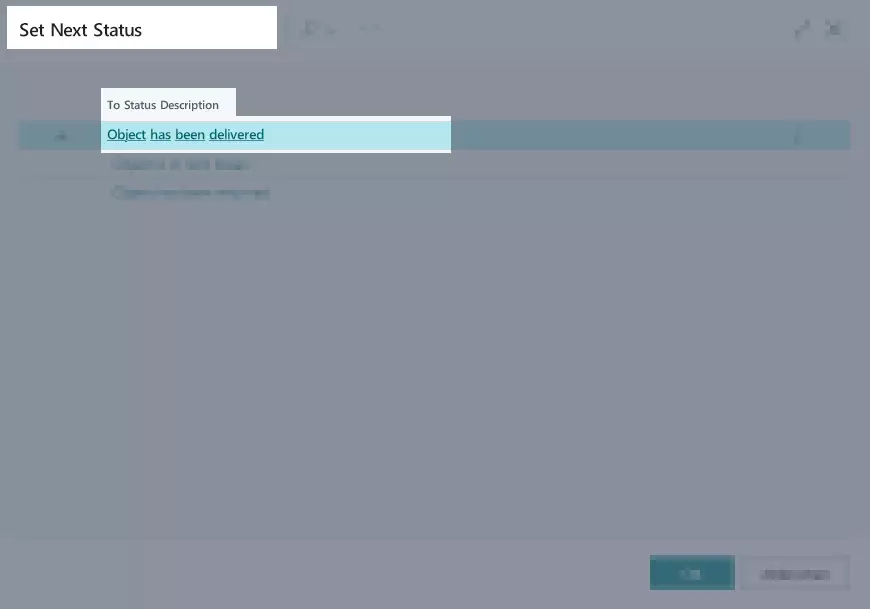
- A message appears indicating that a protocol has been created. Confirm the message with Yes to open the protocol.
- Under the General and Shipping Information registers of the protocol card, you can enter more information on delivering the rent object which were not automatically copied from the contract data into the delivery protocol.
- In the Delivery Lines register, all information that is important for further processing the delivery are entered.

Note
If several rent objects in the rental contract have the same source or target location as well as the same delivery dates, you can process all of them in one protocol.
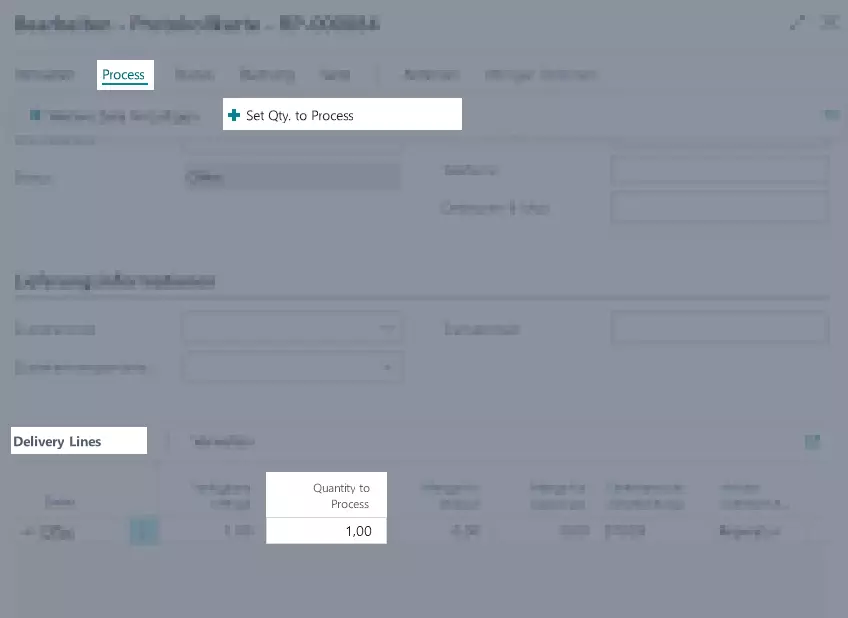
- To do so, click on Process > Add another line in the open protocol.
- A new window with all other rental contract lines opens.
- Select an object line you would like to add to the protocol and then click OK.
- The additional line will be added to the Delivery Lines register and can be processed in the same protocol.
- Enter the quantity you want to deliver in the Quantity to Process column. You can also select the Actions > Set Qty. to Process command in the menu bar. This will automatically fill the quantity to be processed with the value that is stated in the Available Quantity column.
- Once you have filled in the necessary columns, you release the protocol. To do this, choose Process > Release from the menu bar.
- To post the protocol afterwards, select Post > Post from the menu bar.

- The delivery of the rent object has been posted and the status inside the rental contract is now Object has been delivered.
Replacing a rent object
This section describes how to temporarily deliver a replacement object to the customer for the defective or repairable rent object so that the customer does not have to deal with further interruptions. The replacement will be returned once the repaired rent object is delivered again.
You can create a normal replacement or a vendor replacement.
Note
Only service items can be replaced. Items on the other hand are swapped.
Note
To be able to replace a rent object, the rent object must either have the status Object has been delivered or Object is in repair in the Contract Objects register. You can find more information on rent statuses here.
Normal Replacement
To replace a rent object, please proceed as follows:
- Open an already existing rental contract or create a new contract.
- Select the rent class in the Contract Objects register which you want to replace.
- Choose Replacement > Prepare Replacement from the menu bar.
- Choose Normal Replacement in the dialog window.
- Click OK to confirm your selection.
- A new line is added to the Contract Objects register which gets the Start status by default.

- The new contract object line can be processed as already described in other sections. You can for example deliver this line, return it for repair or redeliver it after repair.
- Once the rent object that is to be repaired is operational again, you take back the replacement object and redeliver the repaired rent object.
- If the previous rent object can no longer be delivered because it is too heavily damaged, the new rent object can be defined as the new main object of the contract.
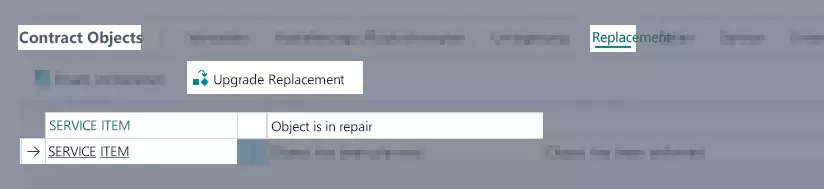
- Select the respective contract object line in the Contract Objects register.
- Select Replacement > Upgrade Replacement from the menu bar. This is only possible if the rent object to be repaired has the rent status Object is in repair.
- This opens the Replacement/Swap Wizard.
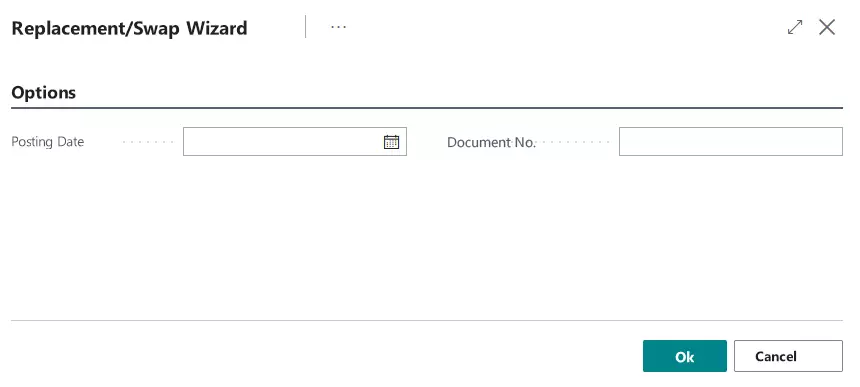
- In the Posting Date column, enter the date that is to be booked.
- The field Document Number is filled automatically if a number series for rent replacement objects has been defined in the TRASER Rental Setup. You can find more information on the setup of number series here.
- The rent object to be repaired is assigned the Object has been returned status. The replacement is now the new main rent object.
Vendor Replacement
To create a vendor replacement, please proceed as follows:
Note
Service items need to have the delivered or in repair status in a linked rental contract to be used for vendor replacement. For more information on rental purchase contracts, go here.
- Open an already existing rental contract or create a new contract.
- Select the rent class in the Contract Objects register which you want to replace.
- Choose Replacement > Prepare Replacement from the menu bar.
- Choose Vendor Replacement in the dialog window.
- Click OK to confirm your selection.
- The Create Replacement Object page is shown.
- Please specify if the Object Number Type is an Internal, a number created by the Vendor or an Alternative object number.
- Enter the object number into the Object No. field.
- All other fields contain the values of the original rent class.
- Confirm your settings with OK.
- A new line is added to the Contract Objects register which gets the Start status by default.
- The replacement object has also been added to the linked rental contract.
- The replacement object can now be upgraded or further processed in the same way as a normal replacement.
- You can also process the replacement object via the linked rental contract.
You have successfully created a vendor replacement.
Swapping a rent object
This section describes how to deliver a swap object to the customer for the defective or repairable rent object so that the customer does not have to deal with further interruptions. The swap object will be upgraded as the new rent object and the initial rent object will not be redelivered to the customer.
To swap a rent object, please proceed as follows:
Note
Only items can be swapped. Service items on the other hand are replaced.
Note
To be able to swap a rent object, the rent object must have the status Object has been delivered in the Contract Objects register. You can find more information on rent statuses here.
- Open an already existing rental contract or create a new contract.
- Select the rent class in the Contract Objects register which you want to swap.
- Choose Replacement > Prepare Swap from the menu bar.
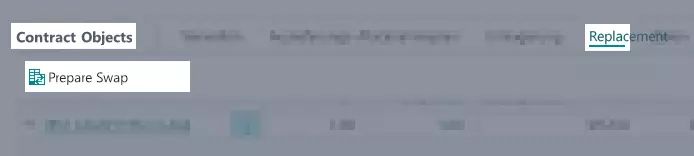
- This opens the Replacement/Swap Wizard.

- Enter the quantity of rent objects to be swapped into the Quantity to Swap field.
- A new line is added to the Contract Objects register which gets the Start status by default.
- The new contract object line can be processed as already described in other sections. For more information on this, go here.
Tracking consumption or mileage
You can define, register and invoice consumption values for rent objects to keep service intervals or for billing after consumption or mileage.
Note
In order to make optimal use of the consumption functions, please make the desired settings in the TRASER Rental Setup and set up the consumption types.
Setting up consumption types
Consumption types specify how a rent class is invoiced (e.g. by operating hours or by wear and tear). You can deposit the set up consumption types in the rent class card. To create consumption types for rent classes, please proceed as follows:
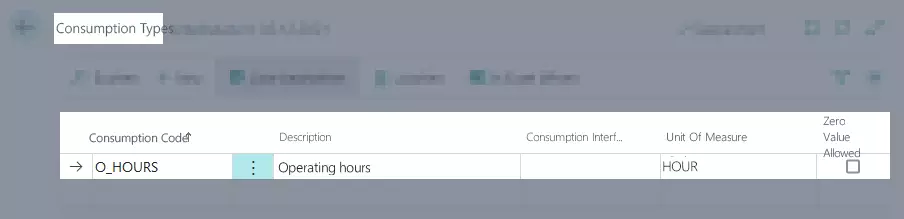
- Use the quick search in Dynamics NAV (ALT+Q) to find the page Consumption Types.
- A list of all created consumption types is displayed.
- Complete the columns according to the table below.
| Column Name | Description |
|---|---|
| Consumption Code | Enter a significant code for the consumption type to select from the list later. |
| Type | You can choose between the types Normal and Wear and Tear. Normal means that entered value increases with every consumption report, e.g. in case of mileages or operating hours. Wear and Tear means that the entered value decreases with every consumption report. |
| Description | Use this column to describe the consumption type with more detail. |
| Interface Type | Optional In this column you can enter a consumption interface type if necessary. This is only for later integration purposes and is therefore not relevant. |
| Qty. per Work Day | Optional The value in this column specifies how much the customer is allowed to use per work day within the scope of his rental contract. The customer will be invoiced for everything above this value. This value is considered the default value for all rent objects that use this consumption type. But you can also define the quantity per work day per rental contract. For more information on this, go here. |
| Unit of Measure Code | Select the unit of measure for the consumption type. |
| Zero Value Allowed | Activate the check box in this column if it should be possible to enter the value “0” for this consumption type, e.g. during delivery of the rent object. |
| Invoice Text Extra Hours | Optional In this column you can enter a text that will be used for the invoicing of additional consumption, in case the options Extra Hours, Per Work Day (End) or Per Work Day (Cycle) have been activated in the contract. |
Setting consumption type per rent class
You can assign 1-2 consumption types to a rent class which will be used during processing of the rental contracts. You then need to enter a value for these consumption types during delivery and return. To assign a consumption type to a rent object, please proceed as follows:
- Use the quick search (ALT+Q) to find the page Rent Classes in TRASER DMS 365.
- A list containing all rent classes is displayed.
- Open the rent class to which you want to assign a consumption type.
- Select the desired consumption type in the fields Consumption Type Code 1 or Consumption Type Code 2 under the Options register. For more information on creating consumption types, click here.
Creating a consumption line for a rent class
Consumption lines in rent classes are needed for invoicing and processing during the contracting process. To create a consumption line in the price lines of a rent class please proceed as follows:
- Open the rent class to which you want to assign a consumption line.
- Fill in the default description.
- In the Revenue Item No. column, select the Consumption option. The value in the Price Type column is automatically changed to Consumption.
- Optional Select the desired price code in the Price Code column.
- In the Consumption Type column, select one of the consumption types that you have entered in the fields Consumption Type Code 1 or Consumption Type Code 2 under the Options register. These determine which consumption type is invoiced in this rent class. For more information on how to assign a consumption type to a rent class, click here.
- Either enter a price for this rent class or select a price code from the list in the Price Code column to specify the price for the rent class. For more information on creating price codes, click here.
- Select an option from the list in the Default Consumption Invoice Type column. The following table explains the different options of consumption invoicing.
Note
The options Invoice Cycle, Per Work Day and Extra Hours are only available if the option Advanced Consumption Active is enabled on the TRASER Rental Setup page.
| Option Consumption Invoice Type | Description |
|---|---|
| End | The customer will be invoiced everything collectively as soon as all rent objects are completely returned and the contract line has been closed completely. |
| After Report | The invoice will be created once a customer’s consumption report has been received. This can either be done via a protocol during the contracting process or via a manual consumption registration in the rental contract. |
| Invoice Cycle | Part of the contractually agreed consumption amount is automatically invoiced in a set invoice cycle (e.g. monthly). This can be defined more precisely in the contract. You can find more information on this topic here. |
| Per Work Day (End) | Once the rental contract ends, the quantity of reported work days and therefore the actual working hours will be invoiced. The Qty. per Work Day can either be defined as default per consumption type or specifically per rental contract. |
| Per Work Day (Cycle) | Part of the contractually agreed working days is automatically invoiced in a set invoice cycle (e.g. monthly). The Qty. per Work Day can either be defined as default per consumption type or specifically per rental contract. |
| Extra Hours | Only the amount exceeding the set quantity per work day is invoiced. You can find more information on how to set up consumption invoice type per rental contract here. |
Invoicing a rent class via consumption only
To invoice a rent class via consumption only, there has to be a rental line and a consumption line in the price lines of the rent class. These will then be linked to one another so that the rental line is invoiced via the consumption line.
- To create a consumption line in the price lines of a rent class please proceed as described under Setting up a consumption line for a rent class.
- To create a rental line, select the option Rental in the Revenue Item No. column and set up the remaining columns.
To now link the rental and consumption line, please proceed as follows:
- Select the desired rent class from the list in the Consumption Line No. column.
- The Consumption Line No. column now shows the value of the respectively linked price line (for example 1000 for line 1, 2000 for line 2 etc.).
- The value in the Price Type column of the rental line is automatically changed to Consumption.
- The rental line is now invoiced via the consumption line.
Setting up a consumption invoice type per rental contract
The consumption setup can be done by default via the consumption types and will therefore apply to all rental contracts. But the consumption can also be defined per rental contract. To do so, please proceed as follows:
- Open a rental contract that contains a rent class with a consumption line.
- Navigate to the Lines register.
- In the consumption line, click on the three dots in the Consumption Quantity column.
- The Edit - Consumption Specification - Contract window opens.
Here you can adjust the consumption type, the consumption invoice type and the consumption price type of the rental contract. The following tables give you an overview of the possible options. You can find more information on how the individual consumption invoice types are invoiced here.
| Consumption Invoice Type | Additional Field | Description |
|---|---|---|
| End or After Report | Consumption Price Type | Here you have the options empty, Minimum and Maximum. If Minimum or Maximum are selected, more fields will be displayed. |
| Consumption Amount | In this field you specify the amount that may be used according to the rental contract. By using the options Minimum and Maximum in the Consumption Price Type field, you can define if these consumption amount has to be used as a maximum or a minimum. | |
| Unit Price Excl. VAT | This field defines the sales unit price of the rent class. This field is not editable. | |
| Min. Sales Unit Price excl. VAT or Max. Additional Price Excl. VAT |
In this field you can specify the price that has to be paid in addition to the price in the Sales Unit Price Excl. VAT field, if the consumption is below or above the agreed quantity. | |
| Consumption Pool Code | Enter here a consumption pool code. With this, too much or too little used values can be divided among rental items in order to avoid penalties. |
| Consumption Invoice Type | Additional Field | Description |
|---|---|---|
| Invoice Cycle | Consumption Price Type | Here you have the options empty, Minimum and Maximum. If Minimum or Maximum are selected, more fields will be displayed. |
| Consumption Amount | In this field you specify the amount that may be used according to the rental contract. By using the options Minimum and Maximum in the Consumption Price Type field, you can define if these consumption amount has to be used as a maximum or a minimum. | |
| Invoice Frequency | Once you have entered a consumption quantity, the invoice frequency from the contract header will automatically filled in this field. The invoice frequency can still be adjusted at a later stage. | |
| Calculation No. of Periods | This field shows the number of chargeable periods based on the entered invoice frequency. This field is not editable. | |
| Calculated Consumption Period Quantity | This field shows the calculated consumption quantity of the period. | |
| Manual Consumption Period Amount | In this field you can enter a value that differs from the calculated consumption quantity. A dialogue window opens asking if you also want to update the Consumption Quantity field with this value. | |
| Calculated Consumption Quantity | This field specifies the invoiced quantity based on the fields No. of Periods and Consumption Quantity Period. | |
| Unit Price Excl. VAT | This field defines the sales unit price of the rent class. This field is not editable. | |
| Min. Sales Unit Price excl. VAT or Max. Additional Price Excl. VAT |
In this field you can specify the price that has to be paid in addition to the price in the Sales Unit Price Excl. VAT field, if the consumption is below or above the agreed quantity. | |
| Consumption Pool Code | Enter here a consumption pool code. With this, too much or too little used values can be divided among rental items in order to avoid penalties. |
| Consumption Invoice Type | Additional Field | Description |
|---|---|---|
| Per Work Day (End) or Per Work Day (Cycle) |
Qty. per Work Day | In this field you can define a value per work day. The customer will only be invoiced quantities above this value. |
| Unit Price Excl. VAT | This field defines the sales unit price of the rent class. This field is not editable. | |
| Max. Additional Price Excl. VAT | In this field you can specify the price that has to be paid in addition to the price in the Sales Unit Price Excl. VAT field, if the consumption is above the agreed quantity. |
| Consumption Invoice Type | Additional Field | Description |
|---|---|---|
| Extra Hours | Qty. per Work Day | In this field you can define a value per work day. The customer will only be invoiced quantities above this value. |
| Unit Price Excl. VAT | This field defines the sales unit price of the rent class. This field is not editable. |
Registering consumption in a rental contract
Note
To be able to register consumption in a rental contract, the rental object has to be delivered. You can find more information on the different processing processes of a rental contract here.
A consumption value can either be registered by using the return protocol or the consumption report of a rental contract. For more information on working with rental protocols, click
here.
To register a consumption value via the consumption report of a rental contract, please proceed as follows:
- Open the rental contract you would like to edit.
- Mark the consumption line in the Lines register.
- Select Invoicing > Consumption Registration from the menu bar.
- The Consumption Report window opens.
- In the Report Date field, select the date on which the consumption value was reported.
- Enter the reported consumption value in the Consumption Quantity field.
- Select via the Chargeable boolean, if this consumption value can be invoiced to the customer or not. If you activate the boolean, the consumption value will be listed in the consumption entries.
- Confirm your settings with OK.
- The consumption has been registered.
Consumption Invoicing
Note
In the consumption entries of a rental line, you will get an overview of all previously registered consumption values for this rental line, if these are chargeable and if these have already been invoiced or not. To call up the consumption entries, please proceed as follows:
- Mark the consumption line in the Lines register of the rental contract.
- Select Invoicing > Consumption > Consumption Entries from the menu bar.
- The View - Consumption Entries window opens.
The invoicing of consumption lines of a rental contract is done via the Consumption Invoice Plan. It is recommended to open this from the respective rental contract because all entries will then already be filtered on the concerned rental contract. To view the consumption invoice plan, please proceed as follows:
- Make sure the consumption line of the rental contract has the Returned state. You can find more information on the different processing processes of a rental contract here.
- Mark the consumption line in the Lines register.
- Select Invoicing > Invoice Plan > Invoice Plan from the menu line of the Lines register in the rental contract.
- The page Consumption Invoice Plan Rental Contract opens.
You then have to determine whether a consumption line that was created by the return of a rental object should be invoiced. These are shown in grey in the consumption invoice plan. To approve these lines for invoicing, please proceed as follows:
- Mark the desired line in the consumption invoice plan.
- Select Documents > Open End Of Contract Lines from the menu bar.
- The End Of Contract Lines window opens with all pending consumption lines.
- To approve the invoicing of the consumption line, mark the desired line and select Approve Line from the menu bar.
- The status of the consumption line changes from Pending to Approved.
To now only invoice the desired lines of the consumption invoice plan, please proceed as follows:
Note
You can also manually close consumption lines in the consumption invoice plan. To do this, mark the desired lines and select Invoice > Close Invoice Line from the menu bar.
- Mark the desired lines in the consumption invoice plan.
- Select Invoice > Create Billing for Rent from the menu bar.
- A dialogue window is displayed in which you have to decide whether the lines should be posted indirectly or directly.
- Click OK to confirm your selection.
- A dialogue window appears with the information that a document has been created. Select Yes to open it.
- Post this rental order to close the invoice lines.
Viewing and processing checklists
This section describes how to view and process a checklist to further process the rent object. Please proceed as follows:
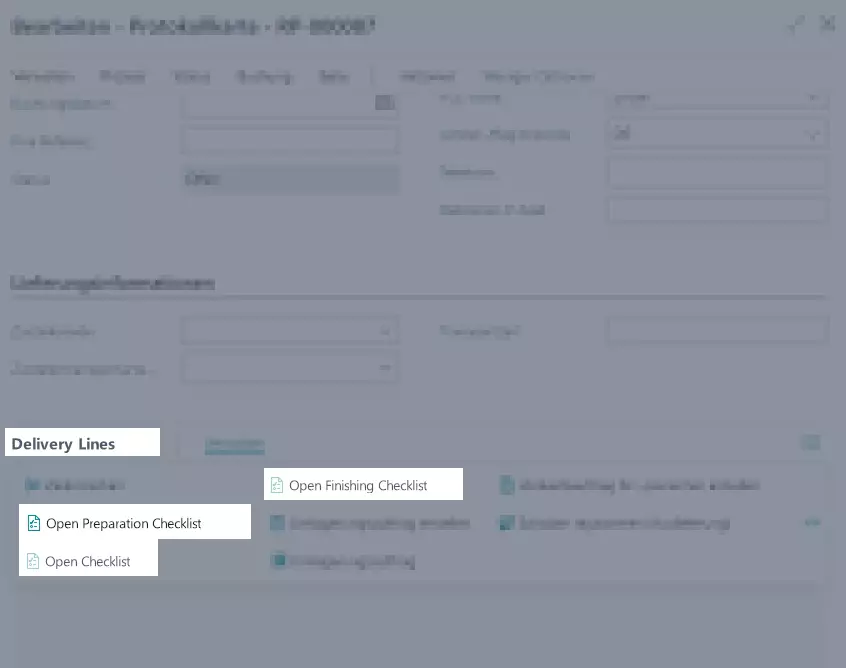
- Open a shipment/return protocol. These protocols are created during delivery or return of a rent object.
- Release the protocol. You can find more information on this process in the manuals regarding the topics delivery and return of a rent object.
- In the Delivery Lines register, select Manage > **Open -checklist from the menu bar. Depending on what checklist was assgined to the rent class at which point in the process, you can either choose Open Preparation Checklist, Open Checklist or Open Finishing Checklist from the menu bar. You can find more information on assigning checklists here.
- The respective checklist card opens.
- To be able to edit the checklist card, you first have to select Status > In Progress from the menu bar.
- The status of the checklist card changes to In Progress.
- Fill in all mandatory fields in the Checklist register of the checklist card.
- Once you have filled in all mandatory fields, select Status > Finish from the menu bar.
- The status of the checklist card changes to Completed.
- If you want to make changes to the checklist card afterwards, select Status > Reset Status from the menu bar.
- Close the checklist card.
In the next chapter you will learn everything important about documenting damages to a rent object.
Continue with the next chapter