Purchase Requests
This chapter deals with the management of rental purchase requests. If an item isn’t available, you can send a rental purchase request to another vendor. You can use this feature to request items that you want to use yourself or that one of your customer needs. In TRASER Rental 365 there are different ways to create rental purchase requests.
This chapter is divided into the following sections:
- Create Rental Purchase Request
- Creating a rental purchase request via a rental contract
- Open E-Mail Setups in Rental Purchase Requests
Create a Rental Purchase Request
The next section describes how to create a rental purchase request for a specific rent class. You can send a rental purchase request to one specific vendor or to multiple vendors. Please proceed as follows:
Note
You can only send rental purchase requests if you have been granted the permission to do so. More information on user permissions can be found here: TRASER DMS Rental Permissions.
- Use the quick search (ALT+Q) to find the page Rental Purchase Requests in TRASER DMS 365.
- A list with all existing rental purchase requests is displayed.
- To create a new rental purchase request click on New.
- Fill in the fields according to the table below. You might have to click More Options to view all fields.
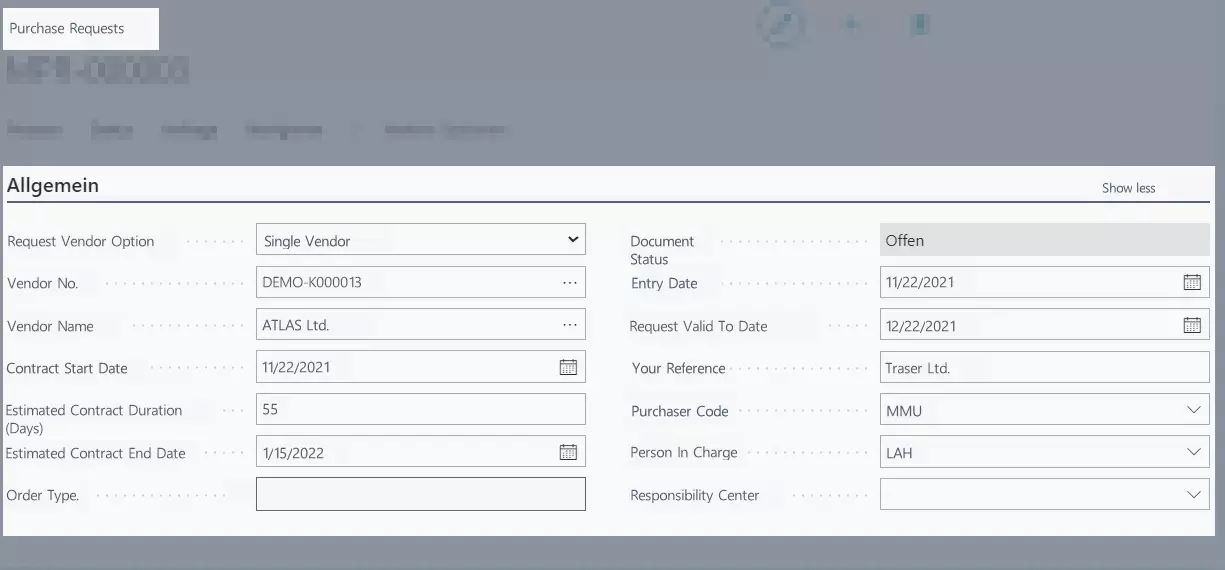
| Register | Option | Description |
|---|---|---|
| General | Request Vendor Option | Here, select whether the request should be sent to one or to multiple vendors. |
| Vendor No. | Enter the number of the vendor that the request should be sent to. | |
| Vendor Name | Enter the name of the vendor that the request should be sent to. | |
| Contract Start Date | Use this field to enter the start date of the contract. | |
| Requested Rent Period Start Date | Here, select the date that should mark the start of the rent period by clicking on the calendar icon. This date will be also used in connection with the Estimated Contract End Date for the calculation of the rent price. The start date of the rent period cannot be earlier than the Contract Start Date. | |
| Estimated Contract Duration (Days) | Use this field to enter the estimated contract duration. | |
| Estimated Contract End Date | Use this field to enter the estimated end date of the contract. | |
| Order Type | Use this field to select the order type for this contract. The order type affects the posting process. | |
| Document Status | Specifies whether the rental purchase request is open or has been released to the next stage of processing. This field cannot be edited. | |
| Document Date | Use this field to select the date for the rental purchase document. | |
| Request Valid To Date | Use this field to enter the validity date of your request. | |
| Your Reference | Use this field to enter your reference. The contents from this field will be printed on the document. | |
| Purchaser Code | Use this field to enter the name of the purchaser that has been assigned to the vendor. | |
| Person In Charge | Use this field to enter the person that is in charge of this document. | |
| Responsibility Center | Use this field to enter the code of the responsibility center (e. g. Logistics) that was assigned to the person in charge. | |
| Lines | This pane will be described in further steps and sections under this table. | |
| Object Attributes | This table shows the attributes which were assigned to a rent class. You can find more information on assigning attributes here. If needed, activate the check box in the Print in Protocol column if you want the attributes to be printed in the protocol. Deactivate the check box if the attributes should not be printed in the protocol. |
- Navigate to the Lines register.
- Click on Manage > Add Rent Class.
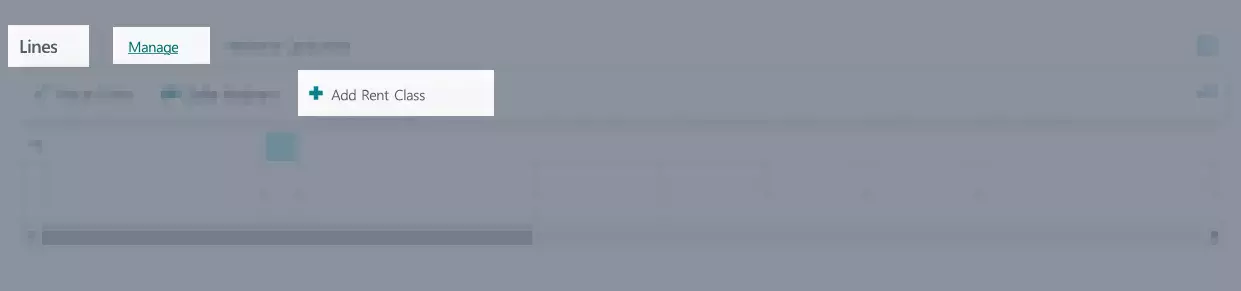
- The Rent Class Wizard opens.
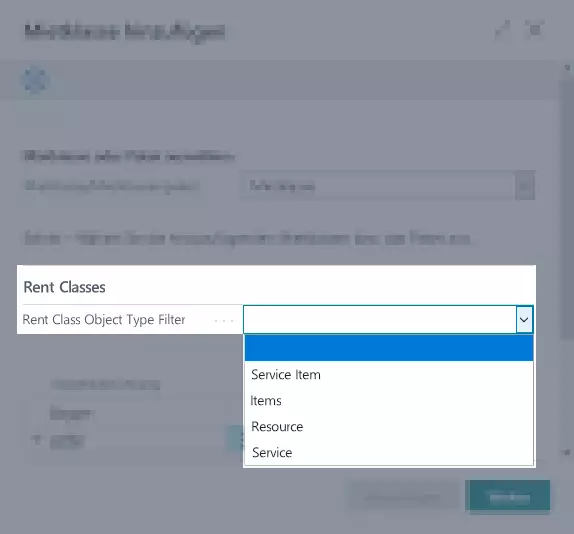
Add Rent Classes or Rent Class Packages Wizard – Step 1

The upper part is meant for filtering rent classes or rent class packages. The lower part displays the filtering results.
- Select under Rent Class/Rent Class Package if you like to filter for rent classes or rent class packages. If you leave this field blank, both rent kinds are filtered for.
Note
If you filtered for a Rent Class, you can select under Object Type Filter for Rent Class the rent class kind that you like to use. This way, you can narrow your search further down.
If you filtered for Rent Class Packages, this filter option is not displayed.
- Enter the requested quantity in the Selected Quantity column if you like to add a Rent Class. The Selected Unit of Measure field will be filled automatically.
*A value ≥1,00 must be entered. If the value is 0,00 in the Selected Quantity column, the rent class will not be used. - Optional If necessary, you can change the unit of measure of the rent class via the Unit of Measure Code (Delivery) column under the Lines register. For this, select a deposited unit of measure for this rent class from the list. This is only possible for items. You can find more information on depositing an alternative unit of measure for a rent class here.
-
Optional Select an invoice calendar in the Selected Invoice Calendar column.
For more information about creating invoice calendars, clickSet up Base Calendar. - Optional The Has linked Rent Classes columns shows if there are any linked rent classes. By clicking on Yes, a window is opened which shows the linked rent classes. Linked rent classes are automatically additionally added to the rent document.
- Click Next when you selected the desired quantity.
- The Second Step of the Add Rent Classes Wizard opens.
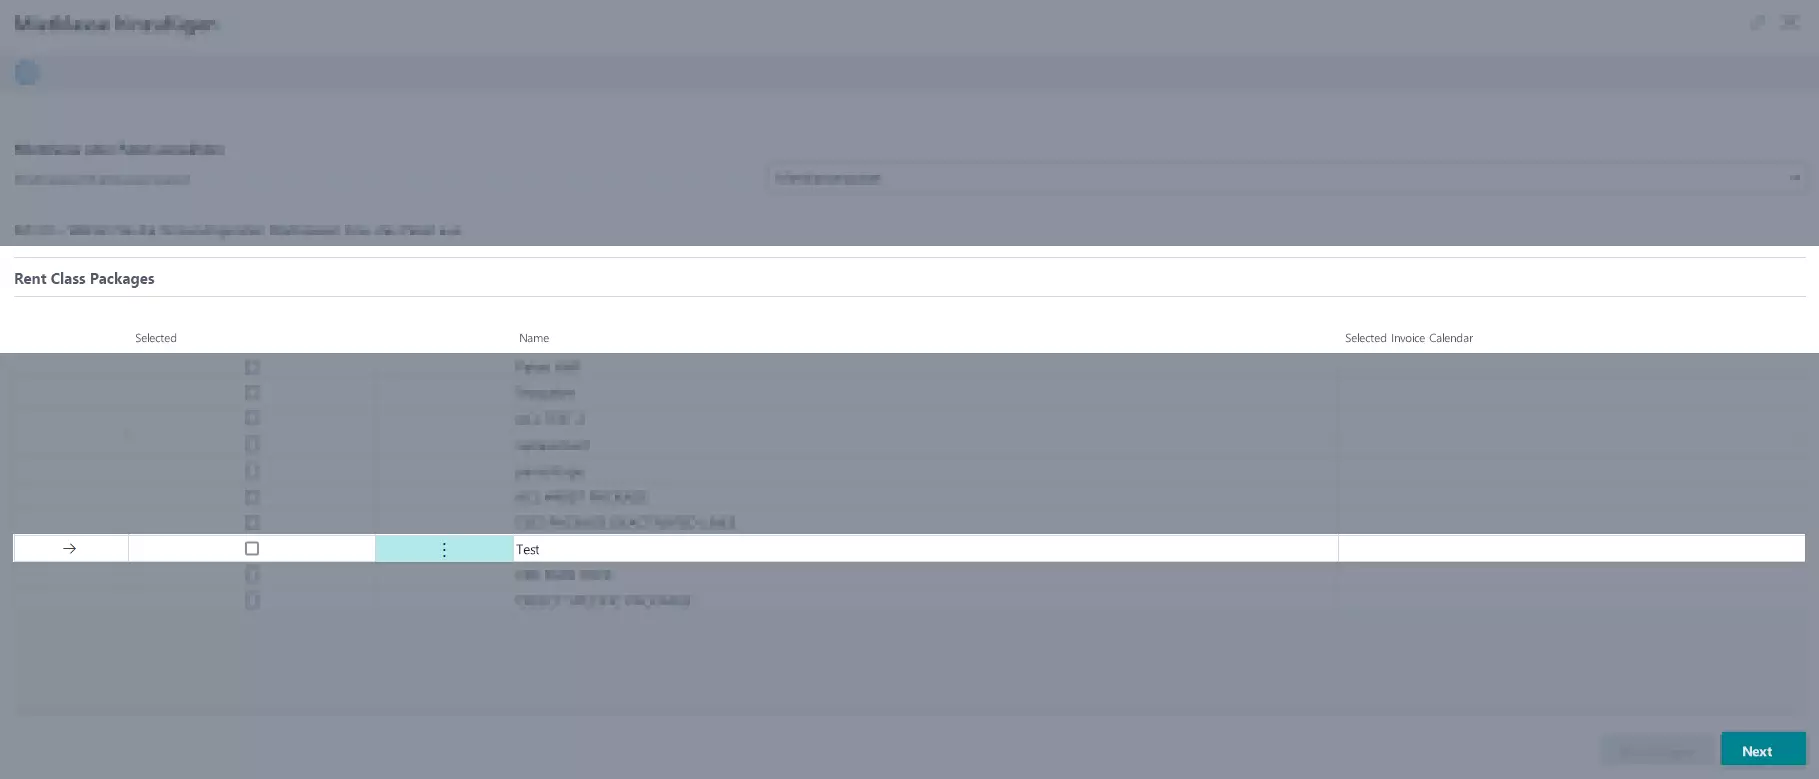
- Activate the check box in the Selected column to add a Rent Class Package
-
Optional Select an invoice calendar in the Selected Invoice Calendar column.
For more information about creating invoice calendars, clickSet up Base Calendar.
Note
If you deactivate a rent class in a rent class package which is marked as Optional, the related price lines of this rent class are also deactivated and hidden.
- Click Next when you selected the desired packages.
- The Second Step of the Add Rent Classes Wizard opens.
Add Rent Classes Wizard – Step 2
In the next step you can select or deselect add. revenue for the previous selected rent classes or rent class packages. Add. Revenue will be added directly for a rent class (see also Create Rent Class).

- Activate or deactivate the check box in the Selected column for the price lines which you like to apply to the rental contract.
Note
Price Lines with Mandatory requirement can not be deselected.
- Click Next when you selected the desired price lines.
- To edit the selection of rent classes or rent class packages, click Previous.
- To Add more rent classes or rent class packages, click Add.
- The Third Step of the Add Rent Classes Wizard opens.
Add Rent Classes Wizard – Step 3
In the next step you can select or deselect contract components for the previous selected rent classes or rent class packages. Contract components will be added directly for a rent class (see also Assign Contract Components). This step is skipped if no contract components are assigned to this rent class or rent class package.
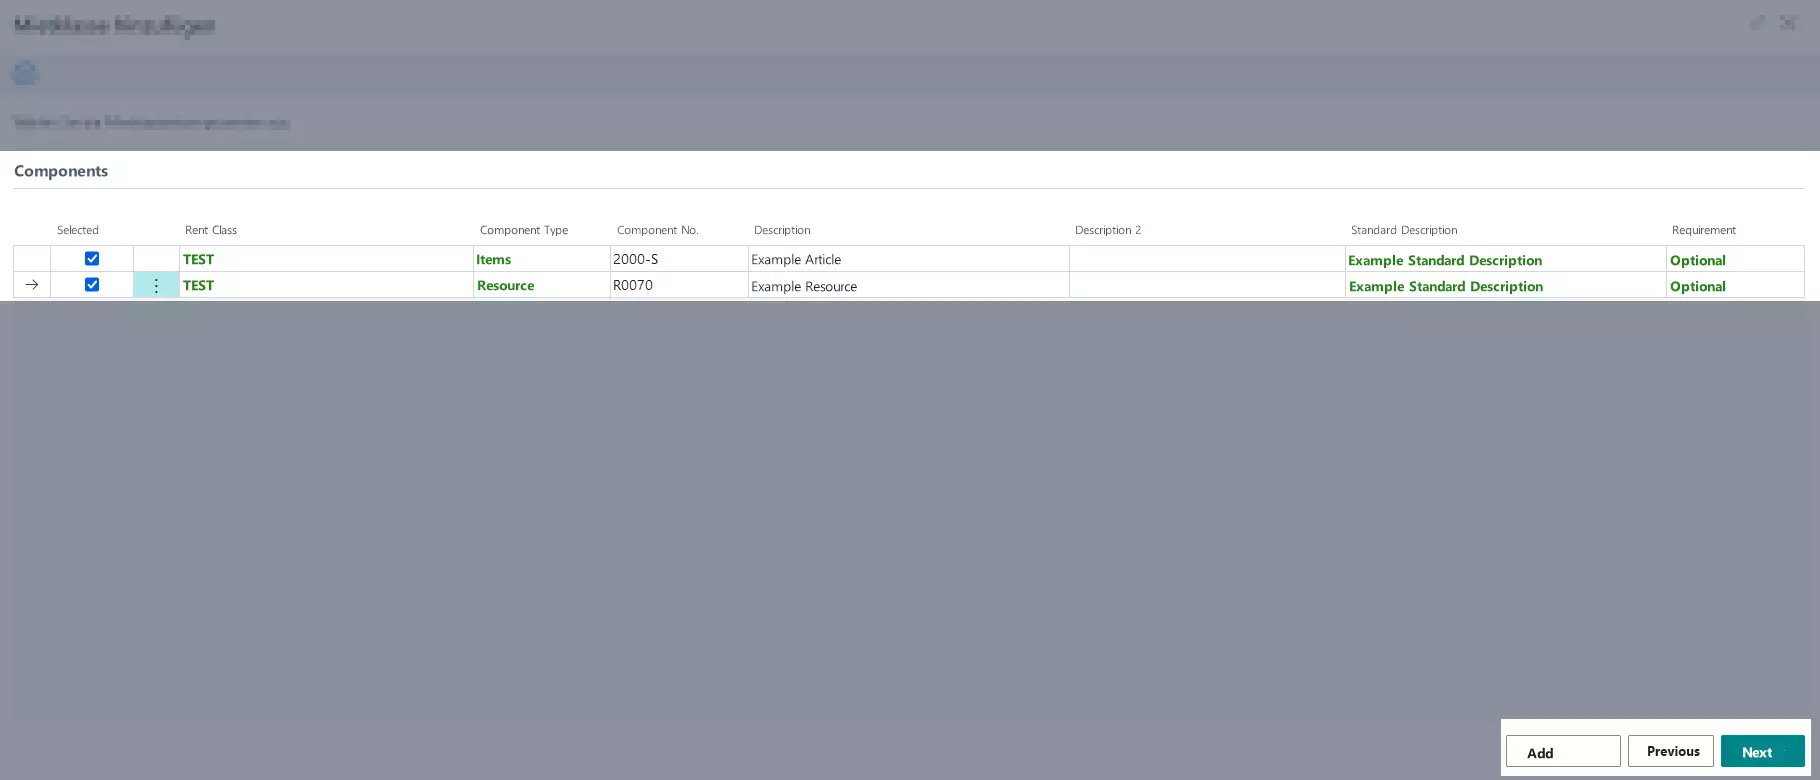
- Activate or deactivate the check box in the Selected column for the contract components which you like to apply to the rental contract.
Note
Contract components with Mandatory requirement can not be deselected.
- Click Next when you selected the desired contract components.
- To edit the selection of price lines, click Previous.
- To Add more rent classes or rent class packages, click Add.
- The Fourth Step of the Add Rent Classes Wizard opens.
Add Rent Classes Wizard – Step 4
In the next step you can select or deselect contract texts for the previous selected rent classes or rent class packages. Contract texts will be added directly for a rent class (see also Assign Contract Texts). This step is skipped if no contract texts are assigned to this rent class or rent class package.
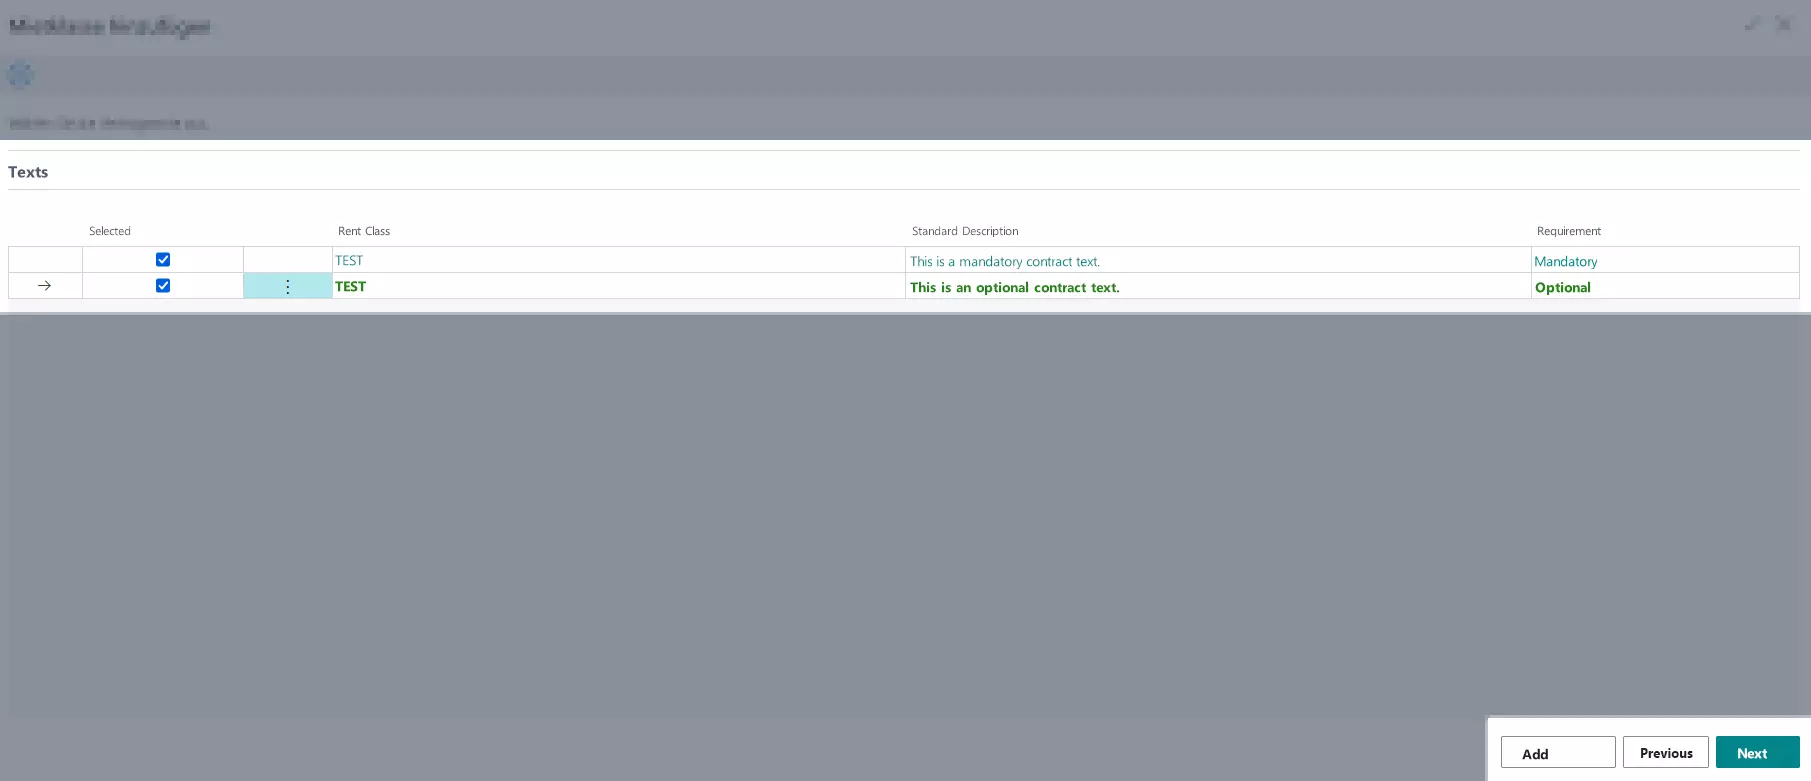
- Activate or deactivate the check box in the Selected column for the contract texts which you like to apply to the rental contract.
Note
Contract texts with Mandatory requirement can not be deselected.
- Click Next when you selected the desired contract texts.
- To edit the selection of contract texts, click Previous.
- To Add more rent classes or rent class packages, click Add.
Note
If the rent class to be added is a linked rent class, the linked rent class can also be selected or deselected in the next step. It can only be deselected if the linked rent class is not mandatory. If the linked rent class should be added, the deposited additional revenues, contract compontents and contract texts of the linked rent class can be selected or deselected afterwards.
Linked rent classes are recognizable by an indent underneath the main rent class in the lines of the rental contract.
In addition, the check box in the Linked to Rent Line column is activated.
If the main rent class is later deleted from the contract lines, the linked rent class remains as an independent rent class in the contract lines.
- The Fifth Step of the Add Rent Classes Wizard opens.
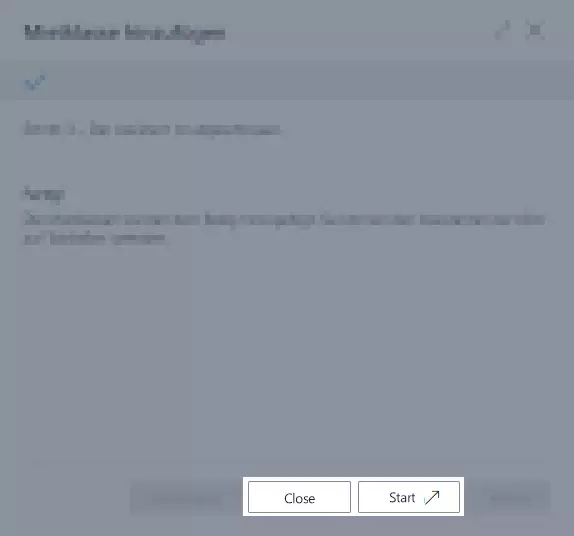
Add Rent Classes Wizard – Step 5
- The Add Rent Classes Wizard is completed.
- Click Close to close the window.
- Optional You can restart the Add Rent Classes Wizard by clicking Start. The previous input will be saved and the First Step of the process will be displayed.
- The Rent Class Wizard has been completed.
- Click Close to close the window.
- After completing the rent class wizard, please check all information and if necessary, update them. However, this step is optional.
| Option | Description |
|---|---|
| Rent Class | This column displays the name of the rent class. |
| Price Description | This column specifies a description of the rent line position. |
| Cost Item No. | This column displays the cost item number of the rent line. |
| Object No. Type | This column displays the object type. Normal means that the object number is either the number of the service item, item or the resource. Vendor means that the object number is the number that the vendor uses. Alternative means that a different number series was used for the creation of the object number. |
| Object Type | This column specifies the type of the rent class object. |
| Object No. | This column specifies the number of the rent class object. |
| Description | This column displays the description of the rent class object. |
| Description 2 | see Description |
| Quantity | This column specifies the quantity of the entry in the respective line. The value of this column will be multiplied with the value of the Unit Price Excl. VAT column and the result will be displayed in the Line Amount Excluding Tax column. |
| Unit of Measure Code (Delivery) | This column specifies the code of the unit of measure in which the rent line will be delivered. |
| Attached to Rent Line | This column specifies if the rent line is linked to a rent class. If the check box is activated, the rent line is linked to a rent class and will be controlled by it. |
| Unit Price Excl. VAT | This column specifies the gross unit price of the rent line entry. The value of this line will be multiplied with the value of the Quantity column and the result will be displayed in the Line Amount Excluding Tax column. |
| Unit of Measure Code (Invoice) | Specifies the code of the unit of measure in which the rent line will be invoiced. |
| Price Type | This column specifies the price type for this rent line. You will find further information under Price Types and Definitions. |
| Price Base | This column specifies the price base of the respective rent line. You can find more information on the price base under Price Base. |
| Invoice Calendar | This column specifies the invoice calendar for this rent line. If this field is empty, all days of the contract duration are invoiced. You can find more information on creating an invoice calendar under Setting up Base Calendar. |
| Line Discount % | This column specifies the discount percent for the respective rent line. If this column is empty, no discount is applied. The entered amount must be ≥0 and ≤100 and can not have more than 5 decimal places. The discount is calculated automatically and is included in the Line Amount Excluding Tax column. |
| Line Amount Excluding Tax | This column specifies the gross total for this rent line. The value is calculated automatically and is the sum of the Quantity and Unit Price Excl. VAT columns minus the percentage of the Line Discount % column. |
| Source Doc. No. | This column shows the number of the linked rental contract in case you Created a Rental Purchase Request from a Rental Contract. |
| Source Doc. Line No. | This column shows the line number of the linked rental contract in case you Created a Rental Purchase Request from a Rental Contract. |
| Source Object Line No. | This column shows the object line number of the linked rental contract in case you Created a Rental Purchase Request from a Rental Contract. |
| Ship-to Location Code | This column shows the location the rental object should be shipped to. |
| Shipping Agent Code | Select the shipping agent that will be used to deliver the rental object. |
| Shipping Agent Service Code | In this dropdown list, you can select a code for the delivery type. For example, this might be a standard delivery period of 7 days, an express delivery or a forwarding delivery. |
| Shipping Time | Enter the period between the shipment of items from the warehouse and delivery. |
| Requested Drop Shipment | This column shows whether a drop shipment has been requested. |
| Requested Direct Return | This column shows whether a direct return has been requested. |
| Requested Delivery Date | This column specifies the requested delivery date for this rent line. This way, the rent object can be shipped to the customer on time. |
| Requested Ship-to Time Prefix | Specifies if the rent object should be delivered by or from a certain time. |
| Requested Ship-to Time | Specifies to which time the rent object is supposed to be delivered. |
| Rent Period Start Date | This column shows the start date of the rent period. This date will be also used in connection with the Estimated Contract End Date for the calculation of the rent price. The date field will be filled automatically with the date of the contract header. It can be changed separately for every main line of a rent class or a rent class package. |
| Estimated Contract End Date | This column specifies the estimated end date of the rental contract. |
| Registered Rent Start Date | This column shows the registered rent start date. This field can be used to check incoming rental purchase invoices. |
| Registered Rent End Date | This column shows the registered rent end date. This field can be used to check incoming rental purchase invoices. |
| Shortcut Dimension 1 Code | Optional Enter the code for shortcut dimension 1 here. |
| Shortcut Dimension 2 Code | Optional Enter the code for shortcut dimension 2 here. |
- To release a rental purchase request, click on Status > Release.
- The Document Status is set to Released.
The next section describes how to create a rental purchase request from a rental contract.
Create a Rental Purchase Request via a Rental Contract
If you notice during the Creation of a New Rental Contract that an item is not available, you can create a rental purchase request from that rental contract. Please proceed as follows:
- Use the quick search (ALT+Q) to find the page Rental Contracts in TRASER DMS 365.
- A list with all existing rental contracts is displayed.
- Open the rental contract that contains a rental object you would like to create a rental purchase request for.
- Scroll to the Contract Objects register.
- Select the rental object you would like to create a rental purchase request for.
- Use the Location Code field to enter the location from where the rental object should be shipped.
If you select the option Vendor under Location Code, please enter the number of the respective vendor into the Vendor Delivery Location No. field. If the request is accepted and changed into a contract, the rental object will be delivered from the vendor to the customer. If you select the option Main under Location Code, the requested rental object will be delivered to your address.
- Select Rental Purchase > Create Rental Purchase Request.

- A pop-up window opens. Here, you can specify whether you want to open the request.
- Click Yes to open the rental purchase request.
- Check all information and click on Status > Release to release the rental purchase request.
- The Document Status is set to Released.
Note
You have to enter an address for the location code Main so that the delivery of rental purchase objects can be carried out without any problems. Fore more information on creating or editing rental location, click here.
Open E-Mail Setups in Rental Purchase Requests
You can open and edit E-Mail setups previously added to contacts in rental purchase requests. That way, you can manage the sender E-Mail addresses depending on the document type.
To open an E-Mail setup in a rental purchase request, please proceed as follows:
- Use the quick search (ALT+Q) to find the page Rental Purchase Requests in TRASER DMS 365.
- The page Rental Purchase Requests is displayed.
- Create a new rental purchase request or select a rental purchase contract with the status Open.
- Fill in the Vendor Name field.
- Click on the three dots next to the Vendor Name field.
- The page Edit - Request Vendors is displayed.
- Select the desired vendor.
- Click on Contact > E-Mail Addresses on the menu bar.
- The Contract E-Mails page is displayed.
- Select the E-Mail scenarios to be used for this E-Mail in the Type field.
- You can select the desired E-Mail address in the E-Mail field. If you have already added a contact to your rental purchase contract, you can also choose from the E-Mail addresses in the contact card by clicking on the three dots.
- Your entries will be saved automatically.
You have successfully created an E-Mail setup via a rental purchase request.
For further information on adding E-Mail setups to contacts, click here.
In the next chapter you will learn everything important about working with rental purchase contracts.
Continue with the next chapter