


Apps Setup and Installation
In order to use the Power BI apps, several setup steps are required. This chapter describes all necessary steps and is divided into the following sections:
Power BI Apps Installation
Note
Please note that a Power BI Pro license is required to download Power BI apps.
Once you have completed all necessary steps for the Aptean Equipment DMS Setup, you can install Power BI apps. To do so, please proceed as follows:
- Open the Power BI Overview Page and log in.
- Select Apps in the left navigation pane to open the Apps market place.
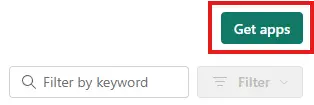
- Click on Get apps in the top right corner.
- On the Power BI Apps page, switch to the Template apps tab and use the search box to search for the name of the app you want to install, e.g., Finance Power BI App for Aptean Equipment DMS.
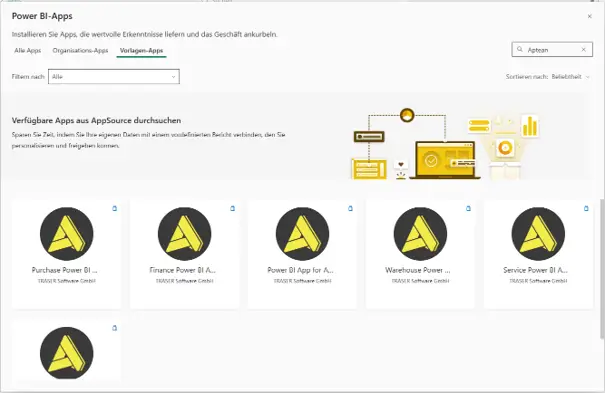
- Install your chosen app. An overview of the currently available Aptean Equipment BI Connect apps can be found here.
- After installation, you will find the app in your workspace. Select Workspaces in the left navigation pane to access it.
- You can now open the installed app.
You have successfully installed a Aptean Equipment BI Connect app. The following section explains how to sync your ERP solution data with a Power BI app.
Tip
You can also download the desired apps directly from Microsoft AppSource. To do this, visit the website Mircosoft AppSource and enter the name of the app you want to install in the search bar, e.g., Finance Power BI App for Aptean Equipment DMS. Then, you can install the desired apps. Further details are available on the Install Power BI apps for Business Central page.
Data Synchronization in Power BI Apps
Note
The available connection options may vary slightly depending on the app. The following example lists all options.
After installing a Power BI app, you have to synchronize the app with your data. To do so, you first need the SQL connection string of the previously created mirrored database from Preparation. Please proceed as follows:
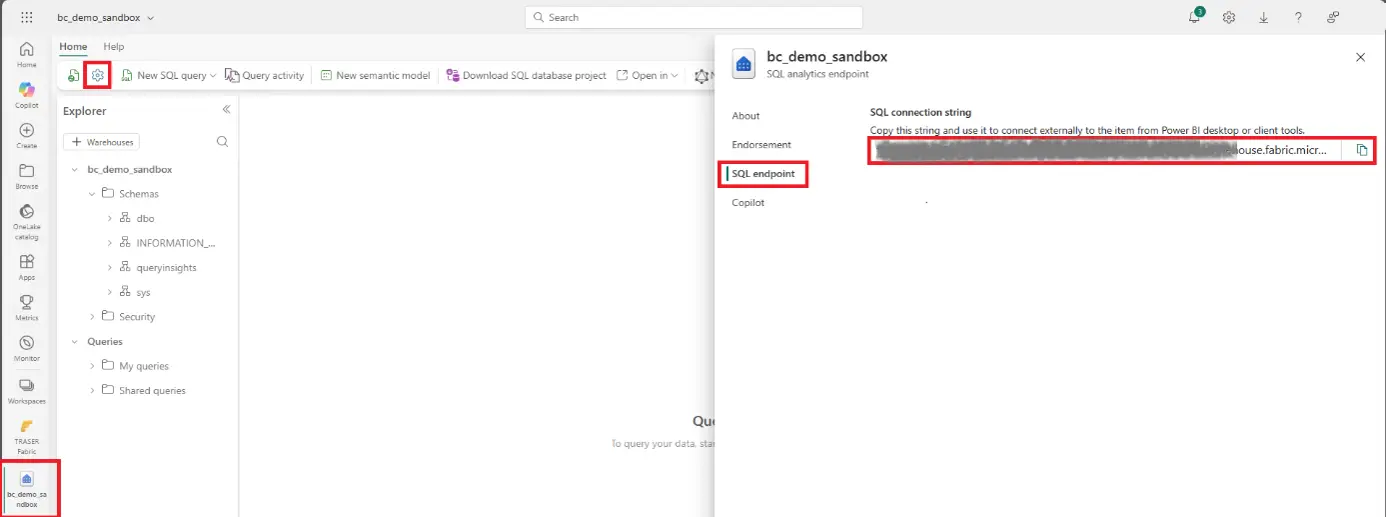
- Open the previously created mirrored database BC_Data in Microsoft Fabric.
- Click the gear icon in the menu bar.
- Select the SQL endpoint area in the window that opens.
- Copy the value displayed under SQL connection string or note it down.
- Open the Power BI Overview Page and log in.
- Select Workspaces in the left navigation pane, then select the desired app.
- Open the Power BI app report.
- The first time you open the app, it comes preloaded with sample data. Click on Connect your data in the yellow notification field in the top of the screen to synchronize the app with your data.
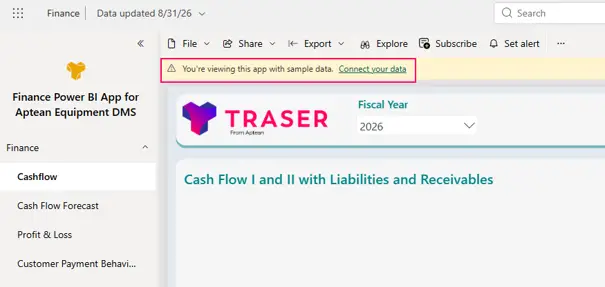
- A new page is displayed where you can connect the app to the ERP solution data.
- In the Company field, enter the company code (not the name) from our ERP solution.
- In the SQL connection string field, enter the SQL connection string you noted down earlier.
- In the Lakehouse name field, enter the value BC_Data.
- Click on Next.
You then have to authorize the connection between the app's semantic model and your mirrored database. To do so, please proceed as follows:
- Open the workspace of the Power BI app.
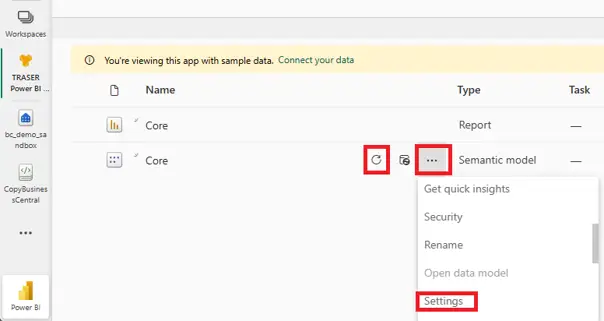
- Click ... next to the corresponding semantic model and select Settings.
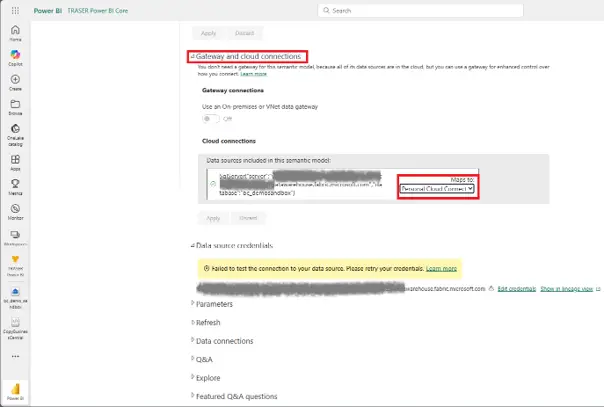
- Open the Gateway and cloud connections section.
- In the Cloud connections section, click Create connection next to Maps to.
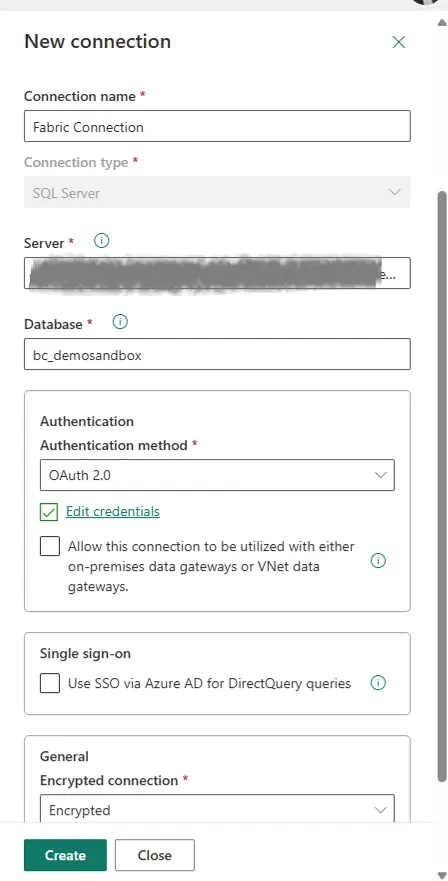
- In the Connection name field, enter a meaningful name for the connection.
- In the Authentication method field, select OAuth 2.0.
- Click Edit credentials and log in with your credentials.
- Click Create.
- In the semantic model settings, in the Cloud connections section, select the connection you just created under Maps to.
- Click Apply.
The connection is now authorized. Finally, open the workspace of the Power BI app again and click Refresh now on the semantic model to refresh your data.
Tip
Under Refresh in the semantic model settings, you can use Scheduled refresh to set up an automatic, recurring data refresh. Schedule the refresh so that it only takes place after the data processing is complete.
Your data from Business Central is now synchronized with the Power BI app, and the report displays your data. The app setup is now complete. The next section explains how to update a Power BI App.
Power BI Apps Update
Proceed as follows to update an app that has already been downloaded.
- Open the Power BI Overview Page and log in.
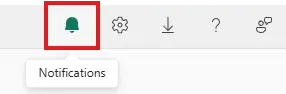
- Click the bell icon in the top right corner of the navigation bar to view your Power BI app notifications.
- If a new version of an app is available, click on Download in the notification of the corresponding app.
- The Update App dialog window is displayed. Here you can choose whether you want to update the workspace and app, update only the contents of the workspace without changing the app itself, or create a copy of the app in a new workspace.
- Confirm your selection with Install.
The app is then updated according to your selection.