User Interface
This page contains all important information regarding the user interface of TRASER Mobile Rent 365.
Login Page
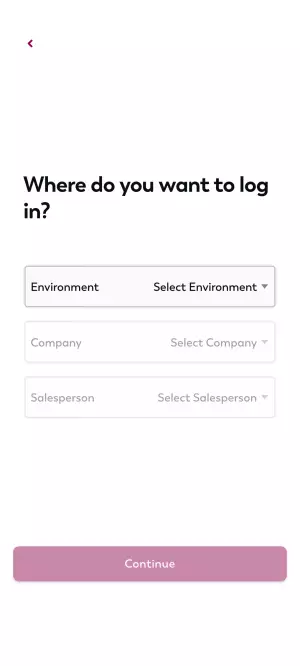
After the successful Microsoft authentication you will be directed to the login page of TRASER Mobile Rent 365. The login page contains the following fields:
| Field | Description |
|---|---|
| Environment | Here you can select the environment for the app. Depending on the system configuration, you can select your test or live system. |
| Company | Here you can select the correct company for the app. All complanies that have been set up are displayed here. It might be necessary to select a company that is specifically intended as a test environment for your company. |
| User | Here you can select the assigned user for the app. |
Once you have entered all login data, you can log into TRASER Mobile Rent 365 by clicking the Continue button. The next section describes the landing page of the app.
Landing Page
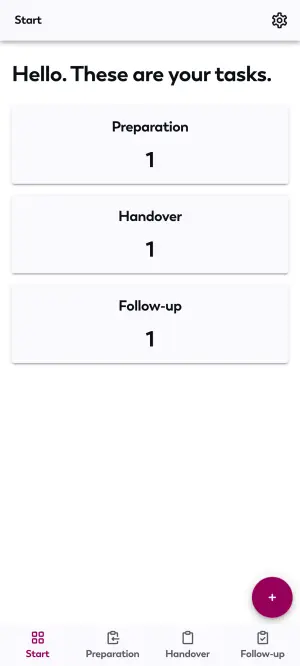
The landing page of the app provides an overview of the tasks assigned to you. Clicking the buttons will direct you to the respective areas. You can open the setting page via the gear icon in the top-right corner of the screen. In the lower section of the screen, you can jump directly to the documents of the respective processes via the Preparation, Handover and Follow-up FastTabs. You can create a new protocol via the + button. The next section describes the setting page of the app.
Setting Page
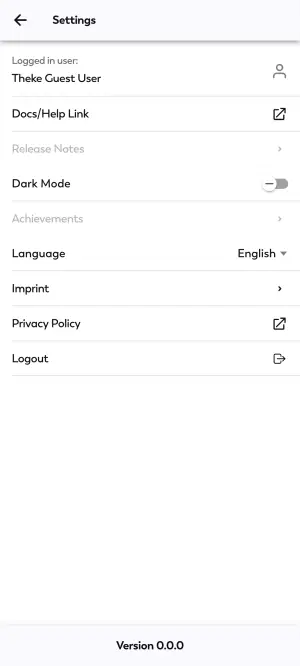
The setting page of the app provides a display of all settings. First, the currently logged-in user is displayed. Clicking the user name provides additional information such as the Environment, the Company and the User. The Docs/Help Link field below the user name provides direct access to the app documentation, in case you need assistance. You can put the app into dark mode with the Dark Mode toggle switch. You can change the language of the app in the Language dropdown list. Furthermore, you can access the corresponding legal information by clicking the Imprint and Privacy Policy buttons. If you want to log out from the app, this option is also available to you on the setting page by clicking Logout. The next section describes the Preparation FastTab.
'Preparation' FastTab
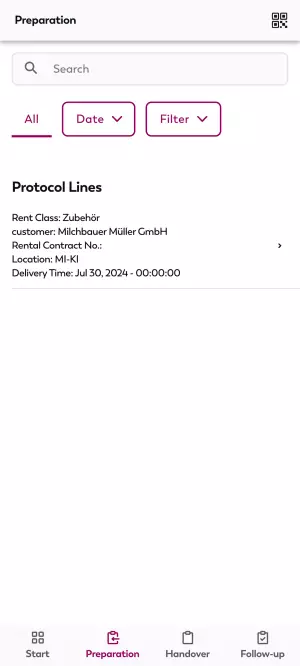
In the Preparation FastTab, all assigned protocol lines are displayed. These protocol lines only refer to deliveries. The preparation of a delivery protocol is always conducted per protocol line and not for an entire protocol. Using the barcode of a machine, you can find the corresponding protocol line via the Barcode icon in the top-right of the screen. Additionally, the full-text search running in the background enables identifying a protocol line via various information. That way, you can specifically search for a protocol line in the search field in the content section of the page. Also, various filter options are available to you from the Date and Filter dropdown menus. If you e.g. want to prepare all lines of a specific rental contract, you can easily find all relevant protocol lines of a rental contract with the filter options. The activated filters are displayed in the top section of the content section and can be removed individually via the X icon. By clicking All, you can reset all filters simultaneously. Selecting a protocol line directs you to a detailed view of the respective line. How to then proceed with the preparation of the protocol line is described on the Preparation page. The next section describes the Handover FastTab.
'Handover' FastTab
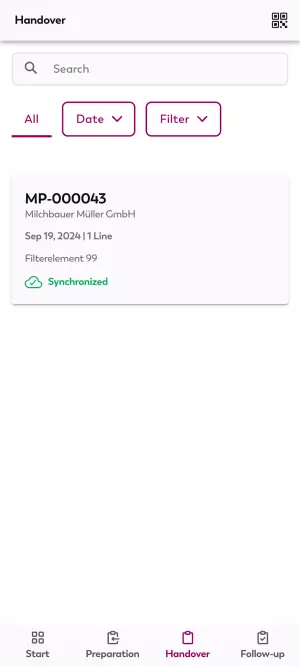
In the Handover FastTab, all assigned rent protocols are displayed. These rent protocols can refer to deliveries as well as returns. In contrast to Preparation and Follow-up, the processing of a handover is always applied per protocol and not per protocol line. Using the barcode of a machine, you can find the corresponding rent protocol via the Barcode icon in the top-right of the screen. Additionally, the full-text search running in the background enables identifying a protocol line via various information. That way, you can specifically search for rent protocols in the search field in the content section of the page. Also, various filter options are available to you from the Date and Filter dropdown menus. The activated filters are displayed in the top section of the content section and can be removed individually via the X icon. By clicking All, you can reset all filters simultaneously. Selecting a rent protocol directs you to a detailed view of the respective protocol. How to then proceed with the handover of the protocol is described on the Handover page. The next section describes the Follow-up FastTab.
'Follow-up' FastTab
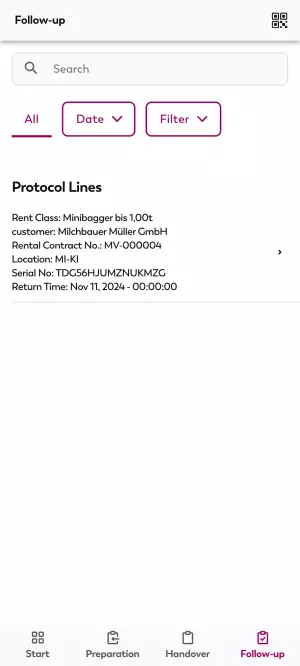
In the Follow-up FastTab, all assigned protocol lines are displayed. These protocol lines only refer to returns. The follow-up of a return protocol is always conducted per protocol line and not for an entire protocol. Using the barcode of a machine, you can find the corresponding protocol line via the Barcode icon in the top-right of the screen. Additionally, the full-text search running in the background enables identifying a protocol line via various information. That way, you can specifically search for a protocol line in the search field in the content section of the page. Also, various filter options are available to you from the Date and Filter dropdown menus. If you e.g. want to follow-up on all lines of a specific rental contract, you can easily find all relevant protocol lines of a rental contract with the filter options. The activated filters are displayed in the top section of the content section and can be removed individually via the X icon. By clicking All, you can reset all filters simultaneously. Selecting a protocol line directs you to a detailed view of the respective line. How to then proceed with the follow-up of the protocol line is described on the Follow-up page.

